
Inspired by this portable secure gateway, I set up my own secure cloud gateway.
Using these three services, Wireguard VPN, Adguard Home, and Tor Anonymizing Proxy. Although TOR doesn’t recommend using TOR in conjunction with VPN’s or proxies, I like this setup the best. For this to work you need a router that can support Wireguard. I use a Netgear r6220 with the Linux based open source router OS, Openwrt. You can easily use any computer that runs Ubuntu instead.
The router I used: https://openwrt.org/toh/netgear/netgear_r6220
Configure your local router
Flash OpenWRT
Set Password
Set LAN subnet
Set Static DHCP lease for desktop
Set name and password for both Wifi Networks
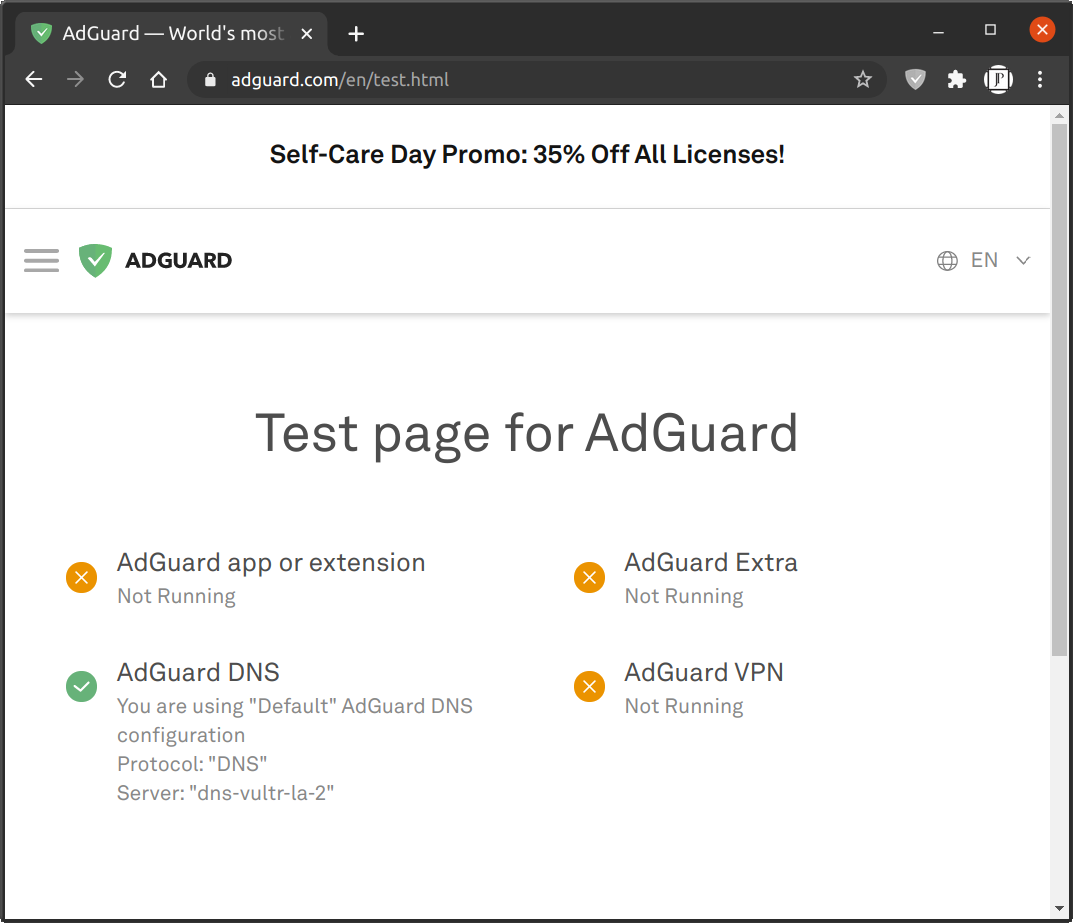
Set Adguard DNS: 176.103.130.130, 176.103.130.131 on wan interface.
Update software lists..
Install nano, curl, ca-bundle, wireguard, etc..
opkg update
opkg install nano curl ca-bundle luci-app-wireguard
reboot
Wireguard
Set up Wireguard on your router with the below guide:
https://www.azirevpn.com/support/guides/router/openwrt/wireguard
Ignore the AzireVPN specific parts.
Time
From: https://forum.openwrt.org/t/initiate-wireguard-after-ntp-success/14751/52
A the end of the guide it says you have to sync the time with the browser after every reboot, because the router does not have a real time clock (RTC). Wireguard needs the time to connect to the other endpoint. However, I found that if you leave the OpenWRT time in UTC, then it shouldn’t need you to do that.
MTU
After making all these changes my upload speeds were terribly slow. To fix this I had to change the MTU of Wireguard interface to 1360. Stop the interface before changing the MTU I think Maybe because I use AT&T 4G which I think has a MTU of 1420.
QOS (SQM – Smart Queue management)
From: https://openwrt.org/docs/guide-user/network/traffic-shaping/sqm
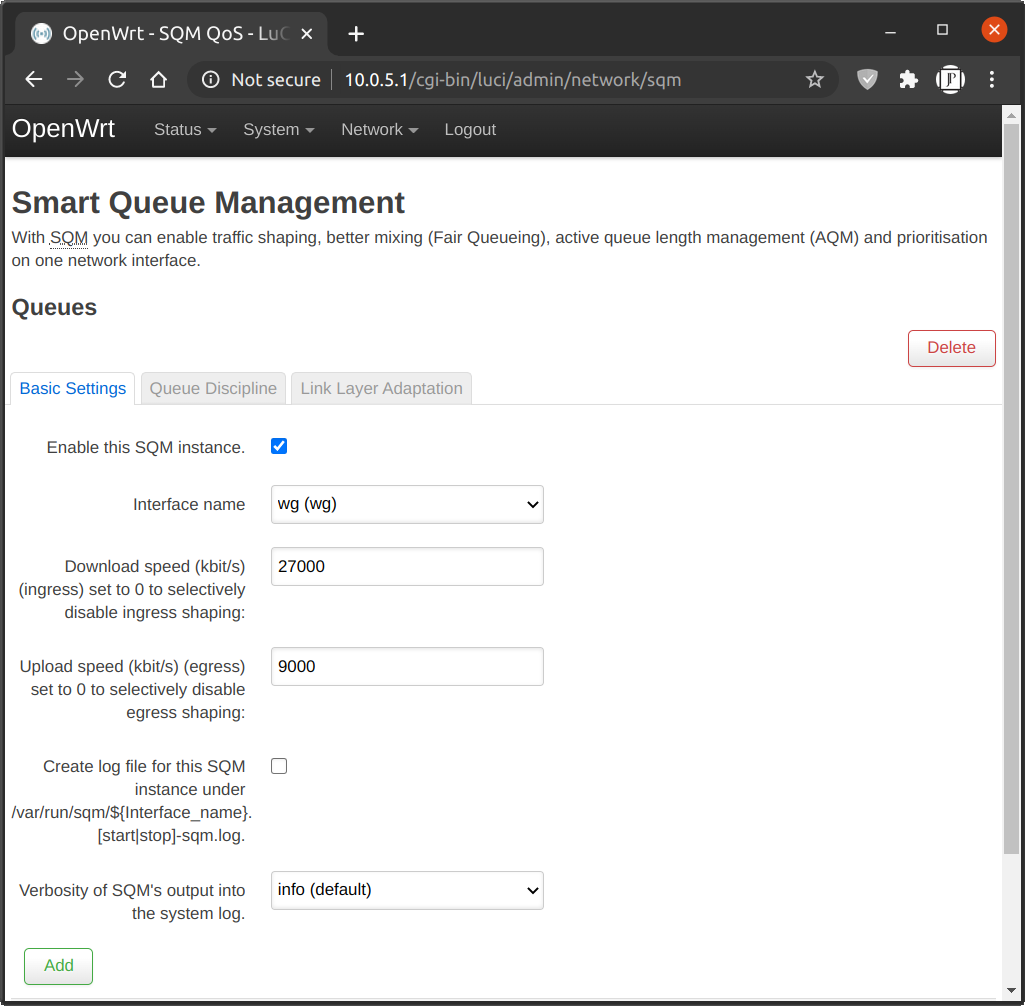
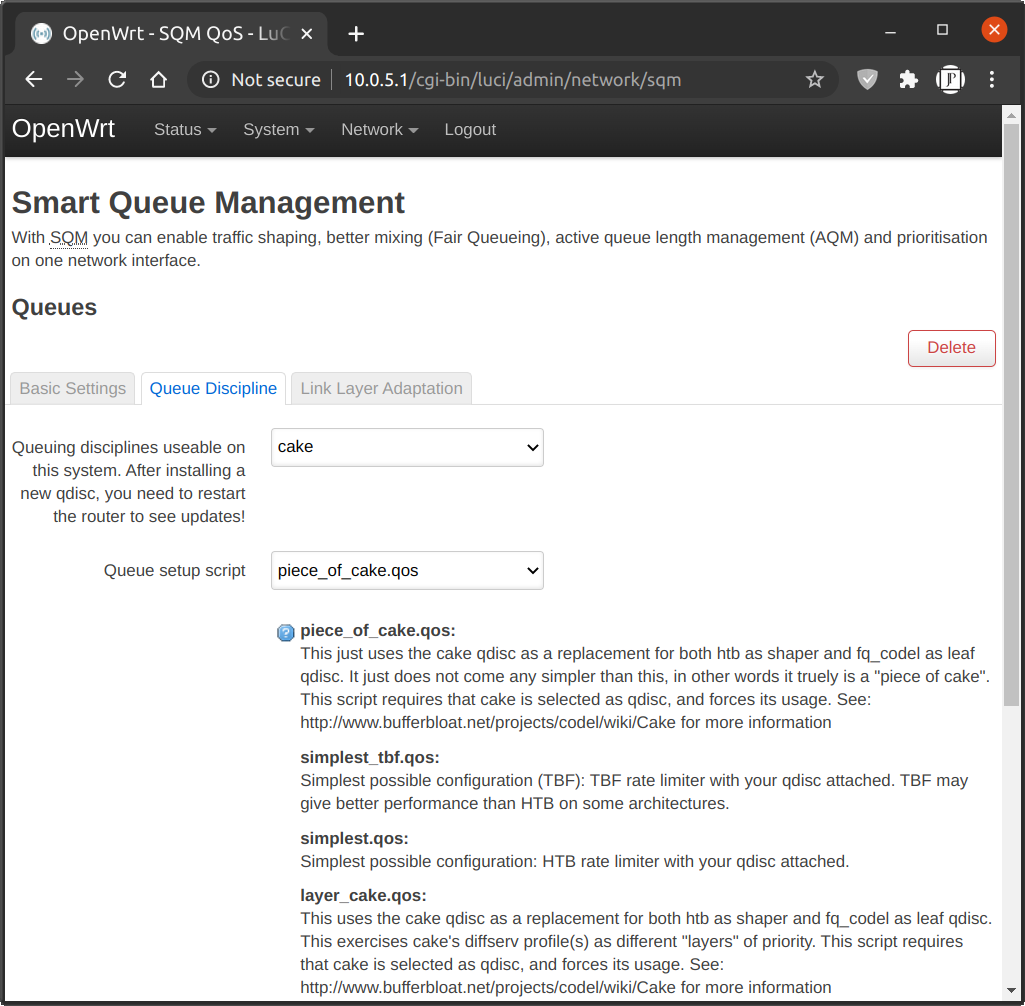
Even if you have nice low latency, low jitter, and high bandwitch up and down you can still experience slow internet. Especially if you do any uploading. Some people call this “buffer bloat”. SQM can mitigate that by managing your traffic to not saturate your upload or download.
You can test your buffer bloat here: http://www.dslreports.com/speedtest
opkg update && opkg install luci-app-sqm
reboot
Play with Download and Upload values until you get good speeds with no buffer bloat.
Configure your cloud server
I used Ubuntu 20.04 for my cloud server.
Follow the above guide.

Results: Over VPN with SQM.
The below needs more testing and fleshing out…
AdGuardHome (Optional)
Just using the AdGuard DNS is sufficient for most people, but if you’d like more control over your block lists, you can also install Adguard Home to either the Router, or the cloud gateway.
Gateway: For the gateway it can be done by using the below instructions, but I didnt have luck with the snap. This should let you configure the DNS lists locally.
https://github.com/AdguardTeam/AdGuardHome/wiki/Getting-Started#installation
sudo snap install adguard-home
Or,
Router: https://forum.openwrt.org/t/howto-running-adguard-home-on-openwrt/51678
Adding Tor to the Cloud gateway, or the local router.
To be continued…
https://trac.torproject.org/projects/tor/wiki/doc/TransparentProxy
https://www.linuxuprising.com/2018/10/how-to-install-and-use-tor-as-proxy-in.html
]]>I’d like thank ANTHONY NGUYEN @ https://atwing.net for the above article. It really widened my perspective with what could be done with voice commands and smart devices. =] That is where I was introduced to IFTTT, MQTT, and Home Assistant. By connecting them to Google Assistant, you can do ANYTHING with your voice. Like execute bash commands. Adding Discord into the mix you can have all responses read back to you. This allows you to have complete hands free control.
However, The following article is about a simpler way of controlling smart devices. Specifically, a waterproof thermometer, and a smart plug.
I purchased the Unibot WS1 Wireless sensor. Thus creating my own smart weather station that can automatically react to temperature, humidity, ambient light and vibration. The optional UbiBot DS18B20 waterproof sensor allows you to monitor the temperature of liquids as well. If we add a few smart plugs and relays in the mix it will then be able to turn on and off heaters (120v, 240v, 24v, or old millivolt systems), fans, AC, humidifiers, lights, and anything else that can be plugged in. I purchased the https://amzn.to/36YCCdX. Simply because it was the least expensive smart plug on Amazon that was rated for 13 amps, and also supported IFTTT.
In my case, I’d like to use it to monitor my softub, and turn it off when it reaches a certain temperature. Normally this is accomplished by the integrated circuit of the hot tub. However, I had to bypass all that and wire the the 120v AC directly to the heat pump when my circuit boards kept burning out. This also allows me to create other conditions like only heat it during non-peak hours. I have PGE EV rates so it makes a HUGE difference when you use your power.

To accomplish all this I had to install the Ubitbot app, the smart life app. Then configure the two below cloud services:
If This Then That
IFTTT is the free way to do more with hundreds of the apps and devices you love, including Twitter, Dropbox, Evernote, Nest, Fitbit, Amazon Alexa, and Google Assistant.
Apilio
To extend IFTTT you may need to use this.
https://hackernoon.com/what-smart-home-iot-platform-should-you-use-2554ea213df1
We start with a local Ubuntu computer running homemate-bridge to connect to the MQTT broker. We will use Cloud MQTT as a broker to connect our plugs to our Home Assistant. We will be installing Home Assistant on an Ubuntu Google Cloud micro instance. We set up rules @ IFTTT.com to connect it all to Google assistant. A Google home mini is used to accept voice commands. Optionally, we can extend this setup to run any Linux bash command on the local machine. For example turning computers on using wake-on-lan, and off using SSH.
Yonomi
The simple smart home integration platform.
Yonomi makes it easy for innovators to build great apps and devices that connect with the smart home.
DIY
PlatformIO
Tasmota – ESP8266 firmware
https://github.com/arendst/Tasmota
Jeedom
INNOVATIVE HOME AUTOMATION
GET JEEDOM
Losant
RemoteMe
Control and collect data from IoT devices from anywhere around the worldUsing web pages hosted for free and mobile applications fully customisable
EasyIOT Cloud
Our goal is to create secure, reliable and cheap platform for Internet of Things at your home. We will provide DIY tutorials to build IoT using components like Raspbery Pi, Arduino, NRF24L01+, ESP8266 and our EasyIoT Cloud. With help of EasyIoT community we will make IoT world Easy Internet of Things world (EasyIoT) .
EasyIoT framework is not home automation. Of course you can build home automation system, but you can build much more. Do you need advanced alarm system, remote plant irrigation system, solar cell charger control, SMS controlled heater, door opener, hydroponic system or even automation process control system. All this you can easily build with EasyIoT framework.BlynkEasyIoT framework is not home automation. Of course you can build home automation system, but you can build much more. Do you need advanced alarm system, remote plant irrigation system, solar cell charger control, SMS controlled heater, door opener, hydroponic system or even automation process control system. All this you can easily build with EasyIoT framework.
gBridge
gBridge.io: Control anything with voice commands
gBridge’s open interface allows you to integrate Google Home and Alexa easily in your Smart Home.
gBridge is…
…an application, that provides a Bridge between Google Assistant smart home devices and MQTT, an open and available messaging protocol that is supported by many smart home applications and devices.
CloudMQTT
Hosted message broker for the Internet of Things
Perfectly configured and optimized message queues for IoT, ready in seconds.
Adafruit IOBlynkAdafruit IO
The internet of things for everyoneThe easiest way to stream, log, and interact with your data. We play nice with any device. Our simple client libraries work with the most popular devices such as the Adafruit Feather Huzzah, ESP8266, Raspberry Pi, Arduino, and more.
Selfhosted
Blynk
OpenHAB
Home Assistant
Scrypted
All product links are affiliate links.
]]>The Oculus Quest is not available in the US, and even if/when it becomes available again it’s still over $400. Plus it’s limited to the Oculus store games, unless you use a USB 3.0 10ft link cable. That is why I needed an alternative setup to run virtual reality programs such as:

- Skyrim VR
- Asgards Rath
- Moss
- Hellblade: Senua’s Sacrifice
- Vanishing Realms
- Blade and Sorcery
- Super Hot
- Beat Saber
- VRChat (Multiplayer)
- Google Earth VR
The following guide is primarily for people that have no VR hardware, besides a google cardboard like phone headset, but it is still useful if you already own Gear VR, Daydream, Oculus GoQuest, etc.. I will show you how to wirelessly stream SteamVR, and Oculus titles. As well as add head, body and feet trackers. Also, play non-VR games in pseudo VR.
I will present two guides below. One for the minimum setup you’ll need, and another for a fully immersive body tracking setup.
Minimum Setup to Play VR Games

3 Degrees of Freedom (3DoF) Head Mounted Display (HMD) w/ Gamepad
This setup will allow you to look around in a VR game with orientation tracking (3 degrees of freedom), and control your movement etc with a gamepad. You can use a keyboard and mouse if you don’t have a controller. The game will not track the position of your body, just the orientation of your HMD. (Yaw, Pitch, and Roll)
It’s smart to start with this setup to test the video streaming software, etc…
Unfortunately you will still need:
Hardware
- Windows 10 computer with a Nvidia Geforce 1050ti or better.
- 5GHz WiFi AP. I use the Netgear R6220. $20 on eBay.
- An Internet connection. I use 1.5Mbps DSL.
- A smartphone. I use the LG G5. $50 on eBay.
- VR Goggle Headset like the Google Cardboard for your phone. I found mine the VR Shinecon at a thrift store for $2. You can of course use the Gear VR, Daydream, Vive Focus, Oculus Go/Quest, PSVR, etc..
- PlayStation or Xbox controller. I use a $5 PS3 Dualshock. Or, an extra android phone. I did end up buying a GearVR controller for $7 on eBay. With the added bonus of being able to use it to control my mouse on my linux desktop with this sweet little package: https://github.com/rdady/gear-vr-controller-linux
NOTE: You can use a keyboard and/or mouse instead. My goal however, was to play wirelessly.
Game Software
You will to download and install all of theses to your Windows 10 computer.
- Steam – https://store.steampowered.com/about/
- SteamVr – https://store.steampowered.com/app/250820/SteamVR/
- Oculus Store – https://www.oculus.com/setup/
- Revive Dashboard – https://github.com/LibreVR/Revive/releases
- Optional: SteamVR Advanced Settings – https://github.com/OpenVR-Advanced-Settings/OpenVR-AdvancedSettings/releases
Headset (HMD) Software
You will need to download and install ONE of the below pieces of software to your smartphone. Also, the server portion of the package to your computer. iVRy is good to start with because if it’s ease of use, and unlimited free version in black and white. If you have a Samsung Gear VR, or an Oculus Go/Quest, use ALVR. If you have an iPhone 5s or newer you might want to try out KinoVR. I use Riftcat/Vridge.
iVRy – $8
Free to try in color for 10 minutes, and black and white after. Easy to use.
Server (Steam plugin): https://store.steampowered.com/app/992490/iVRy_Driver_for_SteamVR/
Android Client: https://play.google.com/store/apps/details?id=com.mediator_software.ivry&hl=en_US
iOS Client: https://apps.apple.com/us/app/ivry/id1210129937
Riftcat/Vridge – $15 (Complete review pending…)
Server: https://riftcat.com/vridge
Android client: https://play.google.com/store/apps/details?id=com.riftcat.vridge2&hl=en_US
iOS client: https://apps.apple.com/us/app/vridge/id1458108034
Pros: Free to try for 10 minutes at a time. Can use Moonlight and ARcore. ARCore is experimental. Using phone as controller is $5. Has play non VR games in VR addon for $10 (Gamewarp). Can use Opentrack for positional tracking. Good support.
Cons: Cannot use ARCore and Moonlight at same time. Cannot use Gamewarp and Moonlight at the same time. Cannot use GearVR controller and Moonlight at the same time.
ALVR – FREE & Open Source! GearVR & Oculus Go/Quest only. Can use ARcore for positional tracking. The developer doesn’t seem to be doing anything for the last year.
Server: https://github.com/polygraphene/ALVR/releases
Client: https://github.com/polygraphene/ALVRClient/releases
Newer Quest fork: https://github.com/JackD83/ALVR
Trinus Cardboard VR – $10
Server: https://www.trinusvirtualreality.com/trinus-cardboard/#downloadtrinus
Android client: https://play.google.com/store/apps/details?id=com.loxai.trinus.test&referrer=utm_source%3Dtweb
iOS client: https://apps.apple.com/us/app/trinusvr/id1101683353
Using phone as controller is free. Can use some LED tracking with your webcam for Positional data, can also use Freepie. You can play non VR games in VR. UI in non-intuitive.
KinoVR – Claims to have 6DoF for it’s iOS version. Maybe using ARKit? Android & iOS. I don’t know anything about this project.
Intugame (No longer being developed)
https://www.quarkxr.com/past-work
Gamepad
If you want to use a PS3 Dualshock controller wirelessly over bluetooth, you’ll need to install this driver:
PS3 Dualshock Controller – https://github.com/nefarius/ScpToolkit
If you install the bluetooth driver, you will not be able to use other bluetooth devices until you remove the driver. To remove the driver follow this guide: https://forums.vigem.org/topic/250/scptoolkit-removal-guide
Xbox Controller’s should work out of the box I think.
VR Controller Software
If you don’t have a wireless gamepad lying around, but you do have an extra android phone. Turn it into a wireless controller.
Turn your Anroid phone into a 3DoF VR controller.
- Vridge Touch – Requires Vridge $5
- Trinus Hand – Requires Trinus. Free
- Google Daydream Controller Emulator – FREE https://developers.google.com/vr/daydream/controller-emulator
If you don’t have a phone on the Daydream compatibility list then you can use the a rooted AndroidOS with Magisk to install the xmlpak – a road to vendor apps module to download the daydream apps. Otherwise you can pair your phone with the emulator app to your computer using bluetooth, and use Driver4VR to connect it to SteamVR. (Although this may conflict with the Kinect skeleton tracking)
This does not work with the most recent Google Services for VR. You need to downgrade to this one: https://www.apkmirror.com/apk/google-inc/google-vr-services/google-vr-services-1-20-235017259-release/
Thank you to this thread: https://www.reddit.com/r/daydream/comments/eduszg/controller_emulator_not_working/
VR Controller Hardware
Riftcat/Vridge supports one GearVr, Oculus Go, Daydream, or Vive Focus controller. However, you have be using the GearVR, Daydream, or Vive Focus HMD respectively.
Driver4VR supports one or two PS Move, Joycon, Wii remote/nunchuck, Daydream, and GearVR controllers without any corresponding HMD. Also Leap Motion, Kinect & NoloVR. You can also use a generic bluetooth VR controller. This includes the option of virtualized hand tracking using the orientation of the controller.
GearVR driver: https://github.com/gb2111/Access-GearVR-Controller-from-PC
https://www.driver4vr.com/forums/topic/2-gear-vr-controllers-w10/
I was confused by Rucio’s reference to “IKN”, but here is how I got both controllers to work in 1909. I’m assuming he meant “IRK”. Heads up, this will mess with your computer’s registry and has the potential to break windows if done incorrectly. No one except yourself is responsible for anything that may go wrong.

* Connect one of the Gear VR controllers to Windows via the Bluetooth menu. Make a note of what the device name is, specifically the 4 letters and numbers inside the parenthesis. This should work without error.

* Regedit.exe as Administrator, navigate to ComputerHKEY_LOCAL_MACHINESYSTEMCurrentControlSetServicesBTHPORTParametersKeys. On the left, there will be a subkey (folder) under “Keys”, the name of this folder will be specific to each computer. Expand that folder with the downwards arrow. Now you should see a folder with the last 4 characters in the name matching the 4 characters in the Bluetooth menu. Open this folder.

* There is a entry with the name “IRK”. Click that and you’ll see the the attached screen. Replace the 01 at the start of each line with 02.

* Close out of Regedit and restart your computer.

You should now be able to pair the second controller without issues. You don’t need to worry about changing that value back, but you may need to remove both devices and repeat this process if you ever need to repair the controller.
See below for verification.
Full Immersive Room Scale Setup w/ 6DoF
6DoF HMD w/ two 6DoF Contollers (position emulated) two 6DoF Foot trackers w/ Virtual hip tracker. For this setup, you will need to use Riftcat/Vridge software for it’s integration with Opentrack. Unless you use Driver4VR for all body tracking. In which case you can use whichever HMD streaming package you like.
There are a number of different ways to get positional data of your HMD. Here are the ones I’ve discovered.
- ARCore (Requires ARCore compatible phone. Check here: https://developers.google.com/ar/discover/supported-devices, or a rooted phone with the Magisk ARCore/Playground Patcher module) This is the most desirable option because it uses the camera from your phone. You will need VR goggles without a front cover, or you’ll need to make a hole for the camera. I’ve heard a messy room is better. I also read you can add stickers of some kind to your walls to improve tracking. Only seems to work when you use the default streaming options, and not Moonlight. It didn’t work very well with my LG G5.
How to enable ARCore in Riftcat:
Go to RiftCat/Config folder and edit your VRidge.cfg file. Find “ArcoreTrackingEnabled” and change its value to “true”. My config was stored at: C:Program Files (x86)Riftcat 2Configvridge.cfg. How you know it is working is when your vridge app requests permission to use the camera. - PS Eye with Aruco Markers via Opentrack (This is the one I chose since I already owned a PS Eye Camera, and a laser printer)
- PS Eye with IR LED’s via Opentrack with IR filter over lens
- Kinect skeleton mode via opentrackkinect + Opentrack OR Immotion OR Driver4VR
- Kinect with color LED markers via Driver4VR
Aruco Marker Requirements:
- A printer, or some graph paper and black pen.
- Cardboard, paper, glue.
- A hat, and some sandals.
- A webcam like the PS Eye $7 X 2. Or the Xbox Kinect $10.
- Two controllers of some kind, I used GearVR controller, and another android phone with the Google Daydream Controller Emulator.
- Driver4VR software for body tracking.
Open Track Head Tracking Software
If you are not ARCore, you’ll need to use either a PS Eye or Kinect camera to track your head. Oculus Go/Quest already does this. Probably using lasers.
To enable headtracking in Riftcat you’ll need to download and install:
Opentrack: https://github.com/opentrack/opentrack
If using Kinect download and install Kinect to Opentrack – https://github.com/sheepsskullcity/opentrackkinect
Hip + Feet Tracking Software
Driver4VR – https://www.driver4vr.com/download/
Drivers
PS Eye Driver – https://github.com/jkevin/PS3EyeDirectShow (Supports multiple camera’s at once, but they are name the same, so you must initialize them in succession.)
Kinect for xbox 360 / v1:
-SDK https://www.microsoft.com/en-us/download/details.aspx?id=40278
-Runtime https://www.microsoft.com/en-au/download/details.aspx?id=40277
Kinect for xbox one / v2
– SDK https://www.microsoft.com/en-us/download/details.aspx?id=44561
– Runtime https://www.microsoft.com/en-us/download/details.aspx?id=44559
Troubleshooting Kinect 360 Download Kinect Developer Toolkit, start Kinect Tookit Browser and try Skeleton Basics application and Color Basics application – You may also run the Kinect Explorer-D2D after a computer restart to get further information from the console window that you can share screenshot https://www.microsoft.com/en-us/download/details.aspx?id=40276
Kinect for xbox one / v2: – Use Kinect Verifier https://developer.microsoft.com/en-us/windows/kinect/hardware-setup
Play non VR games in VR
Riftcat Gamewarp w/ Reshade
https://support.riftcat.com/hc/en-us/articles/360015646579
Trinus
With Reshade or VorpX
VorpX (Full review pending…)
With Moonlight, Opentrack, and OpenPIE MIU, Or Riftcat/Vridge
Reshade
With Moonlight, Opentrack, and OpenPIE MIU, Or Riftcat/Vridge
https://www.reddit.com/r/EliteDangerous/comments/4cfo37/google_cardboard_and_moonlight/
https://github.com/BlueSkyDefender/Depth3D
3D vision
With Moonlight, Opentrack, and OpenPIE MIU, Or Riftcat/Vridge
https://www.reddit.com/r/oculus/comments/7zp9hx/3d_vision_sbs_3d_for_flatscreen_games_with_the/
Cinema Mode
Nero GameVR Will just display any game in big screen mode within VR, but not actually convert game to VR.
Steam will also do this “Play in Theater”.
Also, for GearVR Oculus Go/Quest you can use the Remote Desktop app.
https://www.vrdesktop.net/
Create profile QR code for your VR Goggles
Vridge Commands
Alt+Ctrl+Shift+R – Recenter – By default it’s Alt+Ctrl+Shift+R, but it can be changed in RiftCat settings -> VRidge -> Tracking Options.
Game Specific Help for Vridge
Skyrim
https://youtu.be/Y7hRKgfAgUw – VRidge Basic Tutorial http://go.riftcat.com/SkyrimSharpness – Improve Skyrim image quality. http://go.riftcat.com/SkyrimMods – Learn how to install
Aruco Marker Generator
Turn you non Galaxy device into Gear VR compatible. Not sure if this works yet. Probably not
https://forum.xda-developers.com/mobile-vr/gear-vr/port-gear-vr-software-to-android-device-t3540402
Further Reading About Smartphone VR
https://github.com/ChristophGeske/ARCoreInsideOutTrackingGearVr/blob/master/README.md
]]>- 16GB M.2 SSD Drive. Like this one: https://amzn.to/2DKwv1B
- I used a M.2 to USB 3.1 1st gen (USB 3.0) adapter. Like this one: https://amzn.to/2qUHUDj
- Ubuntu Desktop 18.04 ISO image. Download here: https://www.ubuntu.com/download/desktop
Follow these steps. From: https://www.coolgeeks101.com/howto/infrastructure/connecting-bootable-usb-drive-to-kvm-or-virtualbox-virtual-machine-on-linux/
For a KVM example of a bootable USB drive, we will use Virtual Machine Manager to create a new virtual machine. It appears that when using KVM, we do not need to adjust permissions on the USB device. If this is different in your environment, just follow the steps in the VirtualBox section about for adjusting them.
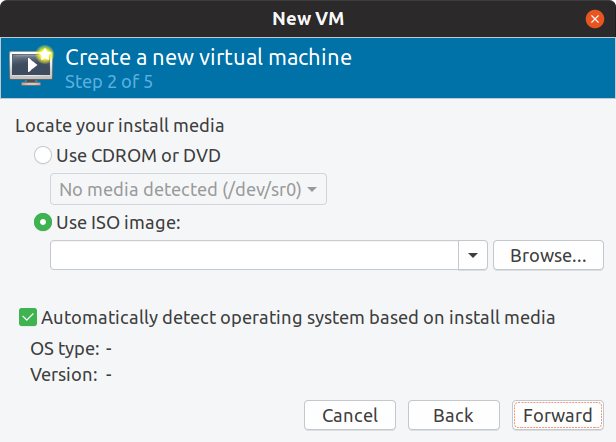
When creating the KVM virtual machine, act as if you will be installing from a local CD/DVD drive
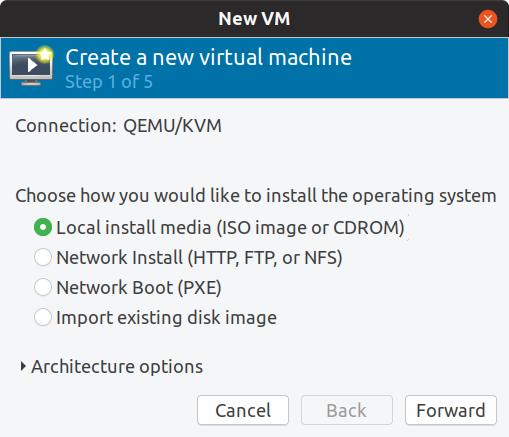
For storage, choose “Select or create custom storage” and paste the full path to your USB drive. You can use either the device name or disk ID
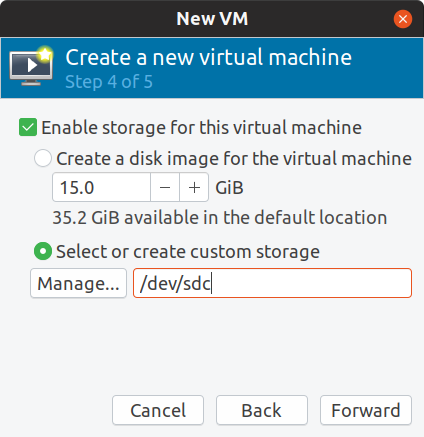
The choice of device name is best determined by how you will be using this USB drive and any possible other ones. If you will be connecting different USB storage drives on separate boots, then referring by simple /dev/sd? device name is best. If you have a specific USB drive that must always be used with a specific virtual machine or machines, then refer to it by the full disk ID
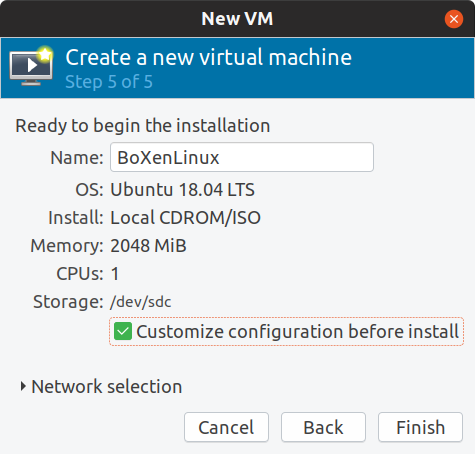
Make sure to select “Customize configuration before install”
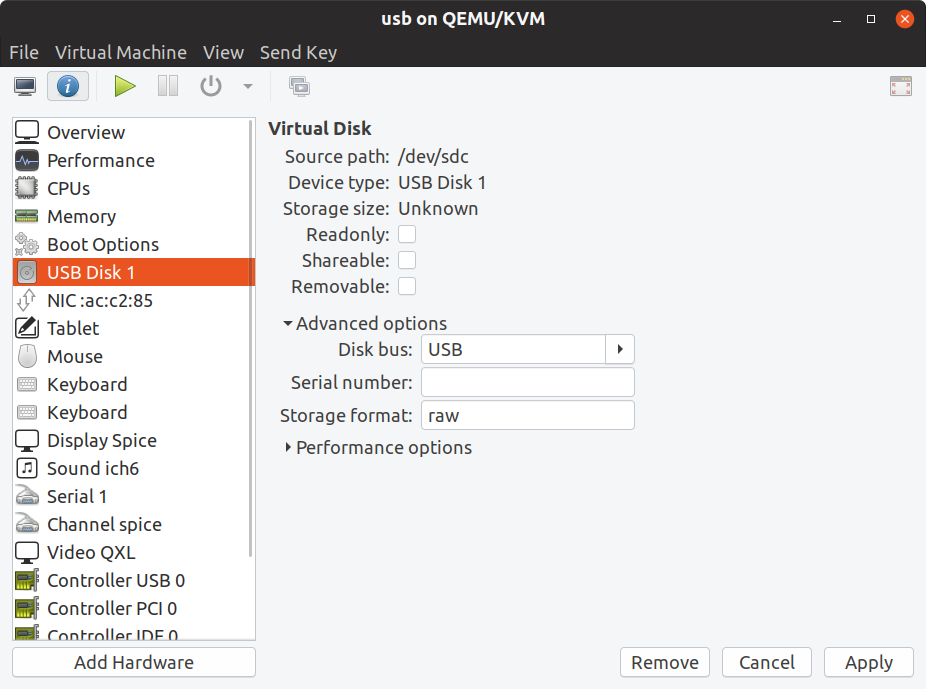
The final setting needed is to switch the storage to USB for “Disk bus” under “Advanced options”
Click “Begin Installation” and you will boot off the USB drive
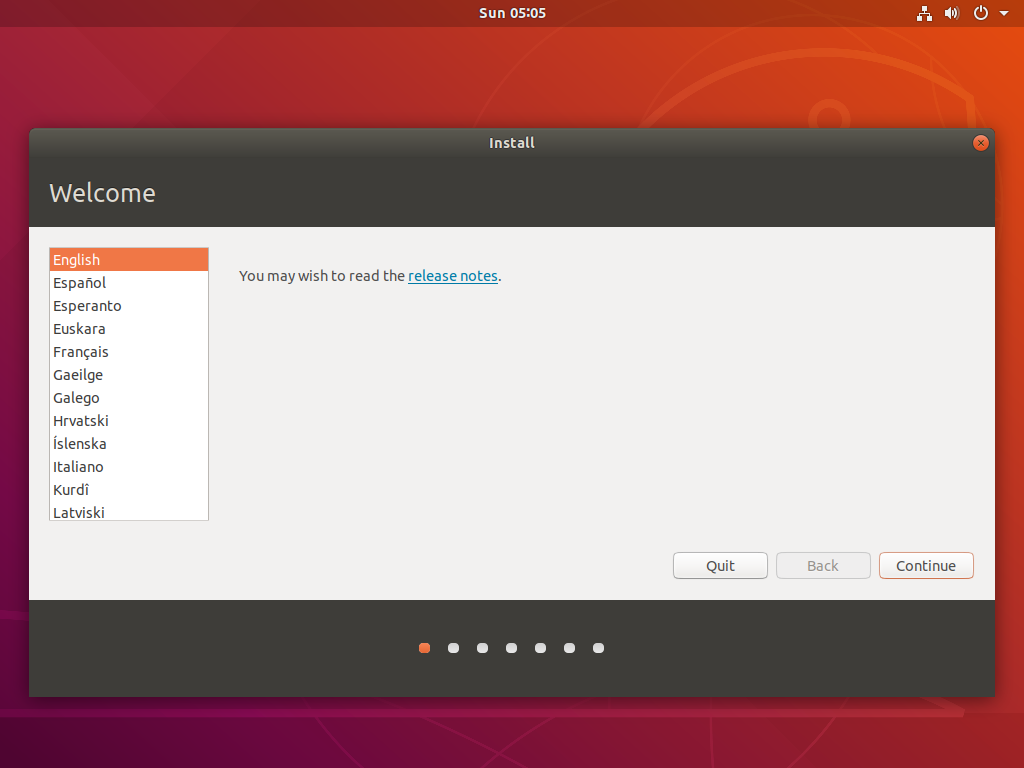
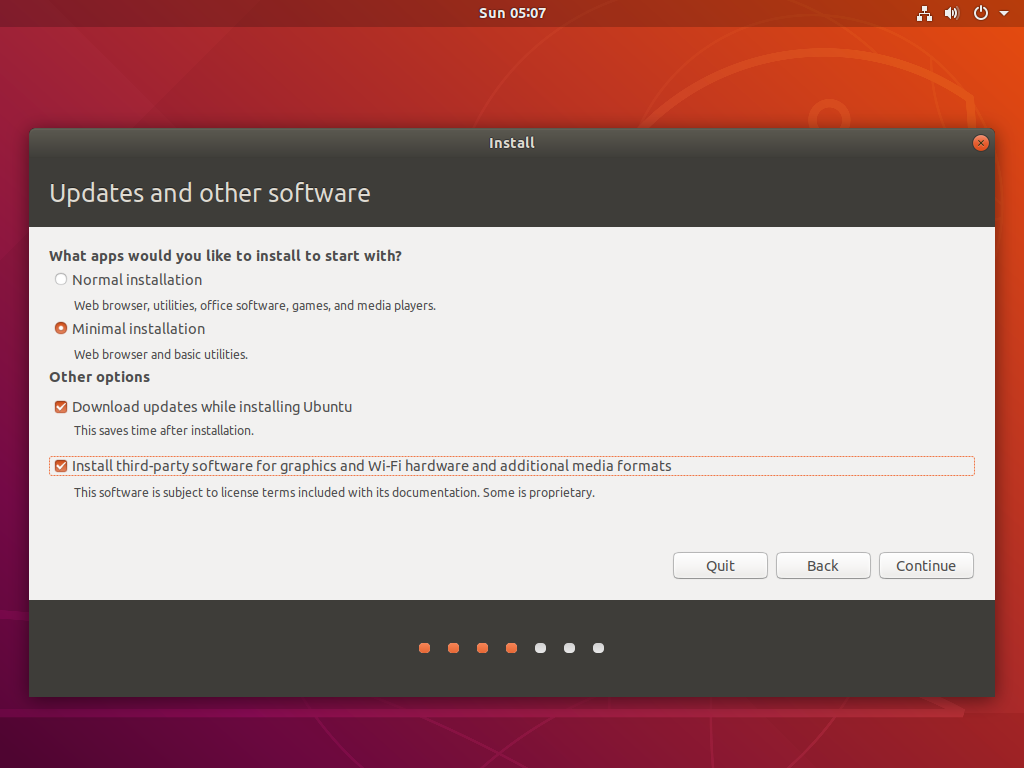
Choose Minimal Installation, Updates, and Proprietary Software.
Disconnect CDROM when prompted.
- Disable Lock screen
- Disable Power screen timeout
- Choose Fastest Mirror
- Enable Cononical Partner Mirror and Bionic-Backports
- sudo apt update
- sudo apt upgrade
As you can see from the matrix below there are MANY ways of providing desktops to your users.
However, I think this way has many advantages for a Nonprofit. I would recommend it generally, although of course other topographies are more useful in specific situations.
Benefits for a Nonprofit
- Green computing – Thin clients use less power than traditional workstations.
- Reduced maintenance costs – Thin client deployment means you’re only maintaining a couple servers, instead of multiple traditional workstations. Using Azure cloud means you don’t have to maintain server hardware.
- 100% free horizontal software – Completely free Open Source horizontal market software.
- Discounted vertical market software – Purchase heavily discounted MS remote desktop licenses at Techsoup. Along with anything else you might need. e.g. Quickbooks, MS Office, and any other vertical market software. https://www.techsoup.org/
- $3500 Azure Credit, Free Office 360 – Free cloud servers, Office.
Apply for Microsoft Nonprofit here: https://nonprofit.microsoft.com/register - Free Voice,Gsuite,etc.. – Free cloud Telephony, calendaring, file management, and email with custom domain.
Apply for Google Nonprofit here: https://www.google.com/nonprofits/ - Free hardware; Nevada County among others will donate their old computers, and peripherals to any eligible local nonprofit. Perfect for blazingly fast thin clients. Bring your tax exempt paperwork to the warehouse on the last Friday of the month. Or, try Purchasing hardware from your local government entity here: https://www.publicsurplus.com/sms/nevadacounty,ca/list/current?orgid=315996 After that try eBay: https://rover.ebay.com/rover/1/711-53200-19255-0/1?mpre=https%3A%2F%2Fwww.ebay.com%2Fb%2FPC-Desktops-All-In-One-Computers%2F179%2Fbn_661752&campid=5337848787&toolid=20008
- No taxes – If you use Comcast as your internet provider, make sure to file tax exemption paperwork with them to waive the applicable taxes. Email tax exempt certificate to: [email protected] . Include service address & account #.
- 50% off internet – If you are school, or other eligible nonprofit in California sign up here for 50% off your internet bill. https://jphein.com/discounted-phone-and-internet-for-nonprofits-in-california/
Terms
- [wiki]Vertical market software[/wiki] – https://en.wikipedia.org/wiki/Vertical_market_software
- [wiki]Thin client[/wiki] – https://en.wikipedia.org/wiki/Thin_client
- [wiki]Linux Terminal Server Project[/wiki] (LTSP) – https://en.wikipedia.org/wiki/Linux_Terminal_Server_Project
- [wiki]Ubuntu[/wiki] – https://en.wikipedia.org/wiki/Ubuntu
- [wiki]Remote Desktop[/wiki]
Guide
Follow along. At the end of this guide you should be able to plug in any number of old computers without hard drives into your local network. Then have them boot blazingly fast Windows based modern software. Wireless, and remote VPN clients are also supported.
In this setup all thin clients will be sharing a single Windows 2016 Datacenter instance. However, you can provide any number of environments using this method, including huge VDI deployments. My favorite is using LTSP Ubuntu fat client desktops with RemoteApps for seamless cloud integration of necessary windows based proprietary software.
I am using Ubuntu 18.04 Bionic Beaver for the LTSP server, because LTSP does not currently work with Ubuntu 18.10 Cosmic Cuttlefish.* In my case the entire setup was virtualized in the Azure cloud using KVM Virtual Machine Manager for virtual thin clients.
It might look like this:
[Azure Standard D4s v3[[PXE thin client – KVM guest] –> [Ubuntu 18.04] LTSP Server]] –>[Azure Standard NV6 [Windows 2016]]
In real life the more likely scenario would be to install Ubuntu on a bare metal server onsite. Then, install Ubuntu 18.04 inside a KVM vm. Plug a thin client into your network, and configure it for PXE boot in BIOS. It would look a little like this:
[PXE thin client] –> [[Ubuntu 18.10] [Ubuntu 18.04 KVM guest LTSP server]] –> [Firewall] –> [Internet] –> [Azure Standard NV6 [Windows 2016]]
In this guide I will be first showing you how to set up the virtualized system, and then go into some changes you’ll need to make in the field.
Requirements
- An internet connection. 3MB/s or more recommended.
- A computer with keyboard and display capable of running at least SSH. To issue the commands from.
- A computer capable of running Ubuntu with at least one network card. Or a virtual machine capable of nested virtualization like the Azure Standard D4s v3. For the LTSP server.
- A virtual or real windows machine locally or in the cloud. You’ll need Remote desktop licenses if you want to use microphone forwarding. If using Azure, not every region has the NVIDIA Tesla servers (NV6) for hardware graphics rendering. USA South Central is what I used. This is used for the desktop environment.
IPs
- 10.0.0.1 – Gateway.
- 10.0.0.5 – eth0 – Local interface on Ubuntu server – Connected to the Internet.
- 192.168.122.1 – virbr0 – Virtual bridge on Ubuntu server for testing virtual thin clients.
- 10.0.0.4 – Windows 2016 datacenter RDP server with NV6 Nvidia Tesla hardware.
Create your Azure Virtual Machines
After signing up and being accepted to Microsoft Nonprofit, verify your $3500 credit here: https://www.microsoftazuresponsorships.com/Balance
Create your virtual machines here: https://portal.azure.com
Note: DO NO USE accelerated networking on the Ubuntu Server.
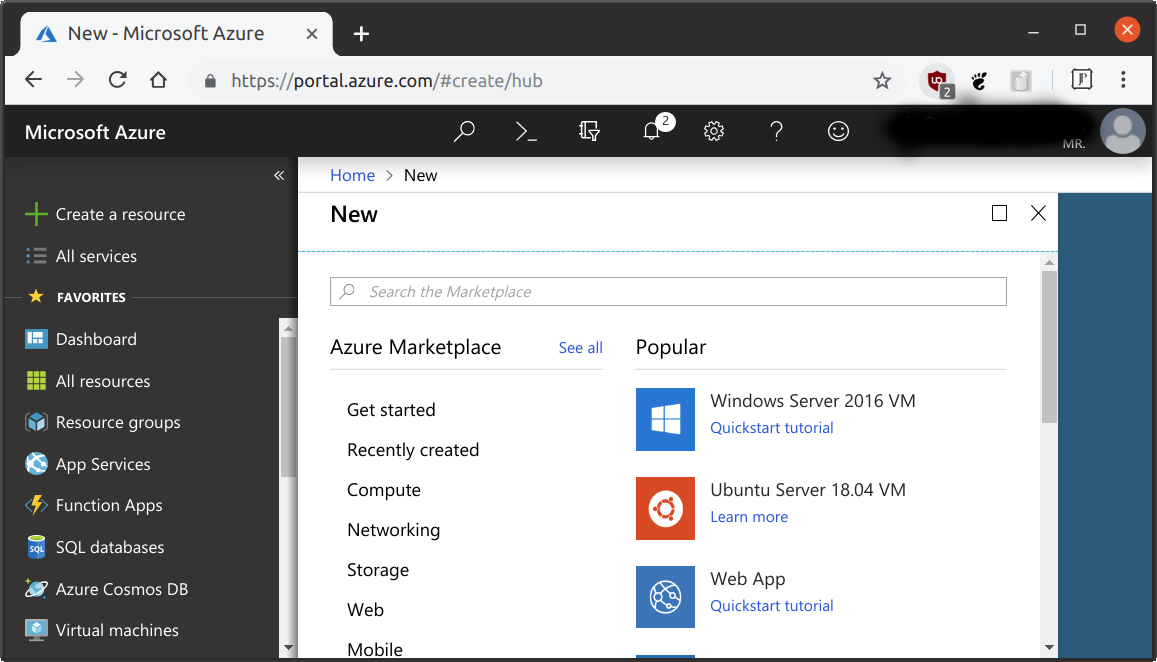
LTSP Server
- Image type: Ubuntu 18.04
- Size: Azure Standard D4s v3
Desktop Server
- Image type: Windows 2016 Datacenter
- Size: Azure Standard NV6
[jbox]Azure comes with a premade Ubuntu 18.04 image, but if you are doing this in the field you would need to install Ubuntu on your server:
Install Ubuntu 18.04.1 Desktop (Minimal)
- Ubuntu 18.04.1 Desktop.
- Download ISO here: https://www.ubuntu.com/download/desktop
- Install the desktop version, minimal install.
- Instructions here: https://jphein.com/how-to-install-ubuntu-18-04-18-10-to-an-usb-3-1-m-2-16gb-drive-using-kvm/
If you decide to have a local Windows server instead or in addition to the Azure vm, you’ll need to install Windows locally.
Install Windows 2016 Datacenter
- Download ISO from Microsoft Volume Licensing Center
- Install
[/jbox]
Configure Windows 2016 Datacenter
Configure remote desktop for microphone redirection:
- Install Remote Desktop Session Host
- You’re either still inside the grace period OR have the Remote Desktop Licensing role installed and a valid CAL
- Make sure the remote desktop group policy allows audio recording
Configure graphics acceleration: https://lg.io/2016/10/12/cloudy-gamer-playing-overwatch-on-azures-new-monster-gpu-instances.html
Configure the Ubuntu and install LTSP Server
[jbox]You can find a bash script automating all the below commands here: https://raw.githubusercontent.com/jphein/boxen/master/boxenbrain [/jbox]
To manually install BoXenLinux we will be configuring LTPS using the Chrootless Proxy mode for in the field. It is the easiest of the 4 ways to install LTSP. However, for the Azure cloud we’ll need to install using a chroot.
[jbox color=green]Set a static IP for your wired network interface in the field
Microsoft azure VM comes with the static IP set on your default interface. However, in the field you’ll need to set a static IP address.
https://www.itzgeek.com/how-tos/linux/ubuntu-how-tos/netplan-how-to-configure-static-ip-address-in-ubuntu-18-04-using-netplan.html
https://netplan.io/examples
[/jbox]
Optional: Install OpenSSH server
If using the Azure install as the LTSP server, you’ll want to overwrite the existing sshd_config so that you can using password login if you used a key when creating the VM.
sudo apt install ssh
Install LTSP and epoptes (epoptes lets you remote desktop in and help anyone using a thin client), Instructions from http://wiki.ltsp.org/wiki/Installation/Ubuntu:
sudo add-apt-repository --yes ppa:ts.sch.gr #The Greek Schools repository
sudo apt install --yes --install-recommends ltsp-server-standalone ltsp-client epoptes
Configure dnsmasq
Note: You may want to edit the /etc/dnmasq.d/ ltsp-server-dnsmasq.conf and add “dhcp-option=3,192.168.122.1” to set a different gateway, but probably not.
sudo ltsp-config dnsmasq --enable-dns
sudo service dnsmasq restart
Add yourself the epoptes group
sudo gpasswd -a ${SUDO_USER:-$USER} epoptes
Was told to remove these packages
sudo apt purge --yes --auto-remove mate-hud snapd
[jbox color=blue title=”Optional: Chroot Install”]
Build a chroot client for alternate arch, dekstop enviroment or package base
Grab freerdp’s key
cd /etc/ltsp
sudo wget http://pub.freerdp.com/repositories/ADD6BF6D97CE5D8D.asc
- Option 1 – with command
sudo ltsp-build-client --purge-chroot --mount-package-cache --mirror 'http://azure.archive.ubuntu.com/ubuntu/'
 --apt-keys '/etc/ltsp/ADD6BF6D97CE5D8D.asc, /etc/apt/trusted.gpg.d/ts_sch_gr_ubuntu_ppa.gpg'
 --extra-mirror 'http://ppa.launchpad.net/ts.sch.gr/ppa/ubuntu bionic main, http://pub.freerdp.com/repositories/deb/bionic/ freerdp-nightly main'
 --late-packages epoptes-client freerdp-nightly --prompt-rootpass --fatclient
- OR, Option 2 – using my ltsp-build-client.conf
sudo wget https://github.com/jphein/boxen/raw/master/etc/ltsp/ltsp-build-client.conf
sudo ltsp-build-client --config ltsp-build-client.conf
You may want to install a new kernel like this one if the azure kernel doesn’t work with all of KVM’s input drivers:
sudo apt-get install linux-image-lowlatency
Then you have to edit the update-kernels.conf file, so that LTSP chooses that one to boot the client.
Create some symlinks so freerdp-nightly is more easy t my lazy scripting
sudo ltsp-chroot
ln -s /opt/freerdp-nightly/bin/xfreerdp /usr/bin/xfreerdp-nightly
ln -s /usr/share/ltsp/screen.d/xfreerdp /usr/share/ltsp/screen.d/xfreerdp-nightly
exit
Create GUI login screen for xfreerdp-nightly (Not updated!)
cd /opt/ltsp/amd64/usr/share/ltsp/screen.d/

sudo wget https://raw.githubusercontent.com/jphein/boxen/master/rdpgui

sudo wget https://raw.githubusercontent.com/jphein/boxen/master/xfreerdp-prompt

sudo chmod +x rdpgui xfreerdp-prompt
sudo ltsp-update-image
Note: You may get this error on Microsoft Azure VM! https://bugs.launchpad.net/ubuntu/+source/ltsp/+bug/1802707 hmmmm…. This script seems to fix it:
#!/bin/bash
# tadaen sylvermane | jason gibson
# configure locales for ubuntu bionic ltsp chroot creation


for var in LC_ALL= LANG= ; do
        export "$var"en_US.UTF-8
done
ltsp-build-client --chroot "$1"
[/jbox]
[jbox color=green title=”Local Chrootless Install”]
This is the recommended, and simplest install
Install FreeRDP-nightly and client zenity GUI
sudo sh -c 'echo "deb http://pub.freerdp.com/repositories/deb/$(lsb_release -cs)/ freerdp-nightly main" >> /etc/apt/sources.list.d/freerdp-nightly.list'
wget -O - http://pub.freerdp.com/repositories/ADD6BF6D97CE5D8D.asc | sudo apt-key add -
sudo apt update
sudo apt install --yes freerdp-nightly
sudo ln -s /opt/freerdp-nightly/bin/xfreerdp /usr/bin/xfreerdp-nightly
cd /usr/share/ltsp/screen.d/
sudo ln -s xfreerdp xfreerdp-nightly
sudo wget https://raw.githubusercontent.com/jphein/boxen/master/usr/share/ltsp/screen.d/rdpgui
sudo wget https://raw.githubusercontent.com/jphein/boxen/master/usr/share/ltsp/screen.d/xfreerdp-prompt
sudo wget https://raw.githubusercontent.com/jphein/boxen/master/usr/share/ltsp/screen.d/launch
sudo mkdir boxen
cd boxen
sudo wget https://raw.githubusercontent.com/jphein/boxen/master/usr/share/ltsp/screen.d/boxen/welcome
cd ..
sudo ln -s launch welcome
sudo ln -s /sbin/shutdown shutdown
sudo chmod +x rdpgui xfreerdp-prompt launch boxen/welcome
Create LTSP client NBD image using the chrootless method of the servers root /
You need to run this any time you make changes to your filesystem you want to be updated in your LTSP client.
sudo ltsp-update-image --cleanup /
[/jbox]
Grab the lts.conf for our thin clients
cd /var/lib/tftpboot/ltsp/amd64/
sudo wget https://raw.githubusercontent.com/jphein/boxen/master/var/lib/tftpboot/amd64/lts.conf
Edit lts.conf to suit your needs
nano -w lts.conf
Test with KVM virtual pxe thin client
If you are already using KVM to install Ubuntu in a VM then you don’t need to install it again. However, if you are using a real bare metal server then you’ll need to run the install command.
sudo apt install virt-manager
[jbox]Libvirtd will run dnsmasq on virbr0 by default. We need to kill that instance and restart the global dnsmasq with our LTSP configs. You will need to killall and restart dnsmasq every time you reboot.
###dnsmasq hack for testing
sudo mv /etc/dnsmasq.d/libvirt-daemon /root/
sudo sh -c 'echo "dhcp-range=192.168.122.20,192.168.122.250,8h" >> /etc/dnsmasq.d/ltsp-server-dnsmasq.conf
#These steps will need to performed again if you reboot
sudo killall dnsmasq
sudo service dnsmasq restart
[/jbox]
#Create the PXE test KVM client
sudo virt-install
  --name pxe
  --memory 4096
  --vcpus 2
  --disk none
  --pxe
  --os-variant ubuntu17.10
  --wait 0
Connect locally using very nice spice
virt-viewer --connect qemu:///system pxe
Connect remotely using spice
virt-viewer --connect qemu+ssh://[email protected]/system pxe


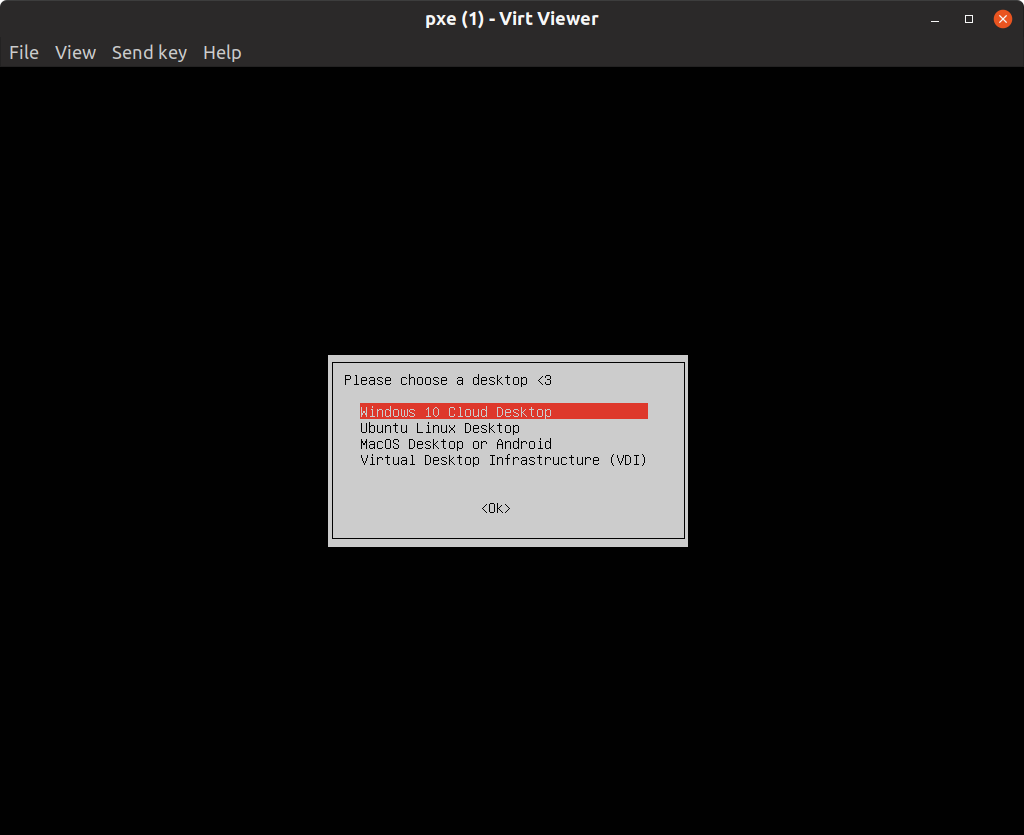
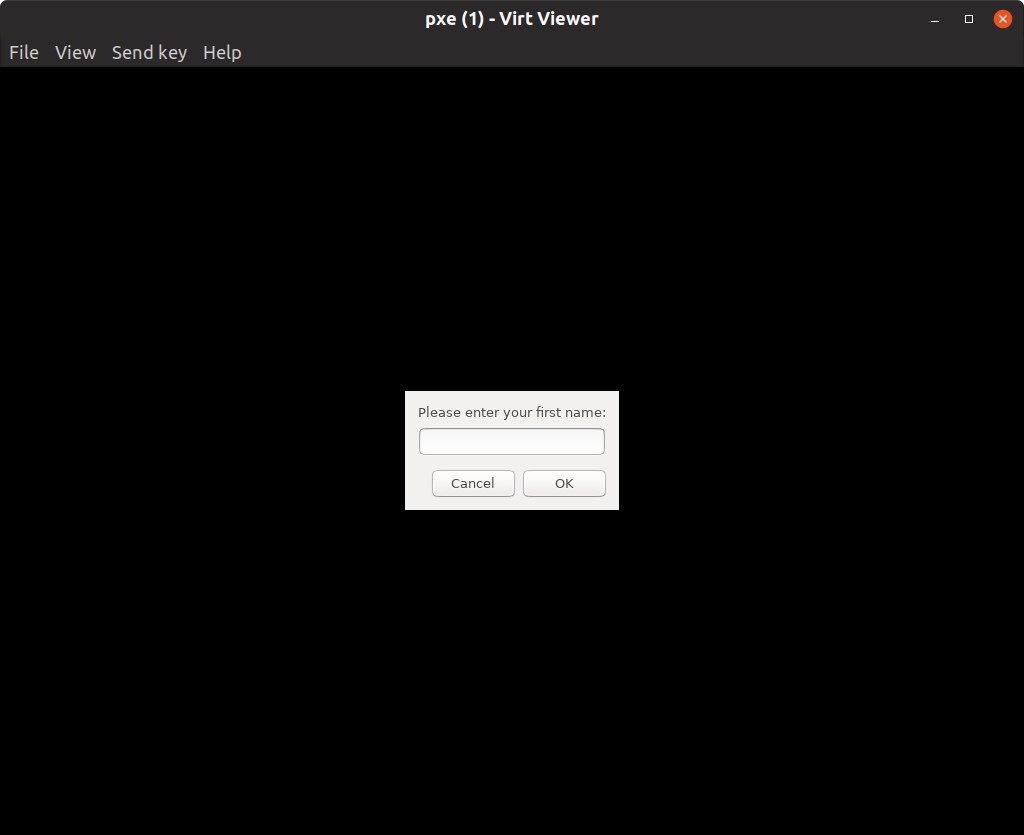
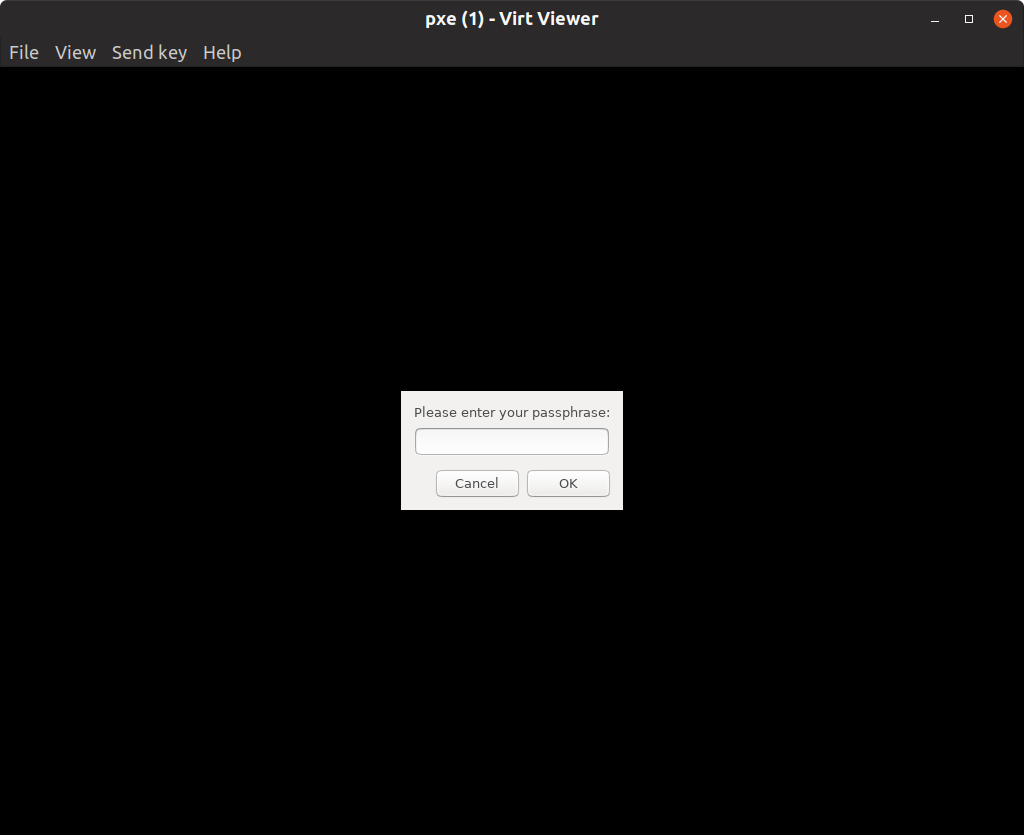
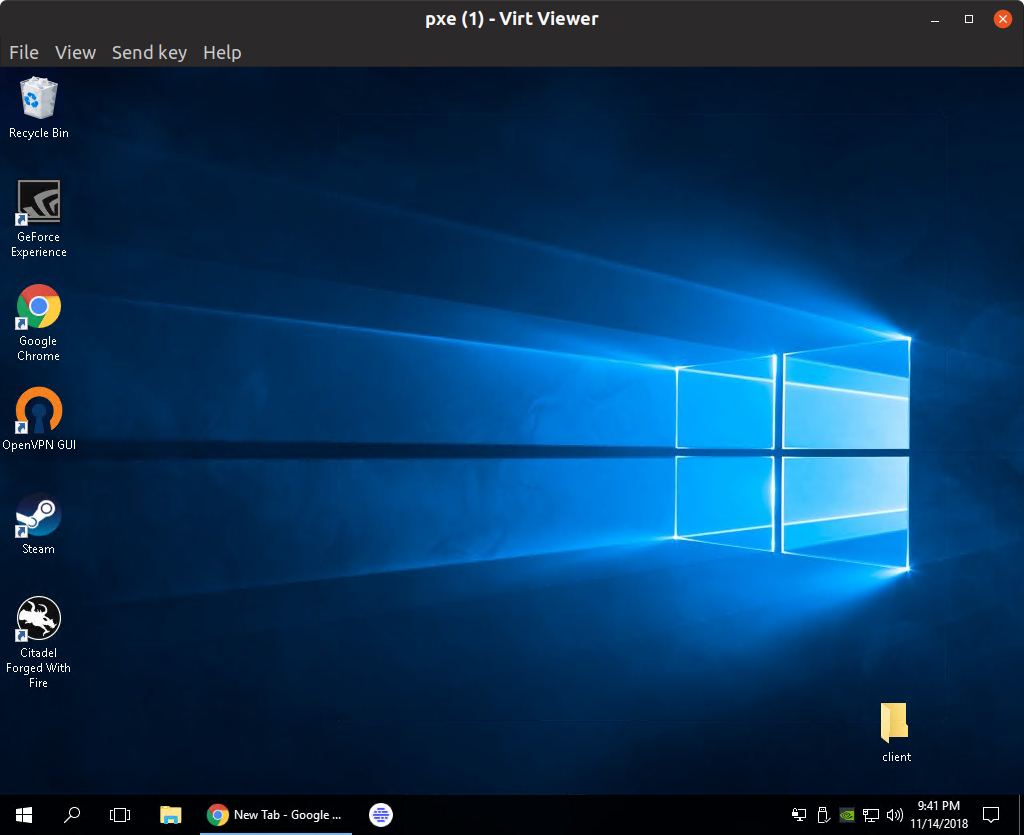 Tada!!!
See also
lts.conf manpage ltsp-build-client manpage ltsp-update-image manpage ltsp-config manpage ltsp-chroot manpage http://wiki.ltsp.org/wiki/Installation/Ubuntu https://help.ubuntu.com/community/HowToSetupLTSPDevelEnvironment https://github.com/wyllianbs/xfreerdp-gui https://unix.stackexchange.com/questions/119880/make-freerdp-prompt-user-for-username-and-password/187370 http://www.saminiir.com/debugging-pxe-boot/
* Ubuntu 18.10 I previously tried this with Ubuntu 18.10 Cosmic Cuttlefish, and ran into some issues. Mainly the maintainer of LTSP for Ubuntu does not fix anything that is not a LTS release.
Optional Install ltsp-manager
sudo add-apt-repository --yes ppa:franz-die/ltsp-manager; apt update

sudo apt install ltsp-manager
Optional: Install X2Go remote desktop software
sudo add-apt-repository ppa:x2go/stable
sudo apt-get update
sudo apt-get install x2goserver x2goserver-xsessions x2gomatebindings
Optional: Install Ubiquity to install Ubuntu on PXE booted clients or servers
sudo apt-get install ubiquity ubiquity-frontend-gtk
Running it is a manner of running from the client
ubiquity gtk_ui
Optional: Add iPXE to grub menu
apt install grub-ipxe
[jbox]Optional: Set up Firewall with IP Masquerading
Probably won’t need to do this.
First, packet forwarding needs to be enabled in ufw. Two configuration files will need to be adjusted, in /etc/default/ufw change the DEFAULT_FORWARD_POLICY to “ACCEPT”:
sudo nano -w /etc/default/ufw #change DEFAULT_FORWARD_POLICY="ACCEPT"
Then edit /etc/ufw/sysctl.conf,
sudo nano -w /etc/ufw/sysctl.conf
and uncomment:
net/ipv4/ip_forward=1
net/ipv6/conf/default/forwarding=1
Now add rules to the /etc/ufw/before.rules file. The default rules only configure the filter table, and to enable masquerading the nat table will need to be configured. Add the following to the top of the file just after the header comments:
sudo nano /etc/ufw/before.rules
# nat Table rules
*nat
:POSTROUTING ACCEPT [0:0]
# Forward traffic from eth1 through eth0.
-A POSTROUTING -s 192.168.122.0/24 -o eth0 -j MASQUERADE
# don’t delete the ‘COMMIT’ line or these nat table rules won’t be processed
COMMIT
Allow SSH
sudo ufw allow 22
sudo ufw allow from 192.168.122.0/24
sudo ufw enable
[jbox]
Optional: Install apt-cacher
apt-cacher will cache packages so you don’t waste your time downloading them again again.
sudo apt install apt-cacher
sudo nano /etc/apt-cacher/apt-cacher.conf #Uncomment allowed_hosts= *
sudo ufw allow 3142/tcp
sudo sh -c 'echo "Acquire::http::Proxy "http://10.0.0.5:3142"";' > /etc/apt/apt.conf.d/01proxy
sudo /usr/share/apt-cacher/apt-cacher-import.pl -l /var/cache/apt/archives
sudo service apt-cacher restart
Optional: Test with QEMU
Set up virtual bridge for client networking
On the azure VM I was able to use the default virtual bridge virbr0. Just commented out the dnsmasq.d/ file libvirt that prevented dnsmasq from serving IPs on that network. However, testing on a real server I needed to make my own bridge. These commands should not be issued if working on your server remotely. Only a local bare metal install should issue these commands.
sudo ip tuntap add dev virttap mode tap user $USER
sudo brctl addbr virtbr
sudo brctl addif virtbr eth0 # your LAN interface
sudo brctl addif virtbr virttap
sudo ip link set virtbr up
sudo ip link set eth0 up
sudo ip link set virttap up
dhclient virtbr
You may need to restart dnsmasq again
sudo service dnsmasq restart
Run QEMU to test your LTSP setup
cd
qemu-img create -f vmdk testpxe.vmdk 10
/usr/bin/qemu-system-x86_64 -m 1024 -hda testpxe.vmdk
                              -boot n
                              -option-rom /usr/share/qemu/pxe-rtl8139.rom
                              -net nic
                              -net tap,ifname=virttap,script=no,downscript=no
]]>
https://www.pge.com/en_US/residential/rate-plans/rate-plan-options/tiered-base-plan/tiered-base-plan.page
Tiered rates
https://www.pge.com/tariffs/ResElecCurrent.xls
Time of use rates
https://www.pge.com/tariffs/ResTOUCurrent.xls
Electric Vehicle rates
https://www.pge.com/tariffs/tm2/pdf/ELEC_SCHEDS_EV.pdf
Energy/$ saving tips:
If low income, Enroll in the PGE low income CARE program
Use OHM Hour program to know when peak times are and get a rebate if you use less
Pay attention to bill amount, so you can see if your efforts are working
Lease or buy an Electrical Vehicle and sign up for special EV rates + $7000 state and $10,000 federal rebates + $500 clean fuel rebate PGE + $500 BOSCH charger
Install Solar or Get solar service
Sign up for county and/or PGE weatherization programs
Switch to LED bulbs
Put Manual power switches/bars on all wall warts, electronics, etc.. (power vampires) and keep off and/or timers on modems/wifi aps
Light sensitive motion sensor lights outdoors, attics, basements etc..
Use a composting toilet system, or displace some water in your toilet tank with a brick, etc..
Use a solar, wind or manual well pump
Use solar water heating
Plant a garden
Ride a bicycle
Use gravity for water pressure, you may need to change out your shower heads
Hang out outside and go to bed early
Hang clothes to dry, or add a dry towel to your machine dryer load
Summer
Cool off in the shade with no clothes
take a cold shower with clothes on
sit in the kiddie pool
Winter
Use wood heat
Hot tub/softub
Heat with cover on
Make sure jets are off
Keep water clean
add Timer
- Google cloud,
- WordPress, Ubuntu 17.10, Apache2, , MariaDB, PHP7, Letsencrypt
- Pagespeed
- Enable Swap
- WordPress plugins.
- Varnish + plugin
- Cloudflare
- Test
I started by.
- Setup free instance of the Google cloud Compute Engine. Ubuntu 17.10 image.
- Follow these instructions.
https://websiteforstudents.com/install-wordpress-on-ubuntu-17-04-17-10-with-apache2-mariadb-php-and-lets-encrypt/
With one small change when installing the SSL certificate. The guide did not work. I had to change the command to the following:
sudo certbot --authenticator webroot --installer apache -m [email protected] -d w.jphe.in
3. Install pagespeed using this guide:
First, go to the PageSpeed download page and choose the file you need. We’re using a 64-bit Ubuntu server and we’ll install the latest stable version. Download it using wget:
wget https://dl-ssl.google.com/dl/linux/direct/mod-pagespeed-stable_current_amd64.deb
Then, install it with the following commands:
dpkg -i mod-pagespeed-stable_current_amd64.deb
apt-get -f install
Restart Apache for the changes to take effect:
systemctl restart apache2
4. Enable swap
https://www.digitalocean.com/community/tutorials/how-to-add-swap-space-on-ubuntu-16-04
5. Install WordPress and Jetpack (Image CDN), WP Super Cache (expert mode), Adaptive Images for WordPress, P3 (Plugin Performance Profiler), Really Simple SSL. WP-Smush, WP-Optimize. Duplicator
6. Varnish? Varnish WordPress plugin?
7. Set up cloudflare account.
8. Test
Test SSL: https://www.ssllabs.com/ssltest/index.html
Test Pagespeed module: https://ismodpagespeedworking.com/
Test your server response time: http://www.bytecheck.com
Should be 500ms or under. Ideally under 200ms.
4.3 inch Screen (~61.0% screen-to-body ratio)

Complete guide to getting the Square Register App on the Droid X
[jbox]This only needs to be done if your phone does not boot. If your phone does not boot, then you will need to flash it back to stock. Guide from: https://forum.xda-developers.com/showthread.php?t=1321061
1. On your computer, download both the sbf file you’re wanting to flash (extract the .sbf file if it’s zipped. Found here: https://sites.google.com/site/motosbf/droid-x-sbf-files), and the sbf_flash program. You can get the latest version of sbf_flash at http://blog.opticaldelusion.org
2. Open a terminal in the directory where you have the sbf file and sbf_flash program. Type “chmod +x sbf_flash”. This will make the sbf_flash file executable.
3-5. Hold Camera + Volume Down + tap Power to bring up the bootloader.
6. Plug your phone into the computer using the usb cord. Wait a few seconds to allow your computer to recognize the device.
7. In the terminal (still opened in the same directory as the sbf_flash program and the .sbf file), type “sudo ./sbf_flash nameOfSbfFile.sbf” (obviously you’re going to want to change the last part to the actual name of the sbf file you have on your computer) and enter your password when prompted.
Edit: Thanks to balltongue for providing the info on the correct command for running the sbf_flash program on OSX. For OSX, substitute “sudo ./sbf_flash nameOfSbfFile.sbf” with “sh ./sbf_flash nameOfSbfFile.sbf” instead. The rest of the tutorial should work as written.
8. Allow the program to work. It’ll take several minutes and your phone will reboot at the end.
*** If the phone boot loops: ***
Remove the battery. Insert battery again and turn the phone on using the Power Button and the Volume Down button again. This time, press the Volume Down button until you get to “Android Recovery”. Press the Volume Up button to select it. Press BOTH volume keys once you see the exclamation point in the triangle. Select the “wipe data/factory reset” option with the Volume Down button and initiate it by pressing the Power Button.
Reboot your phone and you should be all done.
(Everything copied from this guide:
https://docs.google.com/document/d/1Ds6tlVHsAy9ZwkswQ8OZdclJRfd3YPXVSQBc0ofsZQE/edit#bookmark=id.gnstuvqmjim3)[/jbox]
If it’s booting then you can start here.
- If you’re on a custom ROM already (CM, MIUI, LiquidICS, etc.) goto step 6.
- Download Droid 2 Recovery Bootstrapper CWM 5.0.2.0,
Framaroot: newer versions may not work Framaroot-1.4.1.apk (XDA) – AFH – RootJunky – Mega –
Framaroot.apk
, twrp_2.7_cm11_dx.zip, latest gapps, and ROM to sdcard from one of the storages: MEGA, Mediafire, GDrive. - On phone: Settings->Applications(Enable Unknown sources)->Development->Enable USB Debugging.
- Install Framaroot.apk, launch it and select “Gimli”, reboot you’re phone.
- Install Droid2RecoveryBootstrap_CWM5.0.2.0.apk, launch it, select “Bootstrap Recovery”, grant Superuser access and reboot phone.
- Reboot phone into CWM Recovery or if you on stock firmware launch Droid X Bootstrapper and press “Reboot Recovery“.
- In CWM choose wipe data/factory reset (this will completely delete all your data on phone except sdcard), then install zip from sdcard and select twrp_cm11_dx.zip.
- Reboot system.
- (It’s touch) Recovery -> Team Win Recovery.
- Wipe again! (When I didn’t it rebooted in the middle of installing the rom, and I had to revert back to stock and start all over)
- In TWRP choose Install and select ROM, then slide, then make the same with gapps.
- After install press Reboot system.
(Guide from: https://forum.xda-developers.com/showthread.php?t=2670547)
[jbox color=red]NOTE: Square register crashes without an SD card in the phone.[/jbox]
[jbox]Optional: Enable performance tweaks
- Enable Developer options by tapping on Settings-About Phone-Build Number 10 times
- Go to Settings–Perforance–CPU–Perfomrance
- Enable 16 bit graphics[/jbox]
Install Square
- Enable unknown sources
- Install Square Register POS apk
Sign up here: https://thecellphoneguru.com/free-service
[/jbox]
[jbox color=white title=”FREE Plan”]
200 Minutes (You need to use their VOIP app)
500 texts (You need to use their texting app)
200MB data (Once you sign up you can get up to 500MB more by adding friends like me.)

To get the additional data find friends by email address.
Add my email addresses:
[email protected],[email protected],[email protected],[email protected],[email protected],[email protected],[email protected],[email protected],[email protected],[email protected]
NOTE: Friends can gift you up to an additional 500MB/month. With a total possible limit of 1.2GB/month. You can give 100MB of your data per month per friend. You can make as many accounts as you want, and swap data around.[/jbox]
[jbox color=red]Be sure to keep track of your data usage! Freedompop will bill you automatically if you go over in $15 increments. Sometimes as early as 200MB before your limit. If you do go over and they take the $15, you can turn off auto top off, or it is $5 to turn off auto topoff ahead of time.[/jbox]
[jbox color=red]NOTE: You need to cancel BOTH your premier service plan and your trial 1GB of data plan in order to have truly free service.
Do BOTH to get free service
Change to free plan http://freedompop.com/account/nXV…ngradePla
Remove Premium Plus http://freedompop.com/account/ser…adePremie
Below are some more in depth instructions:
http://www.jadito.us/2014/07/07/canceling-freedompop-premier-service/
Or, this one: https://slickdeals.net/f/9363891-freedompop-global-3-in-1-sim-kit-free-1gb-bonus-freedompop-0-25

Hahahaha… Look how tiny the cancel premier service link is ^^^^^^^^^
To cancel your 1GB international plan go to “Services–> Details and Plan Management–>Downgrade, etc…
[/jbox]
[jbox]
Free Unlimited WhatsApp data: (Optional)
- How to Instantly switch to Free WhatApps Plan : ( thanks for Freedompop user: Ali for providing the following useful link)
WARNING: If you already log into Freedompop, the following URL will instantly switch to WhatApps without any confirmation dialog.
Please do not Click below link unless you are ready to switch to Freedompop, Please read this Discussion for more detail about WhatsApp plan do for you.
http://www.freedompop.com/change_dataplan_now.htm?planSku=vdb-ww-wa-free&cat=MultiPagePlan
- How to Go back to the Basic Freedompop plan
Please click the following link
WARNING: If you already log into Freedompop, the following URL will instantly switch to WhatApps without any confirmation dialog.
http://www.freedompop.com/change_voiceplan_now.htm?voicePlanSku=vdb-us-ww-free
[/jbox]
[jbox color=red]
Turn off Auto Top Ups(optional)
This shuts off Auto Top-Ups.Open your account online and click this link;
https://www.freedompop.com/billing_settings.htm
Or Open your FreedomPop account. On the Tabs at the top you will see”HOME–MY ACCOUNT–BILLING–EARN FREE–SHARE DATA–SUPPORT” Click “BILLING“, and you will see a drop down Menu. Click “BILLING SETTINGS“.
It will take you to the Billing Settings page. Look for the square called “Automatic Top-up” and clickedit. Change these settings to auto top-up (NO), and than click save. You might get a pop up warning, just click yes or “downgrade anyways“. This setting decides if you get charged for anyData Overages.

5$ Credit Require to Turn Auto Top-Up Off;
Freedompop changed this a few month back. It will ask you for a 5$ credit in-order to turn automatic top up off(required).

The 5$ credit is to protect the account if you go over the allotted amount with Auto Top-up disabled. This rarely ever happens. You would need to be downloading a huge file right before you hit your limit, and in the 3 hour delay Sprint has when recording data used. They ask that you keep 5$ in credit at all times with Auto top up disabled, Make sure to re-activate your Credit every 30-90 days(see link)
https://support.freedompop.com/app/answers/detail/a_id/2233/kw/credit
Note: The 5$ Credit is refunded when it expires, If you notice in the link, it shows as “-$5.00” (credited).
[/jbox]
[jbox color=blue]
Contact Freedompop Support here:
https://support.freedompop.com/app/ask
To see your existing trouble tickets:
https://support.freedompop.com/app/account/questions/list
To submit a question to the public forum:
https://support.freedompop.com/app/featured/answer/id/3122
800-671-5017
[/jbox]
[jbox title=”Global coverage”]
UPDATE 12/9
The SIM card gives you access to both AT&T and T-Mobile 3G network’s. I received the SIM card and tested it. Looks like achieves 3G speeds on the HSPA+ network. Here are some speed tests from Auburn California:


Be sure to use the below APN:
freedompop.foggmobile.com
To set the APN on an iPhone you may need to download the profile at unlockit.co.nz.
NOTE: All your traffic will originate in the UK.
The awesome thing about this sim card is that it will work in many other countries too. Check out which countries it supports here below:
[/jbox]
]]>aka inWatch Z2G
This guide is written for the original inWatch Z that came with Andriod 4.2.2, and has the bone conductivity speaker. Not the later version (Z3G) that shipped with Android 4.4. These instructions may work with the later one, but I have not tested it.
Chipset: MediaTek (MTK) MT6572 Why does it identify as a MT6227 via USB?
Specs: RAM: 1GB, ROM: 8GB, CPU: Dual Core,1.2GHz,Cortex-A7
WIFI: 802.11b/g/n wireless internet
GSM Cellular Frequencies: 2G 850/900/1800/1900MHz
GPS: Yes
Bluetooth: Yes
OS: Android 4.2.2
Price: $291.81 http://www.gearbest.com/cell-phones/pp_70817.html
Info: http://inwatchusa.com/
XDA thread: www.xda-developers.com?
Review: http://martian-imperium.blogspot.com/2014/07/one-week-with-inwatch-z.html
This smart watch is a pretty powerful little machine. If it was rooted and had Google play on it, I could use for all sorts of stuff. Unfortunately, it did not come with those features. The goal of this post to root this device, install a custom recovery, and install Google Play.
NOTE: There is an issue with the stock lock screen. After following this guide, you may have a your watch rebooting everytime you try to unlock it. To solve this issue, read this thread:
http://forum.xda-developers.com/smartwatch/other-smartwatches/inwatch-z-day-one-to-factory-t2984378
Required equipment:
- inWatch Z smart watch, and snap on charger.
- Ubuntu laptop (Works with MacOS or Windows as well. I used Ubuntu Linux 16.04 xenial.)
- A Windows virtual machine, or an actual Windows machine.
- Micro USB cable.
- A WIFI internet connection.
- ADB tools for your OS (In Ubuntu type “apt-get install android-tools”
Guide:
- Download all files needed here: https://goo.gl/H8zIcm to your Ubuntu laptop.
To root:
Navigate to kingoapp.com on your inWatchZ.

Download the app for Android, and run the kingoapp. (As many times as it takes)
Worked! Holysmokes! I had to run it twice. o_o
Once it is successful continue on to the next step.
2.This step requires a Windows machine. I used a Windows 10 virtual machine under KVM. Virtualbox, VMWare and a Windows box all work.
To install custom recovery, so we can install Google Play. Follow the below guide.
https://devs-lab.com/clockworkmod-for-all-mediatek-device.html
to verify if you’ve successfully installed the recovery issue:
adb reboot recovery
You should see the CWM recovery screen. Press the power button to reboot.
Once you’ve verified that you can boot into recovery then continue.
3. Install Flashify APK to install Google Apps!
NOTE:
http://forum.xda-developers.com/showthread.php?p=54028344&highlight=welcome#post54028344
Let me save somebody some time! REMOVE OneTimeInitializer.apk and SetupWizard.apk! Otherwise, you’ll get this annoying “Welcome” and be soft bricked there, since the “OK” button was hard coded to dimensions greater than the screen size. Ugh.
- Connect to Wifi
- Install flahify apk from the download link above.
- Navigate to the Superuser app and give flashify acccess to root without asking (asking is incompatible with the small screen)
- Install Google Apps 4.2.2 <choose google apps 4.2.2> from within the flashify app. Have it download the recovery and write it to your watch.
It worked!
4. I’ve got Google Play installed. However the welcome choose language screen is not compatible with such a small screen. so…… (in a terminal issues the below commands)
adb shell
ps |grep com.google.android.setupwizard
u0_a102   886   132   312336 30676 ffffffff 40087a90 S com.google.android.setupwizard
kill 886
Make sure you replace the 886 with whatever the PID on your watch is.
It worked!
5. Now I can install any other app I need. =]
For example:
- Teamviewer Host So I can remote in to the inWatchz with my laptop or phone and input passwords and any other thing that is awkward on the inwatchz keyboard. I also use it to manage applications and processes.
- Google Voice and Hangouts for making free wifi calls and texts.
- Fleksy, and Google keyboard for a keyboard that easier to use than the stock one. Keemple
- IP Webcam for Android to use the watch as a small wireless video camera.
- Portable Wifi Hotspot So I can share the Z’s cell connection with my laptop.
- Set Orientation for allowing rotation of the screen.
- Tiny cam monitor for monitoring your webcams.
- Pandora for listening to tunes.
- Google Maps and GPS essentials.
- Cyril Preiss’ SWApp Link
- OpenMic+
- CPUspy
- Titanium Backup
- Awesome On Off Smart Screen (Grandmaster Tools)
- Mobdro
- Gravity box
- fqrouter2 (to make the inWatch Z a wifi repeater/extender) Link to come
Here is a MTK Tools backup of my inWatchZ rooted, with CWM custom recovery, and Google play installed.
Patched 4.2.2 for inWatch Z
Also, you can install the stock firnware for Kitkat 4.4 from inWatch.cc for inWatch Z
I’m now looking at the CWM recovery on my inWatchZ. The only problem is there is no volume control so, I cannot navigate within the recovery. =[
Now I’m in search of a touch recovery for the MT6572.
Tried with flashify the following recoveries for the MT6572:
http://tutfix.blogspot.com/2015/05/new-touch-recovery-cwm-clockworkmod-for.html
no worky
http://www.mediafire.com/download/iwlq1lavp3938l3/CTRv2.4.7z
No worky
http://www.mtkroms.com/2015/03/philz-touch-recovery-for-all-mtk-devices.html
http://www.mediafire.com/download/87ag7139go6macd/XoLo_A500S_PhilZ_recovery.img
No worky
I’ll try this one next:
https://devs-lab.com/twrp-recovery-for-all-mediatek-phones.html
Next step: Try spflash below:
To flash the new touch recovery:
https://androidmtk.com/smart-phone-flash-tool
Someone else is also looking for this:
http://nox4developper.blogspot.se/2014/12/request-for-touch-recovery-help-inwatch.html
Here is a guide on how to install the custom recovery with MTK tools. If I find it, and flashify and spflash do not work.
http://forum.xda-developers.com/showpost.php?p=38337401&postcount=5
A list of compatible custom roms for the MT6572
https://devs-lab.com/list-of-all-custom-custom-roms-for-mediatek-mtk6572-ext4-ubifs.html
If you need to modify an app windows size, because it’s not compatiple with the screen use:
- Compatibility mode in settings.
- Smaller font size.
- Finally if those fail:
http://repo.xposed.info/module/de.robv.android.xposed.installer
With Module: App Settings Module, to adjust the dpi of Sim Card Apk to around 95. Tinker with it until everything is visible.
If everything has gone horribly wrong. Use this guide to restore your inWatch Z:
https://devs-lab.com/how-to-unbrick-mediatek-device.html
Custom clock faces
Install .zip’s without root:
Make sure you have a folder called “inwatchupdate” on the Z
Make sure the is an update.zip in the inwatchupdate folder
Go to “Settings”
Go to “About Phone”
Go to “Local Update”
Select “Install”
Follow the onscreen instructions
Device will reboot, leave it alone
The update will finish
Device will reboot again
Done
Factory reset
Do NOT do this:
adb shell wipe data; adb reboot;
You will unable to get past the welcome screen. AND adb will be disabled. Only thing you can do is spflash it back to your last mtk-tools backup or stock rom.
WARNING!!!:
When used SPFlash do not “Format all and download”
I did this, and now I have a totally useless bracelet.
]]>https://www.howtoforge.com/how-to-install-glusterfs-with-a-replicated-volume-over-2-nodes-on-ubuntu-14.04
https://www.digitalocean.com/community/tutorials/how-to-create-a-redundant-storage-pool-using-glusterfs-on-ubuntu-servers
https://support.rackspace.com/how-to/glusterfs-high-availability-through-ctdb/
https://jonarcher.info/2014/06/windows-cifs-fileshares-using-glusterfs-ctdb-highly-available-data/
]]>