- Change BIOS to boot when power comes back up.
- Install Ubuntu Desktop
https://ltsp.github.io/docs/installation/ - Install LTSP
https://ltsp.github.io/docs/installation/ - Create interface bridge:
https://netplan.io/examples#configuring-network-bridges
Example bridge config.
sudo nano -w /etc/netplan/01-netcfg.yaml# This file describes the network interfaces available on your system
# For more information, see netplan(5).
network:
version: 2
renderer: networkd
ethernets:
eno1:
dhcp4: no
bridges:
br0:
addresses:
- 10.0.16.25/24
gateway4: 10.0.16.1
nameservers:
search: [mydomain, otherdomain]
addresses: [10.0.16.1, 1.1.1.1]
interfaces:
- eno1- Install KVM
sudo apt install virt-manager Install Windows VM
- Download Windows
- Create QEMU/KVM Virtual Machine.
- Be sure to Disk bus under Disk hard drive type to VirtIO.
- Be sure to change NIC device model to “virtio”
- Be sure to select the bridge you set up.
- Confirm There is a “Display Spice” and “Video QXL”
- Attach both Windows 2016 ISO and the VIRTIO driver ISO downloaded from here:
https://fedorapeople.org
Install FreeRDP nightly
https://ci.freerdp.com/job/freerdp-nightly-binaries/
- /groups/virt/virtio-win/direct-downloads/stable-virtio/virtio-win.iso
- Install Windows server, and choose custom to choose the Win2k16 version. Select the CD-rom drive the was attached and navigate to the prospective folders.
- Balloon
- NetKVM
- vioserial
- Viostor
- Install networking driver from iso. Install virtio serial, and virtio balloon driver. If not done in the above step by simple going to device manager, and right clicking to choose update driver. Choose browse my computer and point it to the iso. be sure to click include sub directories.
- Install Display driver QXL by going to Device mananger Display update driver
- Install QEMU “guest-agent” from iso
- Install spice-guest-tools from:
https://www.spice-space.org/download/windows/spice-guest-tools/spice-guest-tools-latest.exe
Configure VM for remote desktop
- Change serial, and activate Windows 2016
- Enable Windows Audio service and set to automatic.
- Rename Computer.
- Set static IP.
- Allow remote desktop through firewall.
- Connect to existing Domain for User Authentication, or set up a new one:
https://social.technet.microsoft.com/wiki/contents/articles/22622.building-your-first-domain-controller-on-2012-r2.aspx - Install Remote Desktop Services
https://community.spiceworks.com/how_to/122824-install-terminal-services-on-windows-server-2012-r2 - Install Remote Desktop Licenses
https://social.technet.microsoft.com/wiki/contents/articles/37408.setup-rd-licensing-role-on-windows-server-2012-r2.aspx - Add Users.
Configure thin client
- Setup the RDP client
https://github.com/ltsp/community/wiki/xfreerdp
However if you are interested in the PXE boot menu, and netbooting into a Ubuntu install here is some great info:
Alternatively,
<pre>#Add to MAC of second server your existing dhcp conf to tell it to run the installer by default when it PXE boots
[<mac address>]
filename /ubuntu-installer/amd64/pxelinux.0
#Log in remotely into second server, after install
ssh ubuntu@<ip from dhcp syslog> -p ubuntu
</pre>
General Info
* Create PXE menu installer for both client and server.
* Client –> LTSP menu (default)
* Install boxen baby (wifi or vpn remote) client — ubuntu bionic desktop minimal install with xfreerdo-ngihtly
* Install boxen brain server — preseeded ubuntu with boxen install script
* Boot first HD
* netboot.xyz https://netboot.xyz/booting/tftp/
https://wiki.ubuntu.com/UEFI/PXE-netboot-install
https://help.ubuntu.com/community/UbuntuLTSP/LTSPMultiboot
* Create Preseed file for PXE installers.
https://diegolemos.net/2017/08/06/pxe-booting/
https://help.ubuntu.com/lts/installation-guide/example-preseed.txt
https://gist.github.com/skx/ecc3a429eb11a3c7f022
https://help.ubuntu.com/lts/installation-guide/armhf/apbs02.html
https://www.syslinux.org/wiki/index.php?title=PXELINUX
#ltsp: This is the place for support of LTSP. Ask your question and hang around for an answer. Check IRC logs at http://irclogs.ltsp.org
[19:56] == jphein [b8178628@gateway/web/freenode/ip.184.23.134.40] has joined #ltsp
[19:56] -ChanServ- [#ltsp] Welcome to the Linux Terminal Server Project's irc channel
[19:58]  Hello to everyone. =] I have a nice LTSP install in KVM. It's using Ubuntu 18.04.1, with the chrootless dnsmasq proxy method
[19:59]  However, when I run ltsp-update-kernels my pxe config doesn't pick up the changes I make in /etc/ltsp/udpate-kernels.conf
[20:00]  my /var/lib/tftpboot/amd64pxelinux.cfg/ directory remains unchanged
[20:01]  When I make the changes directly in the files it works well
[20:09]  Am I missing something?
[21:56]  jphein: yes, /usr/share/ltsp/update-kernels
[21:56]  This transfers /etc/ltsp/update-kernels.conf to /boot/pxelinux.cfg/default
[21:56]  Then ltsp-update-image puts it in /opt/ltsp/images/amd64.img
[21:57]  And finally ltsp-update-kernels gets it from amd64.img and puts it to tftp
[21:57]  Thank you! I'll try it out. =]
[21:57]  It's so complicated that I wanted to get rid of it and just use a static file :D
[21:59]  hahaha
[22:08]  So it never goes to /var/lib/tftpboot/ltsp/amd64/pxelinux.cfg/ ?
[22:17]  I'd like to install Ubuntu as a pxe option before my ltsp menu
[22:32]  jphein: sure, it goes to pxelinux.cfg after the 4 steps I mentioned above
[22:38]  lol!
and
#ltsp: This is the place for support of LTSP. Ask your question and hang around for an answer. Check IRC logs at http://irclogs.ltsp.org
[21:36] == jphein [b8178628@gateway/web/freenode/ip.184.23.134.40] has joined #ltsp
[21:36] -ChanServ- [#ltsp] Welcome to the Linux Terminal Server Project's irc channel
[21:37]  Hello! =] Does anyone know where I would put my install-ubuntu kernels so that update-kernels picks them up and presents them on the PXE menu?
[21:39]  Or, do I have to edit the pxelinux.cfg/default symlink manually?
[21:39] == vagrantc [~vagrant@unaffiliated/vagrantc] has joined #ltsp
[21:41]  This is my https://github.com/jphein/boxen/blob/master/etc/ltsp/update-kernels.conf
[21:44]  I suppose I can edit my dnsmasq.d/ to add the mac address of the client I'd want to install. With the ubuntu-install pxe boot config.
[21:48]  I'm also having issues with the chrootless method in the Azure cloud. Seems the Azure kernel may not have all the right input drivers for KVM?
[22:25]  jphein: I'm not sure what you're asking; why do you need more than one kernel?
[22:25]  If you only keep one kernel, then ltsp will pick them up
[22:26]  Now if you want multiple kernels, ltsp will pick up the latest
[22:26]  Sorry, let me rephrase that. Do you know of a simple way to present the PXE client user with a menu to install Ubuntu?
[22:26]  So if e.g. azure has 4.1, and you manually install 4.15, then the server will have 4.1 and the clients 4.15, without involving any configs
[22:26]  cool
[22:26]  jphein: ah sure, you just expose the .iso etc
[22:27]  But the "ltsp way to install a client" is to netboot it and cp -a /run/initramfs/rofs /target
[22:27]  I.e. to clone the ltsp image...
[22:27]  that's exactly what i want
[22:28]  You can also easily netboot it, and run: kvm -cdrom /path/to/windows -hda /dev/sda, so that you can even install windows while booted as an ltsp client
[22:28]  All those don't involve pxelinux at all
[22:28]  You do those via epoptes after the client boots normally via ltsp
[22:28]  oh yes kvm
[22:28]  (or locally)
[22:29]  with epoptes
[22:29]  nice
[22:29]  I usually don't want to leave my chair, so I do all clients via epoptes
[22:29]  haha =]
[22:29]  So I can be installed 3 different OSes on 3 clients without me going there
[22:30]  *I can install, meh
[22:30]  I can be installing. OK, got it :P
[22:30]  thank you , again!
[22:30]  np
[22:30]  I like that solution a lot.
[22:31]  Do you know the simplest way to preseed an Ubuntu installation with a few changes?
[22:32]  wcp -a /run/initramfs/rofs /target
[22:32]  Do I make a screen script?
[22:33]  jphein: let's clear something up
[22:34]  cp is for cloning the ltsp image
[22:34]  kvm is for installing ubuntu from an .iso
[22:34]  preseeding only applies to the iso
[22:34]  So which one are you asking about?
[22:35]  hahaha, I'm just very curious
[22:35]  =]
[22:35]  i like all of them
[22:35]  but I want to know more about the cp -a
[22:35]  it's a simple as that?
[22:36]  cloning
[22:36]  I don't make screen scripts for such simple things; I do make scripts that I run either from epoptes or directly from the client
[22:36]  cp, add user, install grub
[22:36]  You can also have a vm on the server, and use dd, to avoid all that
[22:36]  oh i see
[22:37]  using qcow?
[22:37]  or raw img
[22:37]  E.g. I have bionic-mate in vbox, then i expose it via nbd, and I dd if=/dev/nbd2 of=/dev/sda on the clients, and it's ready
[22:37]  Both can be done, qemu-nbd supports qcow and vdi and vmdk and raw
[22:38]  so many ways
[22:38]  that is the one i'll use since I already have the vm
[22:38]  You can even login normally as a user on the client, so that your image is accessible by sshfs in /home/username
[22:38]  So then you do dd if=/home/username/vms/myvm of=/dev/sda, done
[22:38]  No scripts, no screen scripts, nothing
[22:39]  You may only need to resize2fs /dev/sda1 afterwards, so that it extends to all the disk size
[22:39]  right
[22:41]  and you're doing this in a user with sudo privledges or something?
[22:41]  yes
[22:41]  Yup, with LDM_HASH_PASSWORD=True; or via epoptes :)
[23:34]  Which commands do you run after a cp -a /run/initramfs/rofs /target ? Install grub?
[00:16]  jphein: mount /dev/sda1 /mnt; cd /mnt; for d in proc sys dev dev/pts; do mount --bind /$d $d; done; chroot . dpkg-reconfigure grub-pc; umount dev/pts dev sys proc
]]>
LTSP already comes with these client scripts:
- kiosk – Firefox running locally on thin client.
- ldm – Linux desktop running remotely on local server.
- menu – Interactive Menu
- shell – Drop to root bash shell running locally on thin client.
- ssh – Secure Shell for remote terminal on local or remote server.
- telnet – unsecure ssh
 running remotely on local or remote server.
- xdmcp – Raw Xorg linux desktop running remotely on server.
- xfreerdp – RDP for Windows desktop running remotely on local or cloud server.
- xterm – xterm terminal running locally on thin client.
This has been furthered by my BoXen Linux project to include:
- freerdp-nightly – Nightly builds of xfreerdp to take advantage of Microphone redirection and the latest graphics codecs.
- rdpgui – Gui for displaying a welcome website, and to prompt for credentials when using xfreerdp-nightly.
- vdi – KVM-VDI LTSP client, see https://github.com/Seitanas/kvm-vdi/
- vnc – VNCviewer for remote desktop on local or remote Android or MacOS computers.
- spice – virt-viewer for KVM Virtualization software. Can provide remote access to local or remote desktops of ANY kind you can virtualize.
- X2go – remote Linux desktop on remote server
LTSP seems to be a very good way of serving desktops.
]]>As you can see from the matrix below there are MANY ways of providing desktops to your users.
However, I think this way has many advantages for a Nonprofit. I would recommend it generally, although of course other topographies are more useful in specific situations.
Benefits for a Nonprofit
- Green computing – Thin clients use less power than traditional workstations.
- Reduced maintenance costs – Thin client deployment means you’re only maintaining a couple servers, instead of multiple traditional workstations. Using Azure cloud means you don’t have to maintain server hardware.
- 100% free horizontal software – Completely free Open Source horizontal market software.
- Discounted vertical market software – Purchase heavily discounted MS remote desktop licenses at Techsoup. Along with anything else you might need. e.g. Quickbooks, MS Office, and any other vertical market software. https://www.techsoup.org/
- $3500 Azure Credit, Free Office 360 – Free cloud servers, Office.
Apply for Microsoft Nonprofit here: https://nonprofit.microsoft.com/register - Free Voice,Gsuite,etc.. – Free cloud Telephony, calendaring, file management, and email with custom domain.
Apply for Google Nonprofit here: https://www.google.com/nonprofits/ - Free hardware; Nevada County among others will donate their old computers, and peripherals to any eligible local nonprofit. Perfect for blazingly fast thin clients. Bring your tax exempt paperwork to the warehouse on the last Friday of the month. Or, try Purchasing hardware from your local government entity here: https://www.publicsurplus.com/sms/nevadacounty,ca/list/current?orgid=315996 After that try eBay: https://rover.ebay.com/rover/1/711-53200-19255-0/1?mpre=https%3A%2F%2Fwww.ebay.com%2Fb%2FPC-Desktops-All-In-One-Computers%2F179%2Fbn_661752&campid=5337848787&toolid=20008
- No taxes – If you use Comcast as your internet provider, make sure to file tax exemption paperwork with them to waive the applicable taxes. Email tax exempt certificate to: [email protected] . Include service address & account #.
- 50% off internet – If you are school, or other eligible nonprofit in California sign up here for 50% off your internet bill. https://jphein.com/discounted-phone-and-internet-for-nonprofits-in-california/
Terms
- [wiki]Vertical market software[/wiki] – https://en.wikipedia.org/wiki/Vertical_market_software
- [wiki]Thin client[/wiki] – https://en.wikipedia.org/wiki/Thin_client
- [wiki]Linux Terminal Server Project[/wiki] (LTSP) – https://en.wikipedia.org/wiki/Linux_Terminal_Server_Project
- [wiki]Ubuntu[/wiki] – https://en.wikipedia.org/wiki/Ubuntu
- [wiki]Remote Desktop[/wiki]
Guide
Follow along. At the end of this guide you should be able to plug in any number of old computers without hard drives into your local network. Then have them boot blazingly fast Windows based modern software. Wireless, and remote VPN clients are also supported.
In this setup all thin clients will be sharing a single Windows 2016 Datacenter instance. However, you can provide any number of environments using this method, including huge VDI deployments. My favorite is using LTSP Ubuntu fat client desktops with RemoteApps for seamless cloud integration of necessary windows based proprietary software.
I am using Ubuntu 18.04 Bionic Beaver for the LTSP server, because LTSP does not currently work with Ubuntu 18.10 Cosmic Cuttlefish.* In my case the entire setup was virtualized in the Azure cloud using KVM Virtual Machine Manager for virtual thin clients.
It might look like this:
[Azure Standard D4s v3[[PXE thin client – KVM guest] –> [Ubuntu 18.04] LTSP Server]] –>[Azure Standard NV6 [Windows 2016]]
In real life the more likely scenario would be to install Ubuntu on a bare metal server onsite. Then, install Ubuntu 18.04 inside a KVM vm. Plug a thin client into your network, and configure it for PXE boot in BIOS. It would look a little like this:
[PXE thin client] –> [[Ubuntu 18.10] [Ubuntu 18.04 KVM guest LTSP server]] –> [Firewall] –> [Internet] –> [Azure Standard NV6 [Windows 2016]]
In this guide I will be first showing you how to set up the virtualized system, and then go into some changes you’ll need to make in the field.
Requirements
- An internet connection. 3MB/s or more recommended.
- A computer with keyboard and display capable of running at least SSH. To issue the commands from.
- A computer capable of running Ubuntu with at least one network card. Or a virtual machine capable of nested virtualization like the Azure Standard D4s v3. For the LTSP server.
- A virtual or real windows machine locally or in the cloud. You’ll need Remote desktop licenses if you want to use microphone forwarding. If using Azure, not every region has the NVIDIA Tesla servers (NV6) for hardware graphics rendering. USA South Central is what I used. This is used for the desktop environment.
IPs
- 10.0.0.1 – Gateway.
- 10.0.0.5 – eth0 – Local interface on Ubuntu server – Connected to the Internet.
- 192.168.122.1 – virbr0 – Virtual bridge on Ubuntu server for testing virtual thin clients.
- 10.0.0.4 – Windows 2016 datacenter RDP server with NV6 Nvidia Tesla hardware.
Create your Azure Virtual Machines
After signing up and being accepted to Microsoft Nonprofit, verify your $3500 credit here: https://www.microsoftazuresponsorships.com/Balance
Create your virtual machines here: https://portal.azure.com
Note: DO NO USE accelerated networking on the Ubuntu Server.
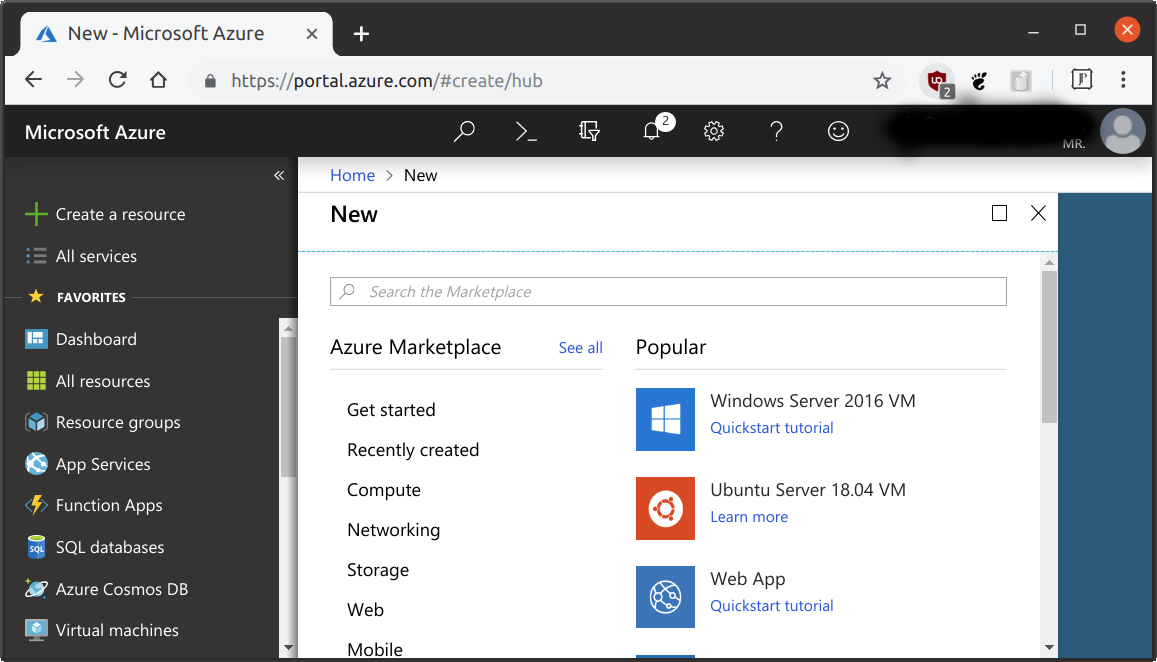
LTSP Server
- Image type: Ubuntu 18.04
- Size: Azure Standard D4s v3
Desktop Server
- Image type: Windows 2016 Datacenter
- Size: Azure Standard NV6
[jbox]Azure comes with a premade Ubuntu 18.04 image, but if you are doing this in the field you would need to install Ubuntu on your server:
Install Ubuntu 18.04.1 Desktop (Minimal)
- Ubuntu 18.04.1 Desktop.
- Download ISO here: https://www.ubuntu.com/download/desktop
- Install the desktop version, minimal install.
- Instructions here: https://jphein.com/how-to-install-ubuntu-18-04-18-10-to-an-usb-3-1-m-2-16gb-drive-using-kvm/
If you decide to have a local Windows server instead or in addition to the Azure vm, you’ll need to install Windows locally.
Install Windows 2016 Datacenter
- Download ISO from Microsoft Volume Licensing Center
- Install
[/jbox]
Configure Windows 2016 Datacenter
Configure remote desktop for microphone redirection:
- Install Remote Desktop Session Host
- You’re either still inside the grace period OR have the Remote Desktop Licensing role installed and a valid CAL
- Make sure the remote desktop group policy allows audio recording
Configure graphics acceleration: https://lg.io/2016/10/12/cloudy-gamer-playing-overwatch-on-azures-new-monster-gpu-instances.html
Configure the Ubuntu and install LTSP Server
[jbox]You can find a bash script automating all the below commands here: https://raw.githubusercontent.com/jphein/boxen/master/boxenbrain [/jbox]
To manually install BoXenLinux we will be configuring LTPS using the Chrootless Proxy mode for in the field. It is the easiest of the 4 ways to install LTSP. However, for the Azure cloud we’ll need to install using a chroot.
[jbox color=green]Set a static IP for your wired network interface in the field
Microsoft azure VM comes with the static IP set on your default interface. However, in the field you’ll need to set a static IP address.
https://www.itzgeek.com/how-tos/linux/ubuntu-how-tos/netplan-how-to-configure-static-ip-address-in-ubuntu-18-04-using-netplan.html
https://netplan.io/examples
[/jbox]
Optional: Install OpenSSH server
If using the Azure install as the LTSP server, you’ll want to overwrite the existing sshd_config so that you can using password login if you used a key when creating the VM.
sudo apt install ssh
Install LTSP and epoptes (epoptes lets you remote desktop in and help anyone using a thin client), Instructions from http://wiki.ltsp.org/wiki/Installation/Ubuntu:
sudo add-apt-repository --yes ppa:ts.sch.gr #The Greek Schools repository
sudo apt install --yes --install-recommends ltsp-server-standalone ltsp-client epoptes
Configure dnsmasq
Note: You may want to edit the /etc/dnmasq.d/ ltsp-server-dnsmasq.conf and add “dhcp-option=3,192.168.122.1” to set a different gateway, but probably not.
sudo ltsp-config dnsmasq --enable-dns
sudo service dnsmasq restart
Add yourself the epoptes group
sudo gpasswd -a ${SUDO_USER:-$USER} epoptes
Was told to remove these packages
sudo apt purge --yes --auto-remove mate-hud snapd
[jbox color=blue title=”Optional: Chroot Install”]
Build a chroot client for alternate arch, dekstop enviroment or package base
Grab freerdp’s key
cd /etc/ltsp
sudo wget http://pub.freerdp.com/repositories/ADD6BF6D97CE5D8D.asc
- Option 1 – with command
sudo ltsp-build-client --purge-chroot --mount-package-cache --mirror 'http://azure.archive.ubuntu.com/ubuntu/'
 --apt-keys '/etc/ltsp/ADD6BF6D97CE5D8D.asc, /etc/apt/trusted.gpg.d/ts_sch_gr_ubuntu_ppa.gpg'
 --extra-mirror 'http://ppa.launchpad.net/ts.sch.gr/ppa/ubuntu bionic main, http://pub.freerdp.com/repositories/deb/bionic/ freerdp-nightly main'
 --late-packages epoptes-client freerdp-nightly --prompt-rootpass --fatclient
- OR, Option 2 – using my ltsp-build-client.conf
sudo wget https://github.com/jphein/boxen/raw/master/etc/ltsp/ltsp-build-client.conf
sudo ltsp-build-client --config ltsp-build-client.conf
You may want to install a new kernel like this one if the azure kernel doesn’t work with all of KVM’s input drivers:
sudo apt-get install linux-image-lowlatency
Then you have to edit the update-kernels.conf file, so that LTSP chooses that one to boot the client.
Create some symlinks so freerdp-nightly is more easy t my lazy scripting
sudo ltsp-chroot
ln -s /opt/freerdp-nightly/bin/xfreerdp /usr/bin/xfreerdp-nightly
ln -s /usr/share/ltsp/screen.d/xfreerdp /usr/share/ltsp/screen.d/xfreerdp-nightly
exit
Create GUI login screen for xfreerdp-nightly (Not updated!)
cd /opt/ltsp/amd64/usr/share/ltsp/screen.d/

sudo wget https://raw.githubusercontent.com/jphein/boxen/master/rdpgui

sudo wget https://raw.githubusercontent.com/jphein/boxen/master/xfreerdp-prompt

sudo chmod +x rdpgui xfreerdp-prompt
sudo ltsp-update-image
Note: You may get this error on Microsoft Azure VM! https://bugs.launchpad.net/ubuntu/+source/ltsp/+bug/1802707 hmmmm…. This script seems to fix it:
#!/bin/bash
# tadaen sylvermane | jason gibson
# configure locales for ubuntu bionic ltsp chroot creation


for var in LC_ALL= LANG= ; do
        export "$var"en_US.UTF-8
done
ltsp-build-client --chroot "$1"
[/jbox]
[jbox color=green title=”Local Chrootless Install”]
This is the recommended, and simplest install
Install FreeRDP-nightly and client zenity GUI
sudo sh -c 'echo "deb http://pub.freerdp.com/repositories/deb/$(lsb_release -cs)/ freerdp-nightly main" >> /etc/apt/sources.list.d/freerdp-nightly.list'
wget -O - http://pub.freerdp.com/repositories/ADD6BF6D97CE5D8D.asc | sudo apt-key add -
sudo apt update
sudo apt install --yes freerdp-nightly
sudo ln -s /opt/freerdp-nightly/bin/xfreerdp /usr/bin/xfreerdp-nightly
cd /usr/share/ltsp/screen.d/
sudo ln -s xfreerdp xfreerdp-nightly
sudo wget https://raw.githubusercontent.com/jphein/boxen/master/usr/share/ltsp/screen.d/rdpgui
sudo wget https://raw.githubusercontent.com/jphein/boxen/master/usr/share/ltsp/screen.d/xfreerdp-prompt
sudo wget https://raw.githubusercontent.com/jphein/boxen/master/usr/share/ltsp/screen.d/launch
sudo mkdir boxen
cd boxen
sudo wget https://raw.githubusercontent.com/jphein/boxen/master/usr/share/ltsp/screen.d/boxen/welcome
cd ..
sudo ln -s launch welcome
sudo ln -s /sbin/shutdown shutdown
sudo chmod +x rdpgui xfreerdp-prompt launch boxen/welcome
Create LTSP client NBD image using the chrootless method of the servers root /
You need to run this any time you make changes to your filesystem you want to be updated in your LTSP client.
sudo ltsp-update-image --cleanup /
[/jbox]
Grab the lts.conf for our thin clients
cd /var/lib/tftpboot/ltsp/amd64/
sudo wget https://raw.githubusercontent.com/jphein/boxen/master/var/lib/tftpboot/amd64/lts.conf
Edit lts.conf to suit your needs
nano -w lts.conf
Test with KVM virtual pxe thin client
If you are already using KVM to install Ubuntu in a VM then you don’t need to install it again. However, if you are using a real bare metal server then you’ll need to run the install command.
sudo apt install virt-manager
[jbox]Libvirtd will run dnsmasq on virbr0 by default. We need to kill that instance and restart the global dnsmasq with our LTSP configs. You will need to killall and restart dnsmasq every time you reboot.
###dnsmasq hack for testing
sudo mv /etc/dnsmasq.d/libvirt-daemon /root/
sudo sh -c 'echo "dhcp-range=192.168.122.20,192.168.122.250,8h" >> /etc/dnsmasq.d/ltsp-server-dnsmasq.conf
#These steps will need to performed again if you reboot
sudo killall dnsmasq
sudo service dnsmasq restart
[/jbox]
#Create the PXE test KVM client
sudo virt-install
  --name pxe
  --memory 4096
  --vcpus 2
  --disk none
  --pxe
  --os-variant ubuntu17.10
  --wait 0
Connect locally using very nice spice
virt-viewer --connect qemu:///system pxe
Connect remotely using spice
virt-viewer --connect qemu+ssh://[email protected]/system pxe


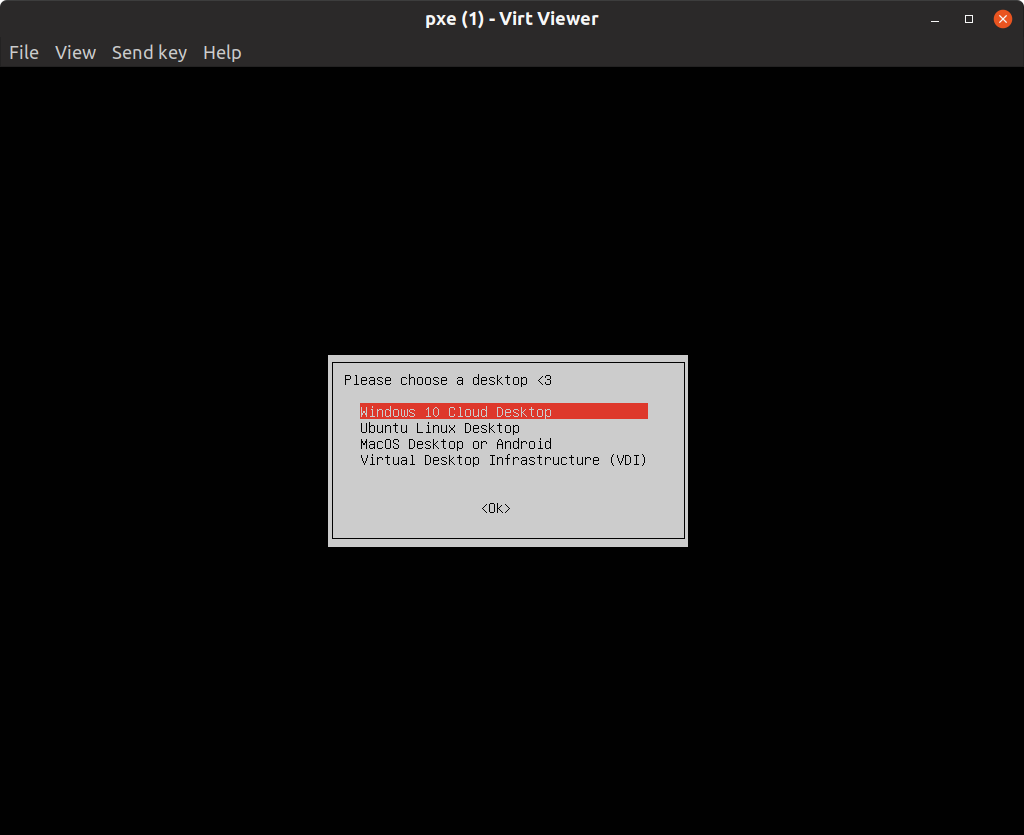
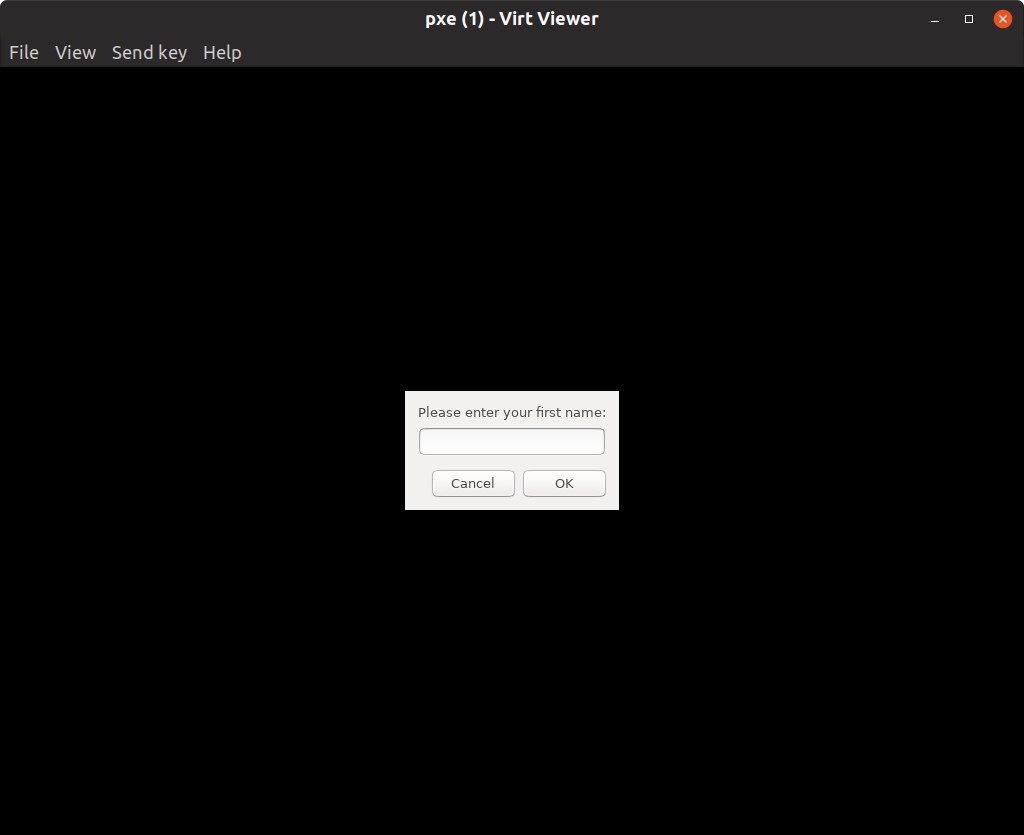
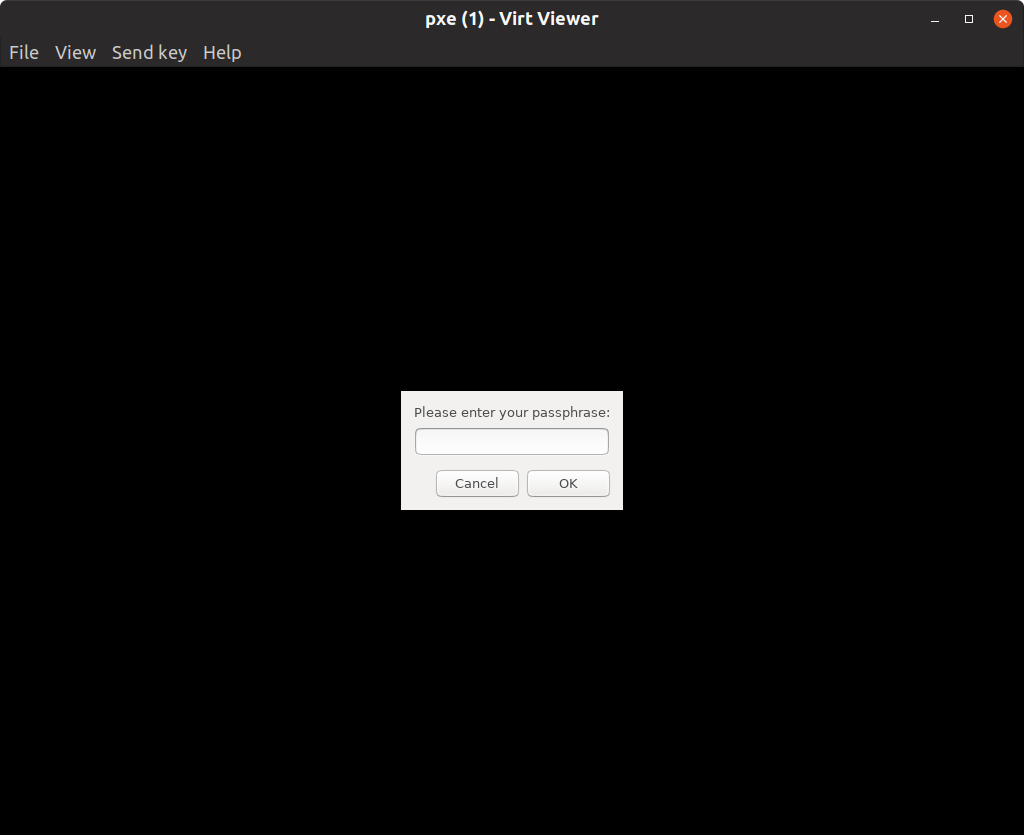
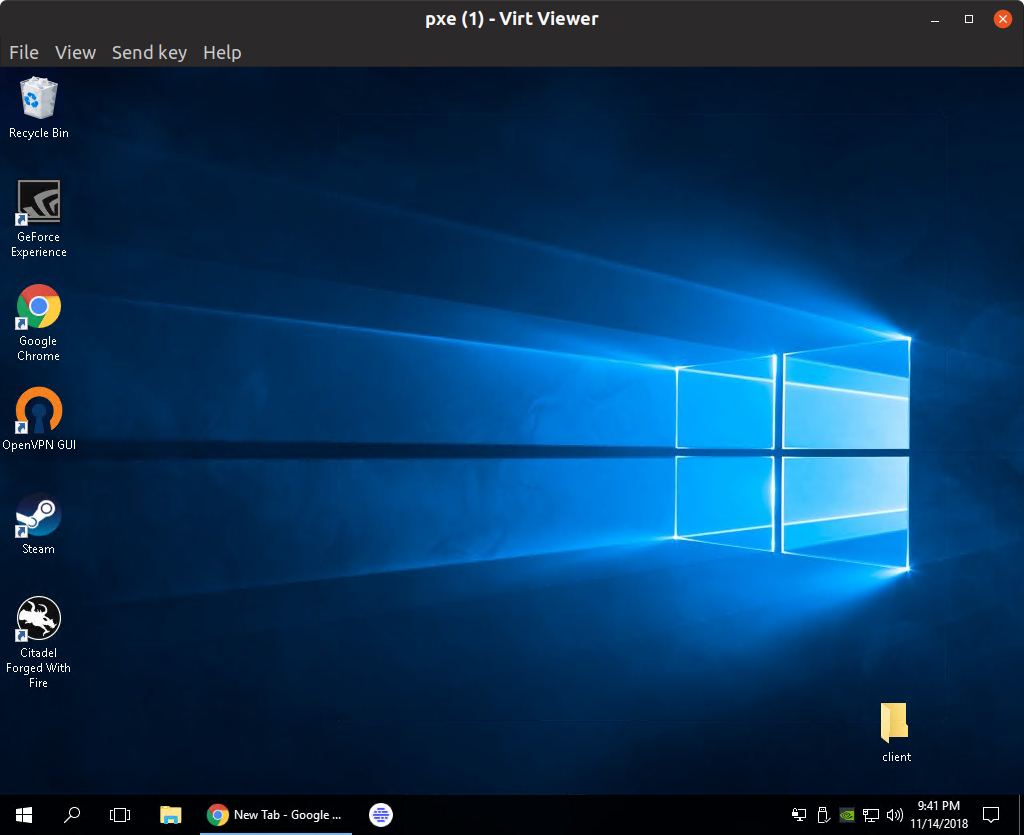 Tada!!!
See also
lts.conf manpage ltsp-build-client manpage ltsp-update-image manpage ltsp-config manpage ltsp-chroot manpage http://wiki.ltsp.org/wiki/Installation/Ubuntu https://help.ubuntu.com/community/HowToSetupLTSPDevelEnvironment https://github.com/wyllianbs/xfreerdp-gui https://unix.stackexchange.com/questions/119880/make-freerdp-prompt-user-for-username-and-password/187370 http://www.saminiir.com/debugging-pxe-boot/
* Ubuntu 18.10 I previously tried this with Ubuntu 18.10 Cosmic Cuttlefish, and ran into some issues. Mainly the maintainer of LTSP for Ubuntu does not fix anything that is not a LTS release.
Optional Install ltsp-manager
sudo add-apt-repository --yes ppa:franz-die/ltsp-manager; apt update

sudo apt install ltsp-manager
Optional: Install X2Go remote desktop software
sudo add-apt-repository ppa:x2go/stable
sudo apt-get update
sudo apt-get install x2goserver x2goserver-xsessions x2gomatebindings
Optional: Install Ubiquity to install Ubuntu on PXE booted clients or servers
sudo apt-get install ubiquity ubiquity-frontend-gtk
Running it is a manner of running from the client
ubiquity gtk_ui
Optional: Add iPXE to grub menu
apt install grub-ipxe
[jbox]Optional: Set up Firewall with IP Masquerading
Probably won’t need to do this.
First, packet forwarding needs to be enabled in ufw. Two configuration files will need to be adjusted, in /etc/default/ufw change the DEFAULT_FORWARD_POLICY to “ACCEPT”:
sudo nano -w /etc/default/ufw #change DEFAULT_FORWARD_POLICY="ACCEPT"
Then edit /etc/ufw/sysctl.conf,
sudo nano -w /etc/ufw/sysctl.conf
and uncomment:
net/ipv4/ip_forward=1
net/ipv6/conf/default/forwarding=1
Now add rules to the /etc/ufw/before.rules file. The default rules only configure the filter table, and to enable masquerading the nat table will need to be configured. Add the following to the top of the file just after the header comments:
sudo nano /etc/ufw/before.rules
# nat Table rules
*nat
:POSTROUTING ACCEPT [0:0]
# Forward traffic from eth1 through eth0.
-A POSTROUTING -s 192.168.122.0/24 -o eth0 -j MASQUERADE
# don’t delete the ‘COMMIT’ line or these nat table rules won’t be processed
COMMIT
Allow SSH
sudo ufw allow 22
sudo ufw allow from 192.168.122.0/24
sudo ufw enable
[jbox]
Optional: Install apt-cacher
apt-cacher will cache packages so you don’t waste your time downloading them again again.
sudo apt install apt-cacher
sudo nano /etc/apt-cacher/apt-cacher.conf #Uncomment allowed_hosts= *
sudo ufw allow 3142/tcp
sudo sh -c 'echo "Acquire::http::Proxy "http://10.0.0.5:3142"";' > /etc/apt/apt.conf.d/01proxy
sudo /usr/share/apt-cacher/apt-cacher-import.pl -l /var/cache/apt/archives
sudo service apt-cacher restart
Optional: Test with QEMU
Set up virtual bridge for client networking
On the azure VM I was able to use the default virtual bridge virbr0. Just commented out the dnsmasq.d/ file libvirt that prevented dnsmasq from serving IPs on that network. However, testing on a real server I needed to make my own bridge. These commands should not be issued if working on your server remotely. Only a local bare metal install should issue these commands.
sudo ip tuntap add dev virttap mode tap user $USER
sudo brctl addbr virtbr
sudo brctl addif virtbr eth0 # your LAN interface
sudo brctl addif virtbr virttap
sudo ip link set virtbr up
sudo ip link set eth0 up
sudo ip link set virttap up
dhclient virtbr
You may need to restart dnsmasq again
sudo service dnsmasq restart
Run QEMU to test your LTSP setup
cd
qemu-img create -f vmdk testpxe.vmdk 10
/usr/bin/qemu-system-x86_64 -m 1024 -hda testpxe.vmdk
                              -boot n
                              -option-rom /usr/share/qemu/pxe-rtl8139.rom
                              -net nic
                              -net tap,ifname=virttap,script=no,downscript=no
]]>
Install the FreeRDP nightlies:
sudo sh -c 'echo "deb http://pub.freerdp.com/repositories/deb/$(lsb_release -cs)/ freerdp-nightly main" >> /etc/apt/sources.list.d/freerdp-nightly.list'
wget -O - http://pub.freerdp.com/repositories/ADD6BF6D97CE5D8D.asc | sudo apt-key add -
sudo apt update
sudo apt install --yes freerdp-nightly
Us the following command to connect:
/opt/freerdp-nightly/bin/xfreerdp /v:SERVER /u:USER /p:PASSWORD /sound /microphone /rfx /multitransport /network:auto /gfx:AVC444 /f /multimon /cert-ignore /drive:hotplug,*

If you don't want fullscreen, use /dynamic-resolution
If you don't like the floatbar, include -floatbar
More helpful flags here: Manpage: https://www.mankier.com/1/xfreerdp
These flags can help you troubleshoot
/log-level:debug > rdp.log
OR
/log-filters:com.freerdp.channels.audin.client:trace
It seems to choose the AAC codec which is Microsoft’s default. If you want to force a specific codec for testing use:
/microphone:format:1 #Where 1 is PCM, raw good for troubleshooting.
Complete list of formats are below.
#define WAVE_FORMAT_PCM	0x0001
#define WAVE_FORMAT_ADPCM 0x0002
#define WAVE_FORMAT_IEEE_FLOAT 0x0003
#define WAVE_FORMAT_VSELP 0x0004
#define WAVE_FORMAT_IBM_CVSD 0x0005
#define WAVE_FORMAT_ALAW 0x0006
#define WAVE_FORMAT_MULAW 0x0007
#define WAVE_FORMAT_OKI_ADPCM 0x0010
#define WAVE_FORMAT_DVI_ADPCM 0x0011
#define WAVE_FORMAT_MEDIASPACE_ADPCM 0x0012
#define WAVE_FORMAT_SIERRA_ADPCM 0x0013
#define WAVE_FORMAT_G723_ADPCM 0x0014
#define WAVE_FORMAT_DIGISTD 0x0015
#define WAVE_FORMAT_DIGIFIX 0x0016
#define WAVE_FORMAT_DIALOGIC_OKI_ADPCM 0x0017
#define WAVE_FORMAT_MEDIAVISION_ADPCM 0x0018
#define WAVE_FORMAT_CU_CODEC 0x0019
#define WAVE_FORMAT_YAMAHA_ADPCM 0x0020
#define WAVE_FORMAT_SONARC 0x0021
#define WAVE_FORMAT_DSPGROUP_TRUESPEECH 0x0022
#define WAVE_FORMAT_ECHOSC1 0x0023
#define WAVE_FORMAT_AUDIOFILE_AF36 0x0024
#define WAVE_FORMAT_APTX 0x0025
#define WAVE_FORMAT_AUDIOFILE_AF10 0x0026
#define WAVE_FORMAT_PROSODY_1612 0x0027
#define WAVE_FORMAT_LRC 0x0028
#define WAVE_FORMAT_DOLBY_AC2 0x0030
#define WAVE_FORMAT_GSM610 0x0031
#define WAVE_FORMAT_MSNAUDIO 0x0032
#define WAVE_FORMAT_ANTEX_ADPCME 0x0033
#define WAVE_FORMAT_CONTROL_RES_VQLPC 0x0034
#define WAVE_FORMAT_DIGIREAL 0x0035
#define WAVE_FORMAT_DIGIADPCM 0x0036
#define WAVE_FORMAT_CONTROL_RES_CR10 0x0037
#define WAVE_FORMAT_NMS_VBXADPCM 0x0038
#define WAVE_FORMAT_ROLAND_RDAC 0x0039
#define WAVE_FORMAT_ECHOSC3 0x003A
#define WAVE_FORMAT_ROCKWELL_ADPCM 0x003B
#define WAVE_FORMAT_ROCKWELL_DIGITALK 0x003C
#define WAVE_FORMAT_XEBEC 0x003D
#define WAVE_FORMAT_G721_ADPCM 0x0040
#define WAVE_FORMAT_G728_CELP 0x0041
#define WAVE_FORMAT_MSG723 0x0042
#define WAVE_FORMAT_MPEG 0x0050
#define WAVE_FORMAT_RT24 0x0052
#define WAVE_FORMAT_PAC 0x0053
#define WAVE_FORMAT_MPEGLAYER3 0x0055
#define WAVE_FORMAT_LUCENT_G723 0x0059
#define WAVE_FORMAT_CIRRUS 0x0060
#define WAVE_FORMAT_ESPCM 0x0061
#define WAVE_FORMAT_VOXWARE 0x0062
#define WAVE_FORMAT_CANOPUS_ATRAC 0x0063
#define WAVE_FORMAT_G726_ADPCM 0x0064
#define WAVE_FORMAT_G722_ADPCM 0x0065
#define WAVE_FORMAT_DSAT 0x0066
#define WAVE_FORMAT_DSAT_DISPLAY 0x0067
#define WAVE_FORMAT_VOXWARE_BYTE_ALIGNED 0x0069
#define WAVE_FORMAT_VOXWARE_AC8 0x0070
#define WAVE_FORMAT_VOXWARE_AC10 0x0071
#define WAVE_FORMAT_VOXWARE_AC16 0x0072
#define WAVE_FORMAT_VOXWARE_AC20 0x0073
#define WAVE_FORMAT_VOXWARE_RT24 0x0074
#define WAVE_FORMAT_VOXWARE_RT29 0x0075
#define WAVE_FORMAT_VOXWARE_RT29HW 0x0076
#define WAVE_FORMAT_VOXWARE_VR12 0x0077
#define WAVE_FORMAT_VOXWARE_VR18 0x0078
#define WAVE_FORMAT_VOXWARE_TQ40 0x0079
#define WAVE_FORMAT_SOFTSOUND 0x0080
#define WAVE_FORMAT_VOXWARE_TQ60 0x0081
#define WAVE_FORMAT_MSRT24 0x0082
#define WAVE_FORMAT_G729A 0x0083
#define WAVE_FORMAT_MVI_MV12 0x0084
#define WAVE_FORMAT_DF_G726 0x0085
#define WAVE_FORMAT_DF_GSM610 0x0086
#define WAVE_FORMAT_ISIAUDIO 0x0088
#define WAVE_FORMAT_ONLIVE 0x0089
#define WAVE_FORMAT_SBC24 0x0091
#define WAVE_FORMAT_DOLBY_AC3_SPDIF 0x0092
#define WAVE_FORMAT_ZYXEL_ADPCM 0x0097
#define WAVE_FORMAT_PHILIPS_LPCBB 0x0098
#define WAVE_FORMAT_PACKED 0x0099
#define WAVE_FORMAT_RHETOREX_ADPCM 0x0100
#define WAVE_FORMAT_IRAT 0x0101
#define WAVE_FORMAT_VIVO_G723 0x0111
#define WAVE_FORMAT_VIVO_SIREN 0x0112
#define WAVE_FORMAT_DIGITAL_G723 0x0123
#define WAVE_FORMAT_WMAUDIO2 0x0161
#define WAVE_FORMAT_WMAUDIO3 0x0162
#define WAVE_FORMAT_WMAUDIO_LOSSLESS 0x0163
#define WAVE_FORMAT_CREATIVE_ADPCM 0x0200
#define WAVE_FORMAT_CREATIVE_FASTSPEECH8 0x0202
#define WAVE_FORMAT_CREATIVE_FASTSPEECH10 0x0203
#define WAVE_FORMAT_QUARTERDECK 0x0220
#define WAVE_FORMAT_FM_TOWNS_SND 0x0300
#define WAVE_FORMAT_BTV_DIGITAL 0x0400
#define WAVE_FORMAT_VME_VMPCM 0x0680
#define WAVE_FORMAT_OLIGSM 0x1000
#define WAVE_FORMAT_OLIADPCM 0x1001
#define WAVE_FORMAT_OLICELP 0x1002
#define WAVE_FORMAT_OLISBC 0x1003
#define WAVE_FORMAT_OLIOPR 0x1004
#define WAVE_FORMAT_LH_CODEC 0x1100
#define WAVE_FORMAT_NORRIS 0x1400
#define WAVE_FORMAT_SOUNDSPACE_MUSICOMPRESS 0x1500
#define WAVE_FORMAT_DVM 0x2000
#define WAVE_FORMAT_AAC_MS 0xA106
Some of the Codecs are disabled and need to be enabled by compiling FreeRDP using this flag:
-DWITH_DSP_EXPERIMENTAL=ON
How to compile from source:
From https://github.com/FreeRDP/FreeRDP/wiki/Compilation
git clone git://github.com/FreeRDP/FreeRDP.git
cd FreeRDP
ln -s packaging/deb/freerdp-nightly debian
dpkg-buildpackage
<M_akallabeth_[m]> well, a thourough test of all modes would be appreciated (some codecs work better than others)<M_akallabeth_[m]> and, of course, reproducible test cases that are currently not working<M_akallabeth_[m]> then fixing is a lot easier<M_akallabeth_[m]> knowing what to look for<jp_> gladly, where is the list of codecs, and how to force them?<jp_> I notice in my logs that there are many being tried<M_akallabeth_[m]> include/freerdp/codec/audio.h contains the defines<M_akallabeth_[m]> the logs should contain something like server formats<M_akallabeth_[m]> that is a list of supported codecs<jp_> ahhh<M_akallabeth_[m]> using the format: syntax you can force that codec<M_akallabeth_[m]> but only if the server supports it already<jp_> Perfect! I’m excited to try them all.<jp_> I’ll first make a list of what Server 2016 datacenter supports<jp_> from my log<M_akallabeth_[m]> freerdp_dsp_encode is the function converting<jp_> Then match it with include/freerdp/codec/audio.h<M_akallabeth_[m]> some codecs are disabled by default, you´ll need to enable them with -DWITH_DSP_EXPERIMENTAL=ON<M_akallabeth_[m]> (they did not work at all currently)<jp_> OK, I would have to recompile with that flag?<M_akallabeth_[m]> yes, if you want to test any of these codecs
WAVE_FORMAT_AAC_MS: wFormatTag: 0xA106]]>
WAVE_FORMAT_PCM: wFormatTag: 0x0001
WAVE_FORMAT_ADPCM: wFormatTag: 0x0002
WAVE_FORMAT_DVI_ADPCM: wFormatTag: 0x0011
WAVE_FORMAT_ALAW: wFormatTag: 0x0006
WAVE_FORMAT_GSM610: wFormatTag: 0x0031
The Greek Schools repository
sudo add-apt-repository --yes ppa:ts.sch.gr
Grab freerdp’s key
cd /etc/ltsp
sudo wget http://pub.freerdp.com/repositories/ADD6BF6D97CE5D8D.asc
- Option 1 – with command
sudo ltsp-build-client --purge-chroot --mount-package-cache --mirror 'http://azure.archive.ubuntu.com/ubuntu/' \
 --apt-keys '/etc/ltsp/ADD6BF6D97CE5D8D.asc, /etc/apt/trusted.gpg.d/ts_sch_gr_ubuntu_ppa.gpg' \
 --extra-mirror 'http://ppa.launchpad.net/ts.sch.gr/ppa/ubuntu bionic main, http://pub.freerdp.com/repositories/deb/bionic/ freerdp-nightly main' \
 --late-packages epoptes-client freerdp-nightly --prompt-rootpass \
- OR, Option 2 – using my ltsp-build-client.conf
sudo wget https://github.com/jphein/boxen/raw/master/etc/ltsp/ltsp-build-client.conf
sudo ltsp-build-client --config ltsp-build-client.conf
Create some symlinks so freerdp-nightly is more easy t my lazy scripting
sudo ltsp-chroot
ln -s /opt/freerdp-nightly/bin/xfreerdp /usr/bin/xfreerdp-nightly
ln -s /usr/share/ltsp/screen.d/xfreerdp /usr/share/ltsp/screen.d/xfreerdp-nightly
exit
Create GUI login screen for xfreerdp-nightly
cd /opt/ltsp/amd64/usr/share/ltsp/screen.d/

sudo wget https://raw.githubusercontent.com/jphein/boxen/master/rdpgui

sudo wget https://raw.githubusercontent.com/jphein/boxen/master/xfreerdp-prompt

sudo chmod +x rdpgui xfreerdp-prompt

sudo ltsp-update-image
sudo ltsp-update-image
[jbox]You may get this error on Microsoft Azure VM! https://bugs.launchpad.net/ubuntu/+source/ltsp/+bug/1802707 hmmmm…. This script seems to fix it:
#!/bin/bash
# tadaen sylvermane | jason gibson
# configure locales for ubuntu bionic ltsp chroot creation


for var in LC_ALL= LANG= ; do
        export "$var"en_US.UTF-8
done
ltsp-build-client --chroot "$1"
[/jbox]
- End of Option 2
This document describes how to:
Automatic Install
Part 1 – PXE
Install BoXenbaby to a computer plugged into a BoXenbrain network.
Manual Install
Part 2 – USB
Install BoXenbaby with a USB drive.
Download the usb image here:
Check out BoXenLinux here: https://github.com/jphein/boxen
Goal: Make a tiny (< 50MB) thinclient OS that can be loaded by iPXE over LAN, WIFI, or WAN using HTTP and HTTPS. I should load completely into RAM. It should be able to support these client applications/protocols: RDP, VNC, SSH, SPICE, X2Go. It should also have a web browser kiosk mode (Google Chrome).
My project is to have a wireless PC using a 1MB iSCSI image on usb flash, booting into Ubuntu 16.04 desktop, Windows 10 pro desktop, and MacOSX 10.11 desktop KVM virtual machines using the KVM-VDI project with virtual snapshots enabled.
Custom iPXE image made with rom-o-matic,
https://www.rom-o-matic.eu/
pointing to my fork of the boot.rackspace.com iPXE LiveCD project.
https://github.com/rackerlabs/boot.rackspace.com
New project is netboot.xyz
Good list of alternatives: http://www.rmprepusb.com/tutorials/ipxe
I want to use Thinstation as the running in RAM OS that iPXE boots. Not sure if x2go is supported in thinstation yet. Then by using the thinstation.conf create a remote-viewer Session wrapped by KVM-VDI script.
Here is someone who was able to iPXE boot thinstation:?
http://thinstation.4464.n7.nabble.com/OT-ipxe-chainloading-td24153.html
Here is a way to netboot a liveCD from iPXE:
Good iPXE guide: http://www.denverslair.co.uk/tech/iPXE.php
Procedure for running windows 10 or 2012r2 over lan with iPXE and iSCSI:
https://www.computeraudiophile.com/forums/topic/26705-diskless-windows-10-pc-setup-procedure/
Wireless iPxe: https://www.coreboot.org/IPXE
Not so hard, right?
It already supports integration with LTSP for wired zeroclients over PXE and thinclients over iPXE. LTSP, also offers thinclient and fatclient modes for shared Remote desktop if you don’t have the resources to offer a Virtual machine pool. Thinstation can also be a thinclient for shared or virtual machine resources.
I currently use Ubuntu LTSP with xfreerdp and I custom login script. That only supports wired zero clients. Wireless or WAN clients boot from a CD, USB, Hard drive or SD card.
Thinstation is needed for Wifi or WAN links, with iPXE downloading the image from the internet or local cache. Otherwise plain PXE works great!
X2Go is used if I want to offer shared Ubuntu desktops over WAN. FreeRDP for shared or virtual Windows desktop over WAN. RemoteAPPs for seamless desktop. VNC for shared MacOS over WAN. (or slow Wifi) SSH for admin. Spice for VDI with KVM. Chrome for web browsing and remoteapps.
Here is an amazing guide for thinstation and RDP over PXE :
https://hinchley.net/articles/use-thinstation-to-build-a-network-bootable-rdp-enabled-thin-client-image/
I am sooo close. I’ll I need is to able install and run remote-viewer, and x2goclient on thinstation, and have it remastered.
Here are the Thinstation Issue tickets for adding x2go and spice:
https://github.com/Thinstation/thinstation/issues/106
https://github.com/Thinstation/thinstation/issues/141
Here are some guides on how to do this with alternatives:
http://hinchley.net/2016/01/17/use-thinstation-to-build-a-network-bootable-rdp-enabled-thin-client-image/
https://github.com/Thinstation/thinstation/wiki/Getting-Started-with-Thinstation
[Outdated] http://tsomatic.agarwal-associates.com/index.php <– seems to be outdated.
Or
[DEFUNCT] LPS https://en.wikipedia.org/wiki/Lightweight_Portable_Security
Or,
[jbox color=green]make my own with lubuntu:
https://wiki.ubuntuusers.de/LiveCD_manuell_remastern/
http://pinguyos.com/2015/09/pinguy-builder-an-app-to-backupremix-buntu/
[/jbox]Couldn’t get Tinycore to work
TinyCore Linux
- Make custom version of TinyCore Linux with extensions embedded. http://forum.tinycorelinux.net/index.php?topic=17423.0
- You can make Pure64 version with FreeRDP
- An i386 version can be made with TigerVNC
- Host custom image on public or private server
- Make custom iPXE image here: https://rom-o-matic.eu/
This should call the hosted iPXE script below. - Copy and host iPXE script from: http://boot.rackspace.com
It is required to run the installation readme above to use KVM-VDI.
KVM-VDI does not come with a built in LTSP (client) script. So, I created one.
This is useful if you want your thinclients to be able to remote into a KVM-VDI, and want full control using lts.conf.
Run the following on your Ubuntu LTSP server, this will install packages you’ll need on the thinclient: (Replace <base> with whatever you used for ltsp-build-client –chroot <base>)
ltsp-chroot --arch <base> -m
apt-get xdotool x11-utils xwit python python-requests virt-viewer freerdp-x11 pulseaudio xinit
exit
[jbox]NOTE: You can also add this to the build client config file so that any time you upgrade or build your client image it automatically installs it. –> /etc/ltsp/ltsp-build-client.conf
Here is an example: ltsp-build-client.conf
[/jbox]
The /var/lib/tftpboot/ltsp/<base>/lts.conf options are:
#KVM-VDI Remote Desktop to Virtual Machine
SCREEN_07 = vdi
Here is an example: lts.conf
Put the below screen script into: vdi <– Right click and “Save link as”
/opt/ltsp/<base>/usr/share/ltsp/screen.d/
IMPORTANT: Be sure to name it “vdi“
The last step is to run
ltsp-update-image <base>
LTSP comes with these screen scripts by default:
kiosk ldm menu rdesktop shell ssh startx telnet xdmcp xfreerdp xterm
I created a VNC session script here, and a SPICE session script here.
(ldm is enabled on VT_07 by default)
]]>
ln -s /usr/bin/xfreerdp-nightly /opt/freerdp-nightly/bin/xfreerdp
ln -s /usr/local/ltsp/screen.d/xfreerdp /usr/local/ltsp/screen.d/xfreerdp-nightly
]]>This is useful if you want your thinclients to be able to remote into a KVM VDI.
I use the virt-viewer package. Run the following on your Ubuntu LTSP server:
ltsp-chroot --arch <base> -m
apt-get install virt-viewer
exit
NOTE: You can also add this to the build client config file so that any time you upgrade or build your client image it automatically installs it. –> /etc/ltsp/ltsp-build-client.conf
The /var/lib/tftpboot/ltsp/<base>/lts.conf options are:
#Spice KVM Remote Desktop to Virtual Machine
SPICE_SERVER = "192.168.11.5"
SPICE_OPTIONS = "--kiosk-quit=on-disconnect --kiosk"
SCREEN_07 = remote-viewer
Put the below screen script goes into
/opt/ltsp/<base>/usr/share/ltsp/screen.d/
IMPORTANT: Be sure to name it “remote-viewer“
remote-viewer <– Right click and “Save link as”
The last step is to run
ltsp-update-image <base>
LTSP comes with these screen scripts by default:
kiosk ldm menu rdesktop shell ssh startx telnet xdmcp xfreerdp xterm
(ldm is enabled on VT_07 by default)
I use the menu screen script on VT_07 so that it gives me the option of what desktop to log into. My lts.conf looks like this: (lts.conf default location is: /var/lib/tftpboot/ltsp/i386/ or /amd64/ you may have to create it)
[default]
SCREEN_07 = menu

#RDP Windows Remote Desktop
RDP_SERVER = "/v:192.168.56.25"
RDP_OPTIONS = "/u:client /p:password /sound /microphone /multimedia /rfx /cert-ignore /drives /f"
VNC_SERVER = 192.168.56.5
VNC_OPTIONS = "-fullscreen -autopass"
VNC_PASSWORD = "password"
SPICE_SERVER = "192.168.56.1"
SPICE_OPTIONS = "--kiosk-quit=on-disconnect --kiosk"

MENU_ITEM_01="Ubuntu 16.04 LTSP"
MENU_COMMAND_01="ldm"
MENU_ITEM_02="Windows 10 Professional"
MENU_COMMAND_02="xfreerdp"
MENU_ITEM_03="MacOS 10.11"
MENU_COMMAND_03="vncviewer"
MENU_ITEM_04="Android 5.5"
MENU_COMMAND_04="vncviewer 192.168.56.6"
MENU_ITEM_05="KVM Virtual Machine (Linux,MacOS,Windows)"
MENU_COMMAND_05="remote-viewer"
MENU_TITLE="Please choose a desktop: "

LDM_DIRECTX = True
As you can see this gives the thinclient to terminal into Linux, Windows, MacOS, or Android. Either shared, or personal virtual machines. o_o
You can view how to enable remote desktop in MacOS here:
]]>X2OS
iPXE (you can use this to chain load other thin OS’s over the internet, nfs, smb, etc..)
Very small, and configurable. Supports some wireless cards.
Basically a zero client. < 1MB.
Ubuntu LTSP! Zero clients that boot over PXE (Thinclient or fatclient options)
Windows XP, Vista, 7, 8, embedded, CE, etc…
If you already have a windows device, you can convert it into a thinclient using:
thinwin
Commercial options
Wyse ThinOS
These two support SPICE! For VDI deployment to KVM-QEMU
http://www.jieyung.com/en/product.asp?wid=195
https://www.igel.com/us/products/igel-linux-thin-clients.html
http://edocs.igel.com/manuals/pdf/en_udlx_v5.pdf
nComputing
VDI Blaster http://www.devonit.com/thin-client-solutions/vdi-blaster
]]>