The Hardware
This build starts with modest hardware — a retired desktop with an Intel Sandy Bridge quad-core CPU, no discrete GPU, and a mix of drives:
| Component | Detail |
|---|---|
| CPU | Intel Sandy Bridge, 4 cores, AES-NI |
| RAM | 8GB DDR3 |
| Boot Drive | 112G WD SSD |
| Disk 1 | 932G Toshiba HDD |
| Disk 2 | 1.82T Seagate HDD |
| Disk 3 | 932G Western Digital HDD |
| GPU | Intel HD 2000/3000 (integrated only) |
No discrete GPU means no hardware transcoding — but that’s fine. We’ll configure everything for direct play and disable ML features that need GPU acceleration.
Storage Architecture
The storage layout uses two strategies: RAID 1 for active data that needs redundancy, and LVM for bulk archive storage.
┌─────────────────────────────────────────────────────────┐
│                      /mnt/raid (923G)                   │
│                     RAID 1 — "mirror"                   │
│   ┌─────────────────────┐  ┌─────────────────────┐     │
│   │  sda2 (923G)        │  │  sdc3 (923G)        │     │
│   │  Toshiba DT01ACA100 │  │  WD WD10EZEX        │     │
│   └─────────────────────┘  └─────────────────────┘     │
└─────────────────────────────────────────────────────────┘

┌─────────────────────────────────────────────────────────┐
│                   /mnt/storage (1.82T)                  │
│                  LVM — VG "lvm" / LV "storage"          │
│   ┌─────────────────────────────────────────────┐       │
│   │  sdb (1.82T) — Seagate ST2000VM003          │       │
│   └─────────────────────────────────────────────┘       │
└─────────────────────────────────────────────────────────┘

┌─────────────────────────────────────────────────────────┐
│                    sdd — Boot Drive                     │
│                  112G WD SSD (ext4 + EFI)               │
└─────────────────────────────────────────────────────────┘
RAID 1 mirrors two drives so active data (documents, photos, music, videos, projects) survives a single drive failure. LVM on the 1.82T Seagate holds archives and backups — data that either exists elsewhere or can be re-downloaded.
The key principle: irreplaceable data goes on RAID, regenerable data goes on LVM. This guides every storage decision on the server.
Setting up the RAID array was straightforward since it was a pre-existing array from 2019:
sudo mdadm --assemble /dev/md0 /dev/sda2 /dev/sdc3
sudo mount /dev/md0 /mnt/raid
The LVM volume just needed activation:
sudo lvchange -ay lvm/storage
sudo mount /dev/lvm/storage /mnt/storage
Both volumes auto-mount via /etc/fstab with the nofail flag, so the system boots even if a data disk fails.
File Sharing: NFS + Samba
The server exports both volumes over NFS v4.2 (for Linux clients) and SMB3 (for Windows and macOS).
NFS v4.2
NFSv4.2 is the cleanest option for Linux-to-Linux file sharing. The server uses a pseudo-root at /srv/nfs with bind mounts:
# /etc/exports
/srv/nfs        10.0.6.0/24(rw,sync,fsid=0,crossmnt,no_subtree_check)
/srv/nfs/raid   10.0.6.0/24(rw,sync,no_subtree_check)
/srv/nfs/storage 10.0.6.0/24(rw,sync,no_subtree_check)
Clients mount with a single line:
sudo mount -t nfs4 -o vers=4.2,noatime,nodiratime disks.local:/ /mnt/disksSamba / SMB3
For Windows and macOS clients, Samba serves the same volumes with SMB3 encryption and macOS Time Machine compatibility via the fruit VFS module. A dedicated family share gives household members access to shared music and documents.
Docker Media Stack
The heart of this build is a Docker Compose stack running eight self-hosted services behind a Caddy reverse proxy:
| Service | Purpose | URL |
|---|---|---|
| Jellyfin | Video streaming | jellyfin.jphe.in |
| Navidrome | Music streaming (Subsonic API) | navidrome.jphe.in |
| Immich | Photo management & phone backup | immich.jphe.in |
| Syncthing | Bidirectional file sync | syncthing.jphe.in |
| Nextcloud | Calendar, contacts & webmail | nextcloud.jphe.in |
| Outline | Wiki & knowledge base | outline.jphe.in |
| Vaultwarden | Password manager (Bitwarden-compatible) | vault.jphe.in |
Jellyfin — Direct Play Only
Without a discrete GPU, Jellyfin is configured for direct play only — no transcoding. This means clients need to support the media formats natively. In practice, most modern clients (phones, smart TVs, web browsers) handle H.264/H.265 just fine.
If a file won’t play on a particular client, I pre-transcode it on my workstation with ffmpeg before adding it to the library.
Navidrome — Lightweight Music Streaming
Navidrome is impressively lightweight — about 30MB of RAM to serve an entire music library. It speaks the Subsonic API, so any Subsonic-compatible client works: Symfonium on Android, play:Sub on iOS, or Sublime Music on Linux.
Immich — Self-Hosted Google Photos
Immich provides a Google Photos-like experience for photo management and mobile backup. Since we have no GPU, the machine learning features (face detection, CLIP search) are disabled — but the core photo browsing, timeline, and mobile auto-upload work perfectly.
Immich Storage Layout
Getting Immich’s storage right took some iteration. The key insight: phone uploads are irreplaceable originals and need RAID redundancy, but thumbnails and transcoded videos are regenerable and can live on cheaper storage.
The final layout uses Docker bind mounts to split data across volumes:
volumes:
  # Base upload directory on LVM (thumbnails, transcodes, backups)
  - /mnt/storage/immich-data:/usr/src/app/upload
  # Phone uploads overlaid onto RAID for redundancy
  - /mnt/raid/immich-upload:/usr/src/app/upload/upload
  - /mnt/raid/immich-library:/usr/src/app/upload/library
  # External photo libraries (read-only)
  - /mnt/raid/photos:/usr/src/app/external-raid:ro
Docker processes volume mounts in order, so the bind mounts for upload/ and library/ overlay onto the base LVM mount. This gives us:
| Data Type | Location | Why |
|---|---|---|
| Phone uploads (originals) | /mnt/raid (RAID 1) | Irreplaceable, needs redundancy |
| Thumbnails | /mnt/storage (LVM) | Regenerable from originals |
| Encoded video | /mnt/storage (LVM) | Regenerable from originals |
| DB backups | /mnt/storage (LVM) | Separate backup chain handles this |
| Postgres database | /mnt/raid (RAID 1) | Bind mount at /mnt/raid/docker/immich-db |
Lesson learned the hard way: Docker named volumes live under /var/lib/docker/volumes/ on the root filesystem — typically a small boot SSD. If Immich starts processing thousands of photos, thumbnails and transcoded videos can eat 20+ GB fast. Always use bind mounts to explicit paths on your data drives.
Fixing Bad EXIF Dates
Old photos from cameras with dead batteries or no real-time clock often have EXIF dates like January 1, 1980 or December 26, 1970. Immich sorts by EXIF date, so these photos end up in the wrong decade.
For JPEGs, exiftool can fix the dates on disk:
exiftool -overwrite_original -DateTimeOriginal="2018:04:01 12:00:00" photo.JPGFor formats that don’t support EXIF writes (like AVI), fix the dates directly in Immich’s Postgres database:
docker exec immich-db psql -U postgres -d immich -c \
  "UPDATE asset_exif SET \"dateTimeOriginal\" = '2023-05-01 12:00:00'
   WHERE \"assetId\" IN (SELECT id FROM asset WHERE \"originalPath\" LIKE '%folder-name%');"
Nextcloud — Calendar, Contacts & Webmail
Nextcloud fills the last major gap in the self-hosted stack: CalDAV for calendar sync and CardDAV for contacts, plus a built-in webmail client that connects to existing email accounts via IMAP/SMTP.
The architecture mirrors Immich — Nextcloud Apache container backed by Postgres 16 and Redis, all on RAID bind mounts. CalDAV/CardDAV client autodiscovery requires /.well-known/caldav and /.well-known/carddav redirects in Caddy, per RFC 6764:
nextcloud.jphe.in {
    redir /.well-known/carddav /remote.php/dav 301
    redir /.well-known/caldav /remote.php/dav 301
    reverse_proxy nextcloud:80
}
With these redirects, phone and desktop calendar/contacts clients only need the hostname — no manual URL entry required. One critical environment variable: OVERWRITEPROTOCOL=https tells Nextcloud it’s behind a TLS-terminating proxy, so it generates correct https:// links instead of http://.
Outline — Team Wiki
Outline provides a clean, fast wiki for shared documentation and knowledge management. It’s the self-hosted alternative to Notion — Markdown-native, real-time collaborative editing, and a powerful search.
Rather than adding yet another authentication system, Outline uses Nextcloud as an OIDC provider. Anyone with a Nextcloud account can log into Outline — no separate credentials needed. This is configured by registering an OAuth2 client in Nextcloud’s admin settings and pointing Outline’s OIDC environment variables at Nextcloud’s authorization endpoints.
File uploads (images, attachments) are stored directly on the RAID filesystem rather than requiring an S3-compatible object store like MinIO. For a personal/family wiki, local storage is simpler and perfectly adequate — Outline supports this with FILE_STORAGE=local.
Vaultwarden — Self-Hosted Password Manager
Vaultwarden is a lightweight, Rust-based implementation of the Bitwarden API. It runs on minimal resources and is fully compatible with all Bitwarden clients — browser extensions, mobile apps, and the bw CLI tool.
The database lives on RAID for redundancy, and automated daily backups provide an additional safety net (more on that below).
Syncthing — Project Sync
Syncthing keeps my ~/Projects directory synchronized between my workstation and the server’s RAID array. It’s bidirectional, peer-to-peer, and encrypted — no cloud service involved.
HTTPS with Caddy + Cloudflare DNS
Every service gets its own subdomain with automatic Let’s Encrypt certificates. Caddy handles this with the Cloudflare DNS-01 challenge — no ports 80/443 need to be exposed to the internet.
One gotcha: the upstream caddy-dns/cloudflare module rejects Cloudflare’s newer cfut_-prefixed API tokens. I used a patched fork that fixes this.
The Caddyfile is clean — each service is just a few lines:
jellyfin.jphe.in {
    reverse_proxy jellyfin:8096
}
Caddy Timeout Tuning for Large Uploads
If you’re uploading large videos through Immich (or any service behind Caddy), the default proxy timeouts will kill the connection mid-upload. The fix is to increase both the request body size limit and the proxy transport timeouts:
immich.jphe.in {
    request_body {
        max_size 20GB
    }
    reverse_proxy immich:2283 {
        transport http {
            read_timeout 600s
            write_timeout 600s
        }
    }
}
Caddy supports hot-reloading — caddy reload applies config changes without dropping existing connections.
Remote Access with Tailscale
All the *.jphe.in DNS records point to the server’s Tailscale IP (100.x.x.x), not a public IP. This means:
- From home (LAN): The OpenWrt router intercepts
*.jphe.inqueries and resolves them to the local IP (10.0.6.120) - From anywhere else: DNS resolves to the Tailscale IP, and traffic flows through the Tailscale mesh
No port forwarding. No dynamic DNS. No exposing services to the internet. Just install Tailscale on your devices and everything works.
Server Tuning
A few targeted optimizations make a noticeable difference on this hardware:
Kernel / sysctl
| Setting | Value | Why |
|---|---|---|
| vm.swappiness | 10 | Prefer file cache over swap |
| vm.dirty_ratio | 40 | Allow large write batches before flushing |
| vm.vfs_cache_pressure | 50 | Keep directory/inode caches longer |
| net.ipv4.tcp_congestion_control | bbr | Google’s BBR for faster throughput |
| net.core.rmem_max / wmem_max | 16MB | Large TCP buffers for big file transfers |
Storage I/O
HDDs get the mq-deadline scheduler with 2MB readahead and write caching enabled. The SSD boot drive uses none (passthrough). Head parking is disabled on the HDDs (hdparm -B254) to avoid the click-of-death wear pattern.
SSH
SSH is tuned to use hardware-accelerated AES-GCM ciphers (the Sandy Bridge CPU has AES-NI), and reverse DNS lookups are disabled for faster connections.
Terminal compatibility tip: If you use Kitty terminal, remote servers won’t have the xterm-kitty terminfo entry. Tools like top, htop, and nano will break. Fix it by installing the terminfo on the server:
infocmp -x xterm-kitty | ssh disks "mkdir -p ~/.terminfo && tic -x -o ~/.terminfo /dev/stdin"Automated Backups
The backup strategy has two layers: database dumps for application state, and BorgBackup for file-level deduplication.
Database Backups (Daily at 2:30 AM)
Every service with a database gets a daily dump to /mnt/raid/backups/databases/:
| Service | DB Type | Method |
|---|---|---|
| Immich | Postgres | pg_dump (consistent snapshot) |
| Nextcloud | Postgres | pg_dump (consistent snapshot) |
| Outline | Postgres | pg_dump (consistent snapshot) |
| Vaultwarden | SQLite | sqlite3 .backup (safe while running) |
| Jellyfin | SQLite | sqlite3 .backup |
| Navidrome | SQLite | sqlite3 .backup |
The dumps land on RAID so they’re included in the Borg backup that follows. Old dumps are pruned after 7 days.
Why not just back up the database files directly? Postgres stores data across multiple files that must be consistent with each other. Copying them while Postgres is running can give you a corrupted snapshot. pg_dump produces a clean SQL dump regardless of database activity. SQLite has the same issue — the .backup command ensures a consistent copy.
BorgBackup (Daily at 3:00 AM)
BorgBackup runs 30 minutes after the database dumps, deduplicating critical data from RAID to the storage volume:
# Backs up: documents, keys, projects, database dumps, photos
# Retention: 7 daily, 4 weekly, 6 monthly
# Compression: zstd level 3
# Destination: /mnt/storage/backups/borg-raid
Borg’s deduplication means incremental backups are fast and space-efficient — only changed blocks are stored. The entire backup history compresses to around 320MB of deduplicated storage.
The Backup Chain
2:30 AM  Database dumps → /mnt/raid/backups/databases/
3:00 AM  Borg backup    → /mnt/raid/* → /mnt/storage/backups/borg-raid/
6:00 AM  Disk health    → SMART checks, logged to /var/log/disk-health.log
This means the storage volume holds a complete, deduplicated history of everything on RAID — including consistent database snapshots.
Cloud Backup with rclone
Local backups protect against drive failure, but not against fire, theft, or disaster. For geographic redundancy, the server syncs critical data to cloud storage using rclone.
The Setup
rclone is configured with three cloud remotes:
| Remote | Provider | Storage |
|---|---|---|
| box-personal | Box (personal) | 100GB |
| box-techempower | Box (work) | 100GB |
| gdrive | Google Drive | 25GB |
That’s 225GB of cloud storage across three accounts — enough for database dumps, documents, phone uploads, music, and a chunk of the photo library.
Google Drive as a FUSE Mount
Google Drive is mounted as a regular filesystem at /mnt/gdrive using rclone’s FUSE mount capability, managed by a systemd service:
[Service]
Type=notify
User=jp
ExecStart=/usr/bin/rclone mount gdrive: /mnt/gdrive \
    --vfs-cache-mode full \
    --vfs-cache-max-size 2G \
    --dir-cache-time 72h \
    --allow-other
The --vfs-cache-mode full setting caches files locally before serving them, so reads and writes behave like a normal filesystem. The --allow-other flag (plus user_allow_other in /etc/fuse.conf) lets other system users and services like Samba access the mount.
OAuth on a Headless Server
Box and Google Drive both use OAuth2 for authentication, which normally requires a web browser. Since the server is headless, the trick is to run rclone config on a workstation that has a browser, complete the OAuth flow there, then copy ~/.config/rclone/rclone.conf to the server. The tokens persist in the config file and rclone handles refresh automatically.
Disk Health Monitoring
smartd runs weekly short tests and monthly long tests on all drives. A custom health check script runs daily at 6am and logs to /var/log/disk-health.log. On a server with aging drives, early warning of failure is critical.
Lessons Learned
A few things I ran into during the build:
- Old EFI partitions cause boot confusion. The BIOS was trying to boot a 2019-era GRUB installation from one of the data drives instead of the actual boot SSD. Clearing the old EFI entries fixed it.
- Always run
e2fsckbefore operating on corrupt inodes. I tried to clean up files on a filesystem with corrupt inodes and triggered a kernel panic — VFS spinlock deadlock. The fix was to unmount and rune2fsck -yfirst. - Docker volume permissions matter. Syncthing’s config volume was created as root but the container runs as UID 1000. Switching to a bind mount with explicit user mapping solved it.
- RAID cleanup freed massive space. The RAID array was 99% full. Moving backups and archives to the storage volume brought it down to 38% — from 917G used to 320G.
- No GPU doesn’t mean no media server. Direct play works great for most use cases. The GPU upgrade path is documented for when I eventually add one.
- Docker named volumes default to the root filesystem. Immich’s thumbnails and transcoded videos filled 23GB on the boot SSD before I noticed. Always use bind mounts for data-heavy containers, pointing to your bulk storage.
- Symlinks don’t work inside Docker volumes. A symlink on the host points to a path as seen inside the container. If the target path isn’t mounted in the container, the symlink leads nowhere. Use Docker bind mounts instead.
- Back up your databases, not just your files. BorgBackup captures files, but copying a live Postgres data directory gives you a potentially corrupt snapshot. I lost an entire Immich database (all photo metadata, albums, users) because there was no
pg_dumpbackup. Now every database gets a daily dump before Borg runs. - Separate irreplaceable from regenerable data. Phone photo uploads need RAID redundancy. Thumbnails and transcoded videos can be regenerated from originals and belong on cheaper storage. This distinction should drive your volume layout from day one.
- Caddy needs timeout tuning for large uploads. The default proxy timeouts are fine for web browsing but kill multi-gigabyte video uploads. Configure
read_timeoutandwrite_timeoutexplicitly for services that handle large files. - Use
rsync, notmv, across filesystems.mvbetween different filesystems is a silent copy+delete with no progress indicator and no resume on failure.rsync -ah --progressgives you visibility and idempotent restarts.
The Final Stack
Here’s what the complete setup looks like:
| Layer | Technology |
|---|---|
| OS | Ubuntu 24.04 (headless) |
| Storage | mdadm RAID 1 + LVM |
| File Sharing | NFS v4.2 + Samba/SMB3 |
| Media | Jellyfin + Navidrome + Immich |
| PIM | Nextcloud (CalDAV/CardDAV/Mail) |
| Knowledge Base | Outline (Nextcloud OIDC auth) |
| Passwords | Vaultwarden (Bitwarden-compatible) |
| Sync | Syncthing |
| Reverse Proxy | Caddy + Let’s Encrypt (DNS-01) |
| Remote Access | Tailscale mesh VPN |
| Backups | Daily DB dumps + BorgBackup + rclone cloud sync |
| Cloud Storage | rclone → Box (2×100GB) + Google Drive (25GB FUSE mount) |
| Monitoring | smartd + daily health checks |
Total cost: effectively $0 in new hardware. The server is quiet, draws minimal power, and serves media to every device in the house — plus anywhere I have Tailscale installed.
If you have an old desktop gathering dust, it’s more than capable of running this entire stack. The only thing I’d eventually add is a discrete GPU for Jellyfin transcoding and Immich ML — but honestly, direct play has been perfectly fine.
]]>Federal Level:
- Supplemental Nutrition Assistance Program (SNAP) (previously known as Food Stamps)
- Temporary Assistance for Needy Families (TANF)
- Medicaid
- Housing Choice Voucher Program (Section 8)
- Low-Income Home Energy Assistance Program (LIHEAP)
- Supplemental Security Income (SSI)
- Child Care and Development Fund (CCDF)
- National School Lunch Program (NSLP)
- Women, Infants, and Children (WIC) Program
- Earned Income Tax Credit (EITC)
- Community Services Block Grant (CSBG)
- Head Start
- Older Americans Act (OAA) Programs
- Supplemental Nutrition Program for Women, Infants, and Children (WIC)
- Children’s Health Insurance Program (CHIP)
- Social Services Block Grant (SSBG)
State of California:
- CalWORKs (California Work Opportunity and Responsibility to Kids)
- California Food Assistance Program (CFAP)
- CalFresh (California’s Supplemental Nutrition Assistance Program)
- In-Home Supportive Services (IHSS)
- California Emergency Assistance and Rapid Transition to Housing (CEART)
- Energy Assistance Fund (EAF)
- Low-Income Home Energy Assistance Program (LIHEAP)
- Women, Infants, and Children (WIC) Program
- School Breakfast and Lunch Programs
- Medicaid (Medi-Cal)
- Health Care for Kids and Families (HCKF)
- Child Care Assistance
- Earned Income Tax Credit (EITC)
- Section 8 Housing Choice Voucher Program
- Community Services Block Grant (CSBG)
- Social Services Block Grant (SSBG)
- Head Start
- Older Americans Act (OAA) Programs
Nevada County, California:
- Nevada County Food Bank
- Interfaith Food Bank
- Nevada County Health and Human Services Agency
- Western Sierra Medical Clinic
- Chapa De Clinic
- Hospitality House
- The Salvation Army of Nevada County
Nonprofit services in Nevada County, California
- Hospitality House
- The Salvation Army of Nevada County
- Community Legal Services of Empowerment
- Interfaith Food Ministry
- Nevada County Free Clinic
- The Resource Connection
- Hospice of the Foothills
- Sierraservice Corps
- Western Sierra Medical Clinic
- Women’s Health Specialists
- Nevada County Nurtured Heart Approach
- Sierra Senior Services
- Boys and Girls Club of Western Nevada County
- Grass Valley Food Co-op
- Nevada County Volunteer Center
- Friends of Nevada County Libraries
- Sierra Nevada Memorial Hospital Foundation
Note: This is not an exhaustive list, and program names, eligibility criteria, and benefits may vary by state.
My experience
I’m consistently amazed at the level of assistant you can get from government, and non-profit organizations if you make less than 21K-40K a year. Here are programs I’ve had personal experience with. Also, some extra money saving tips.
For a comprehensive list of services (Dial 211 or visit www.dial211.com) I feel like their website is very hard to navigate. If it was better than there would be no need for this blog post.
Bottom Line: Minimize buying, but when you do, buy used and buy locally. For instance: Gold Country Craigslist, Nevada County Swap Shop Facebook group, thrift stores, yard sales, and sort by distance on eBay.
Cash Aid
- Calworks
- Unemployment
- Disability or Paid family leave
- Business grants
- Supportive Services
Food
We are incredibly lucky. We have an immense good food network. I only eat organic, non-GMO, no sugar and local meat.
- Food banks (Staples, as well as organic, local produce)
- Interfaith Food Ministry – open every Mon, Wed, and Fri. You can go every two weeks. Bring your social security card your first visit. Be sure to return any food you do not want before you leave. http://www.interfaithfoodministry.org/
- NC food bank – Open once a month, view calendar here: Calendar
- Food stamps (EBT or Calfresh) Sign up online – 1-877-847-3663. I get around $200/month.
- TIP: If you’re in a hurry, at Natural Selections you can buy locally premade Way Yum sushi, Theresita’s Haute Tamales, or Warehouse deli sandwiches with your EBT card!
- TIP: You can use EBT at the Nevada City Farmers Market
- TIP: You can use EBT to mail order food from Amazon or Walmart.
- Markets: Nevada City farmers Market, EBT, and $25 free voucher.
- Stores: Grocery outlet (Pick out the organic food), Natural Selections (Clearance shelves)
- Free School Lunch Program
- WIC if you are pregnant or have a child you can get food and a free breast pump. They also provide tokens for the Nevada City farmers’ market.
TIP: Save your vegetable scraps and meet scraps in the freezer to make vegetable and bone sock respectively.
TIP: Eat your food in the order that it will perish. Regularly eat all the food in your fridge.
TIP: Save your bacon grease. Cook with it, or make soap.
TIP: Nut/seed/grain milk is super easy to make. Kefir/Yogurt. Kombucha/jun. SaurKraut/Kimchi, Sprouts.
More info here: http://211nevadacounty.org/resources/food/
Housing
Federal Subsidized housing
Grass Valley First Time Home Buyer Program
Nevada County Habitat For Humanity Homeownership Program
Nevada County weatherization program Project Go call 1-800-655-7705
PGE Weatherization program
Habit for humanity REstore
Regional Housing Authority of Sutter and Nevada County
Utilities
PG&E Care program – Gives a discount on Electricity and Natural Gas
Project Go For Energy Assistance, please call 1-888-524-5705 – Will pay your PG&E for a year, and/or will provide vouchers for wood, or propane.
Ferrelgas w/ neighborhood association or refurbished tank.
TIP: Composting toilet
TIP: Dryer lint and tp rolls for firestarters
TIP: Dry your clothes on a line!
TIP: Use cold water to wash your clothes.
TIP: If you use the dryer, add a dry towel with your wet clothes to speed up drying, or use wool dryer balls.
Phone and cellphone
California and Federal Lifeline programs – A free cellphone and service, or a discount on your landline. For more info check out my article here: The Cell Phone Guru blog post
(Sprint) Freedompop – 200 Voice Minutes 500 Text Messages 500MB 3G/4G Data with $99 phone +$10 s/, OR activate your own Sprint phone for $20. Not limited to low income users.
Google Voice with Hangouts and dailer- free wifi calling for your smart phones or computers. Not limited to low income users.
MVNO’s: Republic Wireless (Sprint, Verizon, Wifi), Pageplus (Verizon), Airvoice (ATT) Not limited to low income users.
Internet
More info here: http://www.cheapinternet.com/low-income-internet
(Sprint) Freedompop – 500MB/month 4G connection free with $30 + $10 s/h hotspot purchase. Not limited to low income users.
(Sprint) Netzero – 200MB/month for a year.$76.90 for device and s/h. Not limited to low income users.
(T-mobile) http://basic-internet.com/everyoneoncampaign/ – $10/month hotspot for $62.51 1.2GB at 4G speed, then unlimited at 3G for month.
(Comcast) http://www.internetessentials.com/ – Most have a child that qualifies for some school lunch program. Actually you have tons of options if you qualify for school lunch programs.
(Sprint) https://yourkarma.com/
(ATT) Sonic – semi-local DSL company
Gas
TIP: Gasbuddy
scooter
electric bicycle
bicycle
Medical
Medi-cal @ Western Sierra Medical Center General and dentist, vision dr. moon, equine therapy
Women’s health specialist w/ qwest and fee waiver
Vehicle Insurance
Minimum insurance or
Pay as you go: Metromile
Banking
FirstUS Credit Union – Free checking and savings
River Valley Community Bank – Free checking and savings
School
Sierra College: FAFSA, Governor Fee Waiver
Business
Nevada City Small Business Loans and Grant
David Nelson – Nevada City CDBG Program Manager
http://nevadacityca.gov/sites/all/modules/tinytinymce/tinymce/jscripts/tiny_mce/plugins/filemanager/files/admin/EconomicDevel.pdf
Sierra commons
Kickstarter Indiegogo, etc…
Website hosting
HangLeft Hosting
Software:
Ubuntu
Open source software
Sundries
Use white vinegar to clean everything
Make your toothpaste
Use soap nuts for soap or make it
Use apple cider vinegar and baking soda to wash hair, coconut oil to condition
coconut oil for all lotion, moistorizer, sunblock
Use reusable toilet rags instead of toilet paper
Petfood: Animalsave program or make your own.
Make cloth bags for bulk items and produce
Store vegetables in cloth bags or dish towels
More resources
These are the programs that I personally use. A resourced, single, white male living in Western Nevada County. If you are a person without reliable transportation, a person without a permanent home, a person with two X chromosomes, a person with children, a person with a disability, a person suffering from chronic illness, a person who has suffered violence, a person suffering from addiction, a person that has served in the military, a person with more than 65 years under your belt, of you live in Eastern Nevada County, check out the site below where you will find even more services.
Nevada County Community Resource Directory (available 24 hours a day)
Emergency Assistance Coalition (EAC)
877-847-0499 (Dial 211 / www.dial211.com)
You can view Nevada County’s 2014-2015 Cummunity Action Plan (CAP) that was created so that we could receive the $1.6M Federal CSBG* grant that helps fund these services here: CAP. Note: Each non-profit that applied and was approved got $60K/year for 2 years.
*The Community Services Block Grant (CSBG), administered by the states, provides core funding to local agencies to reduce poverty, revitalize low-income communities and to empower low-income families to become self-sufficient.
]]>Some advantages of hosting your own custom WordPress website with Docker include: – You have full control over your website and can customize it however you want. – Docker makes it easy to set up and maintain your website. – You can run your website on any platform that supports Docker. – Your website will be more scalable and reliable than if it were hosted on a traditional web server.

Set up cloudflare
Create account, and add domains.
Set up google free tier instance:
From: https://cloud.google.com/free/docs/free-cloud-features
Set up billing notifications if it goes over $0.03
Compute Engine free tier
1 non-preemptible e2-micro VM instance per month in one of the following US regions:
Oregon: us-west1
Iowa: us-central1
South Carolina: us-east1

30 GB-months standard persistent disk

5 GB-month snapshot storage in the following regions:
Oregon: us-west1
Iowa: us-central1
South Carolina: us-east1
Taiwan: asia-east1
Belgium: europe-west1

1 GB network egress from North America to all region destinations (excluding China and Australia) per month
Your Free Tier e2-micro instance limit is by time, not by instance. Each month, eligible use of all of your e2-micro instance is free until you have used a number of hours equal to the total hours in the current month. Usage calculations are combined across the supported regions.

Compute Engine free tier does not charge for an external IP address.

GPUs and TPUs are not included in the Free Tier offer. You are always charged for GPUs and TPUs that you add to VM instances.

Learn more- Modify firewall
- remove rdp allow firewall rule
- modify ssh to only accept connections from cloudshell: 35.235.240.0/20
- allow from anywhere to ports 80,443
- (optional) allow port 51820 for wireguard
- Make swap file, and add to fstab: https://www.digitalocean.com/community/tutorials/how-to-add-swap-space-on-ubuntu-16-04
- (Optional) Install wireguard for VPN access: How to set up your own VPN using WireGuard on Ubuntu 21.10
Setup Dynamic DNS with Cloudflare
From: How to use Cloudflare for Dynamic DNS on Ubuntu 22.04
Install docker, and dependencies
From: https://docs.docker.com/engine/install/ubuntu/
##Set up the repository
#Update the apt package index and install packages to allow apt to use a repository over HTTPS:

sudo apt-get update

sudo apt-get install
    ca-certificates
    curl
    gnupg
    lsb-release

##Add Docker’s official GPG key:

sudo mkdir -p /etc/apt/keyrings
curl -fsSL https://download.docker.com/linux/ubuntu/gpg | sudo gpg --dearmor -o /etc/apt/keyrings/docker.gpg
#Use the following command to set up the repository:

echo
  "deb [arch=$(dpkg --print-architecture) signed-by=/etc/apt/keyrings/docker.gpg] https://download.docker.com/linux/ubuntu
  $(lsb_release -cs) stable" | sudo tee /etc/apt/sources.list.d/docker.list > /dev/null

#Install Docker Engine
#Update the apt package index, and install the latest version of Docker Engine, containerd, and Docker Compose, or go to the next step to install a specific version:

sudo apt-get update
sudo apt-get install docker-ce docker-ce-cli containerd.io docker-compose-plugin docker-compose
Install configurations
From: https://carlwillimott.medium.com/quickly-setup-wordpress-ssl-via-lets-encrypt-and-certbot-b29e8abf2072
git clone https://github.com/carlwillimott/docker-compose-wordpress-ssl.git
cd docker-compose-wordpress-ssl
nano -w docker-compose.yml
version: '3.3'

services:

  swag:
    image: linuxserver/swag
    container_name: swag
    restart: always
    depends_on:
      - wordpress
    volumes:
      - ./config:/config
      - ./default:/config/nginx/site-confs/default
    environment:
      - [email protected]
      - URL=blog.jphein.com
      - VALIDATION=http
      - TZ=America/Los_Angeles
      - PUID=1001
      - PGID=1002
    ports:
      - "443:443"
      - "80:80"

  wordpress:
    image: wordpress:latest
    container_name: wordpress
    hostname: wordpress
    depends_on:
      - db
    restart: always
    ports:
      - "8080:80"
    volumes:
      - ./www/:/var/www/html/
      - ./custom.ini:/usr/local/etc/php/conf.d/custom.ini
    environment:
      WORDPRESS_DB_HOST: db
      WORDPRESS_DB_USER: wp_db_user
      WORDPRESS_DB_PASSWORD: wp_db_pass
      WORDPRESS_DB_NAME: wp_db
      WORDPRESS_CONFIG_EXTRA: |
        define( 'WP_MEMORY_LIMIT', '96M' );

  db:
    image: mysql:5.7
    container_name: db
    volumes:
      - /var/lib/mysql:/var/lib/mysql
    restart: always
    ports:
      - "3306:3306"
    environment:
      MYSQL_ROOT_PASSWORD: mysql_root_pass
      MYSQL_DATABASE: wp_db
      MYSQL_USER: wp_db_user
      MYSQL_PASSWORD: wp_db_pass
Bring up the containers
docker-compose up -dMake the containers come up on boot
From: https://bootvar.com/systemd-service-for-docker-compose/
# Write systemd service in
nano -w /etc/systemd/system/mysite.service
[Unit]
Description=Service for mysite
Requires=docker.service
After=docker.service
[Service]
Type=oneshot
WorkingDirectory=/home/jp/jphein.com
Environment=COMPOSE_HTTP_TIMEOUT=600
ExecStart=/usr/bin/env /usr/bin/docker-compose -f /home/jp/jphein.com/docker-compose.yml up -d
ExecStop=/usr/bin/env /usr/bin/docker-compose -f /home/jp/jphein.com/docker-compose.yml stop
StandardOutput=syslog
RemainAfterExit=yes
[Install]
WantedBy=multi-user.targetNow you have created the systemd service, enable it and start the service. Enabling service will make sure to start this service at server startup.
# will enable service to start at server bootup
systemctl enable mysite

# start service ( Executes ExecStart command )
systemctl start mysite
Enable PageSpeed in WordPress docker
To be continued…
Configure WordPress
Go to yourdomain.com
Install WordPress Plugins
- Jetpack
- Jetpack boost
- Google Sitekit
- Cloudflare?
- Varnish? https://www.varnish-software.com/developers/tutorials/running-varnish-docker/
Test
Test SSL: www.ssllabs.com/ssltest/…
Test Pagespeed module: ismodpagespeedworking.co…
Test Varnish: https://isvarnishworking.uk/
Test your server response time: www.bytecheck.com
Should be 500ms or under. Ideally under 200ms.
Test email: https://www.mail-tester.com/
Forward your custom domain email to your gmail account
Cloudflare offers this service for free
Automated backups to Cloud storage bucket
Free tier
| Cloud Storage | 5 GB-months of regional storage (US regions only)5,000 Class A Operations per month50,000 Class B Operations per month1 GB network egress from North America to all region destinations (excluding China and Australia) per month |
|---|---|
Free Tier is only available in us-east1, us-west1, and us-central1 regions. Usage calculations are combined across those regions. |
Create a bucket in the google cloud console or terminal.
Install gcsfuse
Download .deb package frome: https://github.com/GoogleCloudPlatform/gcsfuse/releases
wget https://github.com/GoogleCloudPlatform/gcsfuse/releases/download/v0.41.6/gcsfuse_0.41.6_amd64.deb
sudo dpkg -i gcsfuse_0.41.6_amd64.deb
Permissions
You may need to run “gcloud init” if your permissions aren’t set up correctly. You may also need to edit your bucket permissions as well.
Mount bucket
From: https://github.com/GoogleCloudPlatform/gcsfuse/blob/master/docs/mounting.md
gcsfuse bucket_name mount_point
#unmount
fusermount -u /path/to/mount/point
Add to fstab to mount on boot
sudo echo "jphfree /home/jp/jphfree gcsfuse rw,_netdev,allow_other,uid=1001,gid=1002" >> /etc/fstab#Backup script
NOTE: If you want to use duplicity gs: urls then you should follow this guide: https://jphein.com/how-to-use-duplicity-to-backup-directly-to-a-google-cloud-storage-bucket-to-achieve-time-machine-like-incremental-backups-on-ubuntu-15-10-wily/
#Install mysqldump
sudo apt install mysql-client-core-8.0
#Install duplicity
sudo apt install duplicity
nano -w backup#!/bin/bash
#--A simple backup script
#----Change the variables below to reflect your information
echo "------------------------------------------------------------------"
echo " Website Backups"
echo "------------------------------------------------------------------"
echo "Creating variables..."
printf "$0 <-- Name and path of this script.n"
#Working directory
WD="/home/jp"
printf "$WD <-- Working Directory on local server.n"
echo "------------------------------------------------------------------"
#Google Cloud storage bucket"
printf "A Google Cloud storage bucket is used for longterm storage of incremental backups.n"
BUCKET="jphfree"
printf "$BUCKET <-- Google Cloud storage bucket namen"
echo "------------------------------------------------------------------"
#MySQL database
MYSQL_DB="wp_db"
MYSQL_USER="root"
MYSQL_PASS="db_root_pass"
printf "$MYSQL_DB <-- MySQL Database Namen"
printf "$MYSQL_USER <-- MySQL Database Usernamen"
echo "------------------------------------------------------------------"
#Google Cloud Storage Mount the storage bucket
printf "Mounting Google Cloud storage bucket...n"
gcsfuse $BUCKET $WD/$BUCKET
echo "------------------------------------------------------------------"
#MySQL dump
printf "Dumping MySQL database...n"
mysqldump --opt -h localhost --protocol=tcp --user=$MYSQL_USER --password=$MYSQL_PASS $MYSQL_DB > $WD/mysqldump/database.sql
echo "------------------------------------------------------------------"
#-------Duplicity Backup everything to the bucket
echo "------------------------------------------------------------------"
echo "Backing up data to a Google Gloud storage bucket using duplicity.."
echo "------------------------------------------------------------------"
echo "An incremental backup every day. A full backup every month."
echo "We keep 12 full backups and their corresponding incrementals."
echo "One year of daily back up data!"
echo "------------------------------------------------------------------"
#Clean up in case of aborted backups
duplicity cleanup --no-encryption file://$WD/$BUCKET/backups
#Backup data to bucket
duplicity --progress --no-encryption --exclude $WD/$BUCKET --full-if-older-than 1M $WD file://$WD/$BUCKET/backups
#Delete old backups
#duplicity remove-older-than 1Y --force $SYNC_DIR/$i gs://$BUCKET/$i
duplicity remove-all-but-n-full 12 file://$WD/$BUCKET/backups
#------------------------------------------------------------------------------chmod 700 backup#Add to crontab
crontab -e# Edit this file to introduce tasks to be run by cron.
#
# Each task to run has to be defined through a single line
# indicating with different fields when the task will be run
# and what command to run for the task
#
# To define the time you can provide concrete values for
# minute (m), hour (h), day of month (dom), month (mon),
# and day of week (dow) or use '*' in these fields (for 'any').
#
# Notice that tasks will be started based on the cron's system
# daemon's notion of time and timezones.
#
# Output of the crontab jobs (including errors) is sent through
# email to the user the crontab file belongs to (unless redirected).
#
# For example, you can run a backup of all your user accounts
# at 5 a.m every week with:
# 0 5 * * 1 tar -zcf /var/backups/home.tgz /home/
#
# For more information see the manual pages of crontab(5) and cron(8)
#
# m h dom mon dow command
0 0 * * * /home/jp/backup > /home/jp/backup.log 2>&1
Restore from Backups
duplicity restore file:///home/jp/jph-backups/backups /home/jp/restored/ --no-encryption
Install and Configure WireGuard
From: https://www.stavros.io/posts/how-to-configure-wireguard/
Note: for the client configuration to work you must first have a working wireguard server.
#become root
sudo -i

#install wireguard
apt install wireguard

#create keys
cd /etc/wireguard
umask 077  # This makes sure credentials don't leak in a race condition.
wg genkey | tee privatekey | wg pubkey > publickey
#edit the config
nano -w wg0.conf
Client (Example config file) – wg0.conf
Add the client private key, the server public key, and the server IP address.
[Interface]
Address = 10.5.5.25
PrivateKey = client private key

#-------------DNS
#DNS = 10.5.5.1 #Server caching dnsmasq that forwards to azure in my case
#DNS = 168.63.129.16 #Azure
#DNS = 1.1.1.1 #Cloudflare
DNS = 176.103.130.130, 176.103.130.131 #AdGuard

#-------------MTU
MTU = 1280 #This may need to be changed depending on your connection to the internet.
#MTU = 1384
MTU = 1360

#-------------MSS Clamping
#PostUp = iptables -A FORWARD -p tcp --tcp-flags SYN,RST SYN -j TCPMSS --clamp-mss-to-pmtu
#PostDown = iptables -D FORWARD -p tcp --tcp-flags SYN,RST SYN -j TCPMSS --clamp-mss-to-pmtu


[Peer]
PublicKey = server public key
Endpoint = server IP address:51820
#AllowedIPs = 0.0.0.0/0 #Use this if you want all your traffic to pass through the VPN
AllowedIPs = 10.5.5.25/32

# This is for if you're behind a NAT and
# want the connection to be kept alive.
PersistentKeepalive = 25
Server (Example config file) – wg0.conf
Add the server private key, and each client’s public key.
[Interface]
Address = 10.5.5.1
PrivateKey =
ListenPort = 51820

[Peer]
PublicKey =
AllowedIPs = 10.5.5.5/32

[Peer]
PublicKey =
AllowedIPs = 10.5.5.25/32
Securing
After you’re done, run the following to make the directory and files readable only by administrators (it does contain secret keys, after all):
exit # exit rootsudo chown -R root:root /etc/wireguard/
sudo chmod -R og-rwx /etc/wireguard/*
Start and test wireguard
On both server, and client run:
sudo wg-quick up wg0; wg
#to bring it down
sudo wg-quick down wg0
Automatically run at startup
After you’ve created and secured the file, you can easily set WireGuard to initialize the VPN on startup if your OS is using systemd:
sudo systemctl enable [email protected]
Similarly, to start or stop the service:
sudo systemctl start [email protected]
sudo systemctl stop [email protected]
Android or iOS client
To turn your conf file into a qr code use:
qrencode -t ansiutf8 < wg0.confSet up DNS on the server
From: https://askubuntu.com/questions/1032450/how-to-add-dnsmasq-and-keep-systemd-resolved-18-04
Install openresolv on client
apt install openresolvInstall dnsmasq on server
apt install dnsmasq
nano -w /etc/dnsmasq.conf
server=168.63.129.16 #Azure
#server=176.103.130.130, 176.103.130.131 #Adguard
interface=lo
listen-address=10.5.5.1
bind-interfacesMake DNSMasq start after our wg-quick service:
systemctl edit dnsmasqpaste
[Unit]
[email protected]
[email protected]
Firewall on server
Allow udp port 51820 through your firewall in whatever cloud service you are using.
Allow Wireguard and DNS through local ufw firewall
ufw allow proto udp from any to any port 51820
ufw allow proto tcp from any to any port 53
From: https://ubuntu.com/server/docs/security-firewall
Make sure to edit the firewall policy’s in your cloud server’s management dashboard as well to allow port 52820. In my case, Azure.
sudo ufw status
Status: active

To                         Action      From
--                         ------      ----
22                         ALLOW       Anywhere
51820                      ALLOW       Anywhere
53                         ALLOW       Anywhere
/etc/default/ufw change the DEFAULT_FORWARD_POLICY to “ACCEPT”:
DEFAULT_FORWARD_POLICY="ACCEPT"
Then edit /etc/ufw/sysctl.conf and uncomment:
net/ipv4/ip_forward=1
Now add rules to the /etc/ufw/before.rules file. The default rules only configure the filter table, and to enable masquerading the nat table will need to be configured. Add the following to the top of the file just after the header comments:
# nat Table rules
*nat
:POSTROUTING ACCEPT [0:0]

# Forward traffic from eth1 through eth0.
-A POSTROUTING -s 10.5.5.0/24 -o eth0 -j MASQUERADE

# don't delete the 'COMMIT' line or these nat table rules won't be processed
COMMIT
sudo service ufw restartTest what is my ip, and dns leak
Gnome shell Indicator extension: https://extensions.gnome.org/extension/3160/wireguard-indicator/
Add a quicklaunch shortcut: https://blog.linuxserver.io/2019/11/24/connect-an-ubuntu-client-to-opnsense-wireguard-tunnel-with-a-gui-toggle-in-gnome/
]]>Open Terminal from dash:
sudo apt install dl-youtube
dl-youtube YOUTUBE-URL #Copy and paste from your browser
sudo snap install shotcut --classic
shotcut &Shotcut Manual:
http://write.flossmanuals.net/introduction-to-video-editing-with-shotcut/about-this-guide/
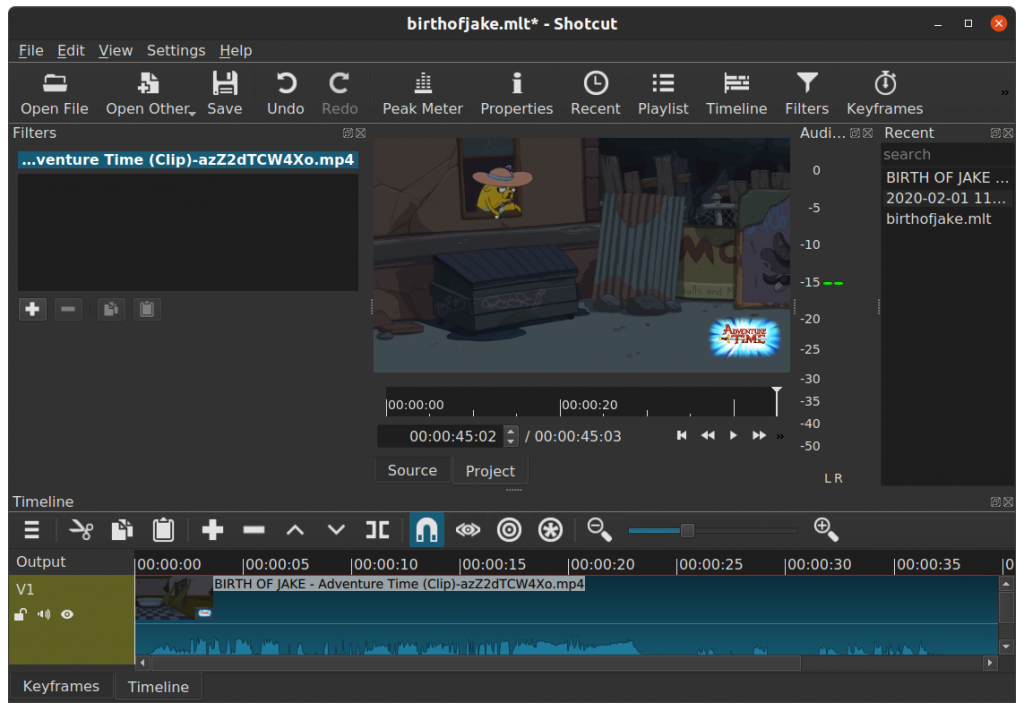
dl-youtube supports many other sites. Visit list here:
https://ytdl-org.github.io/youtube-dl/supportedsites.html
- Why do you want to be private? (Threat Model)
- Create list of all your accounts online.
- Search for all your publicly accessible data.
- Compartmentalize your activities (Use unique names, phone numbers, email addresses, and passwords)
- Cleanup your data
- Use open source software
- Keep devices off
- Use the security software below
Privacy Tools: https://www.privacytools.io/
Privacy Podcast: https://inteltechniques.com/podcast.html
- Services:
- Phone numbers:
- Credit card numbers: Capital One temporary credit card #’s eno
- Password Managers: clipperz.is, lastpass.com
- Search: duckduckgo.com
- Email & VPN: Protonmail.com, ProtonVPN.com
- Phone:
- https://arstechnica.com/tech-policy/2020/08/beware-of-find-my-phone-wi-fi-and-bluetooth-nsa-tells-mobile-users/
- Open source OS: LineageOS
- Open source app store framework: Microg, fdroid, etc…
- Firewall: NetGuard
- Anonymizing: Orbot
- Encrypted phone, video, chat: Signal
- Encrypt traffic: ProtonVPN, AdguardVPN, Wireguard
- Secure Email: ProtonMail
- Secure Browser: https://www.androidauthority.com/best-privacy-web-browsers-android-1084899/
- Adblock: Blokada, Adguard
- Bandwidth Monitor: Network Log, Glasswire
- Have your two factor authentication using Google Authenticator on a non primary phone.
- Computer
- OS: Ubuntu or: https://www.privacytools.io/operating-systems/
- Firewall: ufw
- Adblock: Adguard Browser Extension
- Bandwidth Monitor: Vitals Gnome Shell extension
- Secure Browser: Firefox, Brave, etc…
- Anti-malware: ClamAV, chkrootkit, rkhunter, sophos?
- Intrusion Detection (IDS): Tripwire
- Log checker: Logcheck
- Router:
- VPN: Wireguard
- OS: OpenWRT, or Custom Ubuntu
- Adblock: Adguard Home
- Anonymizing: Tor
Rather then setting up Adguard home, and Tor on your local router. I like the idea of just setting up Wireguard to create a VPN to a cloud server that runs Adblock home, and Tor. I call it a secure cloud gateway:
/how-to-set-up-a-secure-internet-gateway-using-wireguard,-tor,-and-adguard-home-on-ubuntu-20-04
https://en.wikipedia.org/wiki/Link_aggregation
Broadband bonding is a type of channel bonding that refers to aggregation of multiple channels at OSI layers at level four or above. Channels bonded can be wired links such as a T-1 or DSL line. Additionally, it is possible to bond multiple cellular links for an aggregated wireless bonded link.
Previous bonding methodologies resided at lower OSI layers, requiring coordination with telecommunications companies for implementation. Broadband bonding, because it is implemented at higher layers, can be done without this coordination.[24]
Commercial implementations of Broadband Channel Bonding include:
- Mushroom Networks’ Broadband Bonding Service [25]
- Connectify’s Speedify fast bonding VPN – software app for multiple platforms: PC, Mac, iOS and Android [26]
- Peplink’s SpeedFusion Bonding Technology [27]
- Viprinet’s Multichannel VPN Bonding Technology [28]
- Elsight’s Multichannel Secure Data Link [29]
- Synopi’s Natiply Internet Bonding Technology [30]
My journey for usable internet from worse to best on unstable lines:
Speedify on RPi -> OpenMPTCProuter(best of all for TCP only + aggregate) -> borrowed Peplink -> Glorytun UDP (bad with packet loss, even at 1% limiter) -> ExitLag -> Engarde (no aggregation), finally done 
Bonding without aggregation
From: https://github.com/porech/engarde
Site to Site Bonding
https://blog.muthuraj.in/2020/06/high-throughput-site-to-site-vpn-using.html
Ubiquity Edgerouter X on both ends
Load-balancing:
Ubiquity Edgerouter X
OpenWRT MWAN3
https://github.com/bertrandmartel/openwrt-mwan-config

Inspired by this portable secure gateway, I set up my own secure cloud gateway.
Using these three services, Wireguard VPN, Adguard Home, and Tor Anonymizing Proxy. Although TOR doesn’t recommend using TOR in conjunction with VPN’s or proxies, I like this setup the best. For this to work you need a router that can support Wireguard. I use a Netgear r6220 with the Linux based open source router OS, Openwrt. You can easily use any computer that runs Ubuntu instead.
The router I used: https://openwrt.org/toh/netgear/netgear_r6220
Configure your local router
Flash OpenWRT
Set Password
Set LAN subnet
Set Static DHCP lease for desktop
Set name and password for both Wifi Networks
Set Adguard DNS: 176.103.130.130, 176.103.130.131 on wan interface.
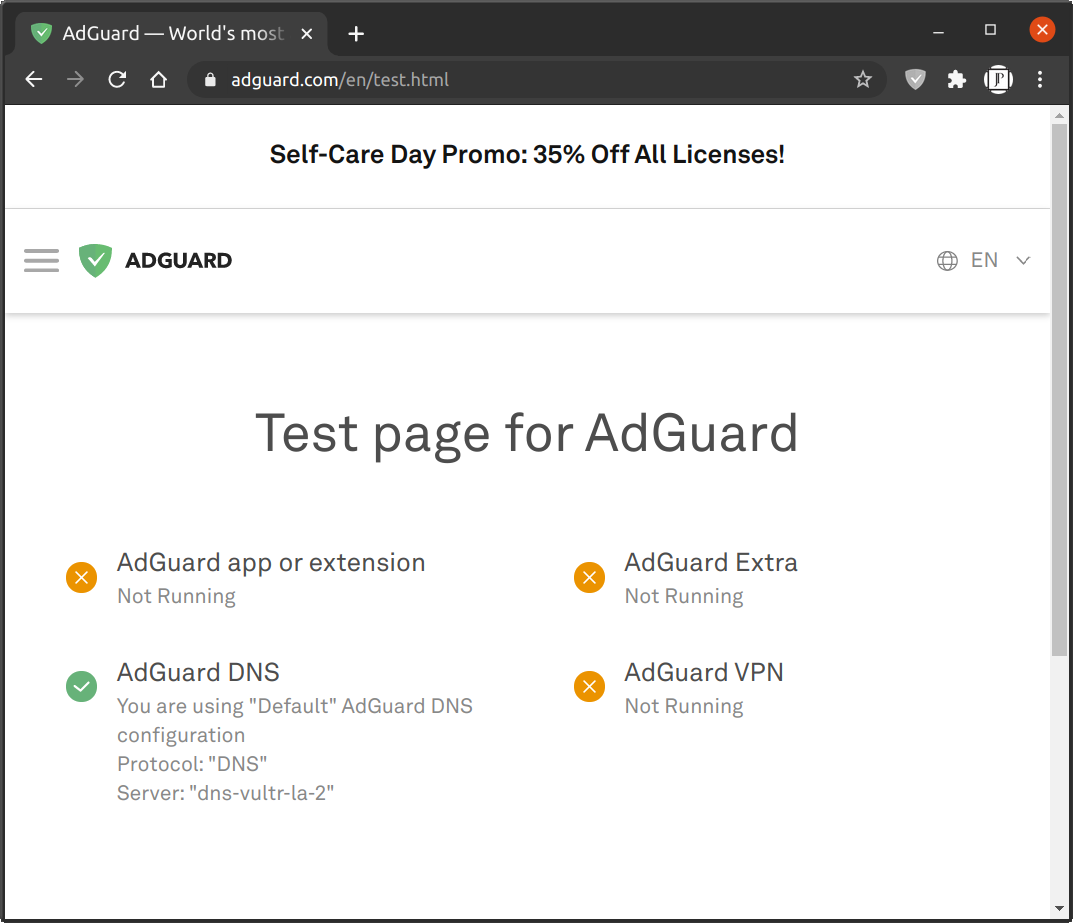
Update software lists..
Install nano, curl, ca-bundle, wireguard, etc..
opkg update
opkg install nano curl ca-bundle luci-app-wireguard
reboot
Wireguard
Set up Wireguard on your router with the below guide:
https://www.azirevpn.com/support/guides/router/openwrt/wireguard
Ignore the AzireVPN specific parts.
Time
From: https://forum.openwrt.org/t/initiate-wireguard-after-ntp-success/14751/52
A the end of the guide it says you have to sync the time with the browser after every reboot, because the router does not have a real time clock (RTC). Wireguard needs the time to connect to the other endpoint. However, I found that if you leave the OpenWRT time in UTC, then it shouldn’t need you to do that.
MTU
After making all these changes my upload speeds were terribly slow. To fix this I had to change the MTU of Wireguard interface to 1360. Stop the interface before changing the MTU I think Maybe because I use AT&T 4G which I think has a MTU of 1420.
QOS (SQM – Smart Queue management)
From: https://openwrt.org/docs/guide-user/network/traffic-shaping/sqm
Even if you have nice low latency, low jitter, and high bandwitch up and down you can still experience slow internet. Especially if you do any uploading. Some people call this “buffer bloat”. SQM can mitigate that by managing your traffic to not saturate your upload or download.
You can test your buffer bloat here: http://www.dslreports.com/speedtest
opkg update && opkg install luci-app-sqm
reboot
Play with Download and Upload values until you get good speeds with no buffer bloat.
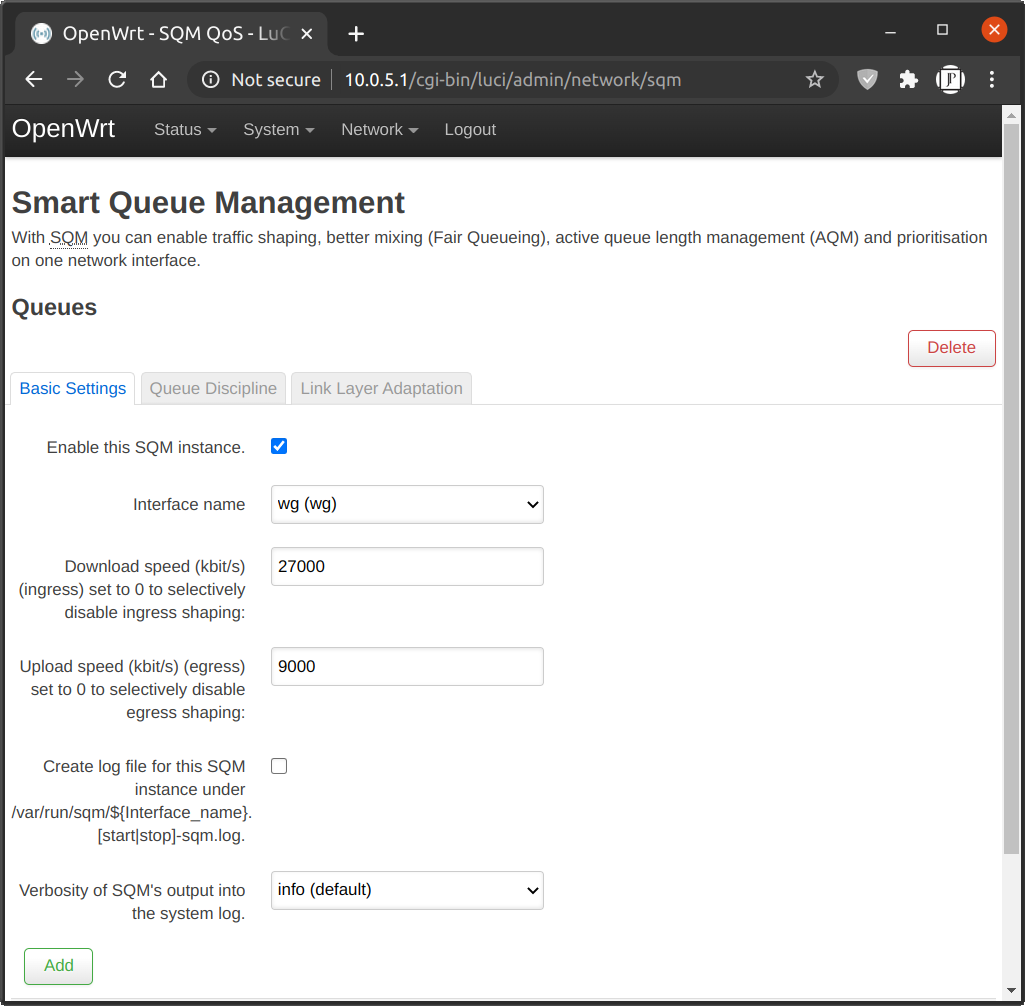
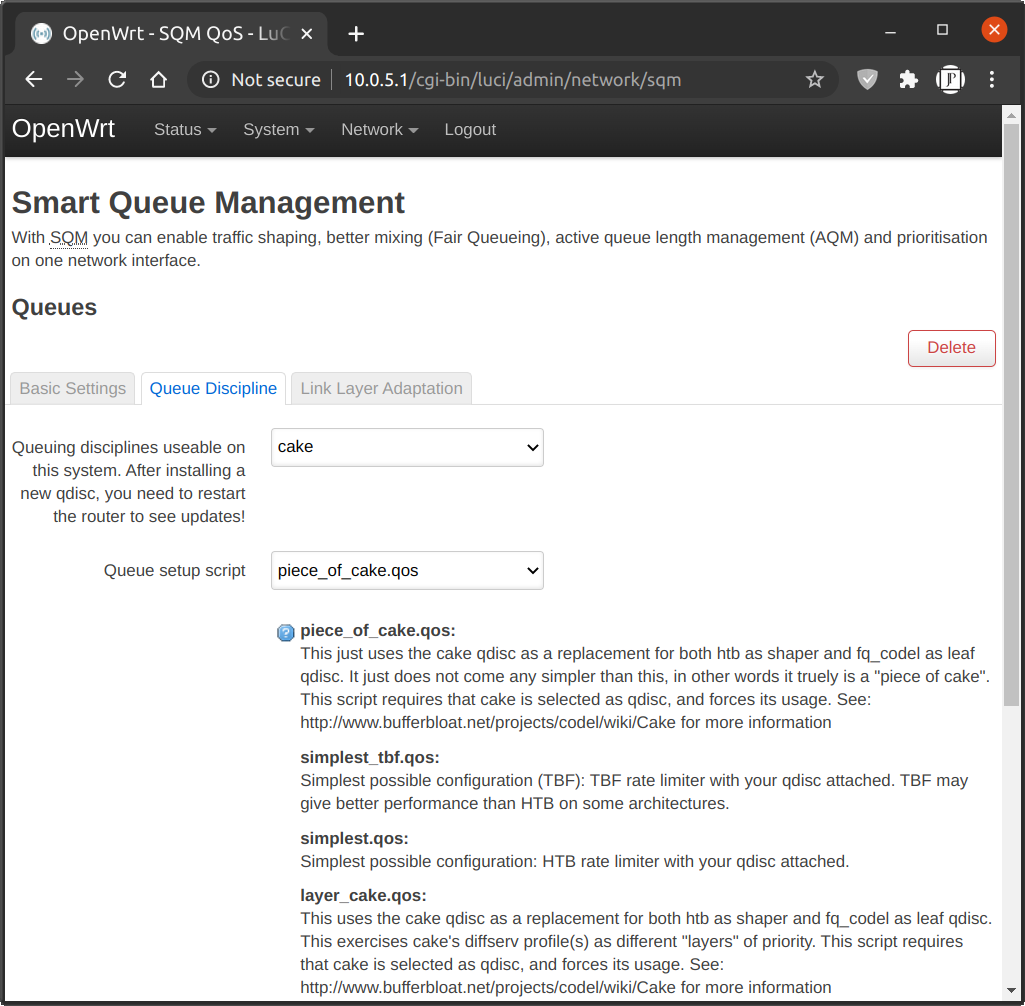
Configure your cloud server
I used Ubuntu 20.04 for my cloud server.
Follow the above guide.

Results: Over VPN with SQM.
The below needs more testing and fleshing out…
AdGuardHome (Optional)
Just using the AdGuard DNS is sufficient for most people, but if you’d like more control over your block lists, you can also install Adguard Home to either the Router, or the cloud gateway.
Gateway: For the gateway it can be done by using the below instructions, but I didnt have luck with the snap. This should let you configure the DNS lists locally.
https://github.com/AdguardTeam/AdGuardHome/wiki/Getting-Started#installation
sudo snap install adguard-home
Or,
Router: https://forum.openwrt.org/t/howto-running-adguard-home-on-openwrt/51678
Adding Tor to the Cloud gateway, or the local router.
To be continued…
https://trac.torproject.org/projects/tor/wiki/doc/TransparentProxy
https://www.linuxuprising.com/2018/10/how-to-install-and-use-tor-as-proxy-in.html
]]>I’d like thank ANTHONY NGUYEN @ https://atwing.net for the above article. It really widened my perspective with what could be done with voice commands and smart devices. =] That is where I was introduced to IFTTT, MQTT, and Home Assistant. By connecting them to Google Assistant, you can do ANYTHING with your voice. Like execute bash commands. Adding Discord into the mix you can have all responses read back to you. This allows you to have complete hands free control.
However, The following article is about a simpler way of controlling smart devices. Specifically, a waterproof thermometer, and a smart plug.
I purchased the Unibot WS1 Wireless sensor. Thus creating my own smart weather station that can automatically react to temperature, humidity, ambient light and vibration. The optional UbiBot DS18B20 waterproof sensor allows you to monitor the temperature of liquids as well. If we add a few smart plugs and relays in the mix it will then be able to turn on and off heaters (120v, 240v, 24v, or old millivolt systems), fans, AC, humidifiers, lights, and anything else that can be plugged in. I purchased the https://amzn.to/36YCCdX. Simply because it was the least expensive smart plug on Amazon that was rated for 13 amps, and also supported IFTTT.
In my case, I’d like to use it to monitor my softub, and turn it off when it reaches a certain temperature. Normally this is accomplished by the integrated circuit of the hot tub. However, I had to bypass all that and wire the the 120v AC directly to the heat pump when my circuit boards kept burning out. This also allows me to create other conditions like only heat it during non-peak hours. I have PGE EV rates so it makes a HUGE difference when you use your power.

To accomplish all this I had to install the Ubitbot app, the smart life app. Then configure the two below cloud services:
If This Then That
IFTTT is the free way to do more with hundreds of the apps and devices you love, including Twitter, Dropbox, Evernote, Nest, Fitbit, Amazon Alexa, and Google Assistant.
Apilio
To extend IFTTT you may need to use this.
https://hackernoon.com/what-smart-home-iot-platform-should-you-use-2554ea213df1
We start with a local Ubuntu computer running homemate-bridge to connect to the MQTT broker. We will use Cloud MQTT as a broker to connect our plugs to our Home Assistant. We will be installing Home Assistant on an Ubuntu Google Cloud micro instance. We set up rules @ IFTTT.com to connect it all to Google assistant. A Google home mini is used to accept voice commands. Optionally, we can extend this setup to run any Linux bash command on the local machine. For example turning computers on using wake-on-lan, and off using SSH.
Yonomi
The simple smart home integration platform.
Yonomi makes it easy for innovators to build great apps and devices that connect with the smart home.
DIY
PlatformIO
Tasmota – ESP8266 firmware
https://github.com/arendst/Tasmota
Jeedom
INNOVATIVE HOME AUTOMATION
GET JEEDOM
Losant
RemoteMe
Control and collect data from IoT devices from anywhere around the worldUsing web pages hosted for free and mobile applications fully customisable
EasyIOT Cloud
Our goal is to create secure, reliable and cheap platform for Internet of Things at your home. We will provide DIY tutorials to build IoT using components like Raspbery Pi, Arduino, NRF24L01+, ESP8266 and our EasyIoT Cloud. With help of EasyIoT community we will make IoT world Easy Internet of Things world (EasyIoT) .
EasyIoT framework is not home automation. Of course you can build home automation system, but you can build much more. Do you need advanced alarm system, remote plant irrigation system, solar cell charger control, SMS controlled heater, door opener, hydroponic system or even automation process control system. All this you can easily build with EasyIoT framework.BlynkEasyIoT framework is not home automation. Of course you can build home automation system, but you can build much more. Do you need advanced alarm system, remote plant irrigation system, solar cell charger control, SMS controlled heater, door opener, hydroponic system or even automation process control system. All this you can easily build with EasyIoT framework.
gBridge
gBridge.io: Control anything with voice commands
gBridge’s open interface allows you to integrate Google Home and Alexa easily in your Smart Home.
gBridge is…
…an application, that provides a Bridge between Google Assistant smart home devices and MQTT, an open and available messaging protocol that is supported by many smart home applications and devices.
CloudMQTT
Hosted message broker for the Internet of Things
Perfectly configured and optimized message queues for IoT, ready in seconds.
Adafruit IOBlynkAdafruit IO
The internet of things for everyoneThe easiest way to stream, log, and interact with your data. We play nice with any device. Our simple client libraries work with the most popular devices such as the Adafruit Feather Huzzah, ESP8266, Raspberry Pi, Arduino, and more.
Selfhosted
Blynk
OpenHAB
Home Assistant
Scrypted
All product links are affiliate links.
]]>For the backgrounds to work you;ll need a solid color background. I ordered this green screen: https://amzn.to/2ZhoAkK.
I use Google meets, but this should work with any video conferencing software. (Google meets should be rolling out virtual backgrounds, and blurring in the coming months.) From: https://cloud.google.com/blog/products/g-suite/introducing-some-new-meet-features
Install OBS
sudo snap install obs-studioInstall V4L2
sudo apt install v4l2loopback-dkmsCreate dummy video device, and make is persist across reboots.
create the config file:
nano -w /etc/modules-load.d/obscam.confAdd the below contents:
v4l2loopback devices=1 video_nr=10 card_label="OBS Cam" exclusive_caps=1Next time you reboot the module should be automatically loaded. Manually add the module with the currently running system:
sudo modprobe v4l2loopback devices=1 video_nr=10 card_label="OBS Cam" exclusive_caps=1OBS Plugin obs-v4l2sink
NOTE: This step is no longer necessary in modern version of OBS. As it is now a base feature. You may need to restart OBS to see the new “Start Virtual Cam” button to appear.
You may have to install libobs, and libobs-dev
sudo apt install libobs libobs-devDownload and Compile OBS plugin obs-v4l2sink
sudo apt install qtbase5-dev
git clone --recursive https://github.com/obsproject/obs-studio.git
git clone https://github.com/CatxFish/obs-v4l2sink.git
cd obs-v4l2sink
mkdir build && cd build
cmake -DLIBOBS_INCLUDE_DIR="../../obs-studio/libobs" -DCMAKE_INSTALL_PREFIX=/usr ..
make -j4
sudo make install
Now start OBS Studio and configure the V4L2 video output to /dev/video10 via the new menu item “Tools”->”V4L2 Video Output”:

Add a Chromakey filter.
Here is a good guide: https://gamingcareers.com/guides/green-screen-in-obs-slobs/
Add border, presets, LUTs, transitions, etc…
Add scenes like thank you, thumbs up, screen sharing, other camera angles etc…
Using Google Meet with the Virtual Camera
Start a Google Meet via https://meet.google.com/ and go to settings:

More Reading
Pretty cool virtual background way from scratch: https://elder.dev/posts/open-source-virtual-background/
Another cool virtual background: https://github.com/floe/deepbacksub
I’m also testing Webcamoid: https://webcamoid.github.io/. (Seems to crash quite a bit.)
]]>Parsec is the only option that allows you to play ANY Windows game. You can then stream Geforce Now, Google Stadia, Steam, Epic Games, Origins, and any other standalone windows game. You can also use it as performant remote desktop for CAD or other graphics heavy programs.
It allows you to reduce the framerate to 30fps, the resolution to 1280×720, and the bitrate to 1Mbps. Even though I have “3Mbps” DSL, in the real word it’s more like 2.5Mbps. When I set the bitrate to 2Mbps it saturates my bandwidth sometimes. I found the best was to set bitrate to 1Mbps or 2Mbps depending on the time of day, or if there was anyone else using it.
Create your cloud virtual machine in Azure, and install parsec
From: https://medium.com/azure-cloud/a-killer-guide-for-cloud-gaming-on-azure-march-2020-1aa56d13fba3
- Connecting to the VM with TeamViewer, open a prompt as admin (Start Menu -> search for “cmd” -> right click on command prompt and select Run as Administrator).
- Go to the C:\Program Files\NVIDIA Corporation\NVSMI folder, and run nvidia-smi. This will get you a table that gives you both what mode your Tesla is set to (which will be TCC by default, check under the heading TCC/WDDM), and the GPU_ID, which is the thing under the Bus-Id heading.
- Run nvidia-smi -g {GPU_ID} -dm {0|1} with your Bus-Id and 0 to set it to WDDM, like so (the GPU_ID may differ):
nvidia-smi -g 1:00:00.0 -dm 0
Instead of Teamviewer you can use the open source DWService: https://www.dwservice.net/
If using a different cloud provider, check out:
https://github.com/parsec-cloud/Parsec-Cloud-Preparation-Tool
My parsec config:
# All configuration settings must appear on a new line.
# All whitespace, besides the newline character '\n', is ignored.
# All settings passed via the command line take precedence.
# The configuration file will be overwritten by Parsec when changing settings,
#   so if you edit this file while Parsec is running, make sure to save this file
#   and restart Parsec immediately so your changes are preserved.

# Example:
# encoder_bitrate = 10

app_run_level = 3
app_discord = 0
client_vsync = 0
client_decoder_index = 2
client_decoder_h265 = true
server_resolution_x = 1280
server_resolution_y = 720
encoder_bitrate = 2
encoder_fps = 30
encoder_fps_1 = 30
I installed parsec from: https://parsecgaming.com/downloads/
I use Ubuntu 20.04 and and Nvidia Geforce 1050ti video card. I had to install this tweak to get Parsec to do hardware decoding using libva-vdpau vaapi. I borrowed it from the moonlight project snap.
I got this error when running vainfo to verify the VAAPI-VDPAU wrapper.
vainfo
error: XDG_RUNTIME_DIR not set in the environment.
libva info: VA-API version 1.7.0
libva info: Trying to open /usr/lib/x86_64-linux-gnu/dri/nvidia_drv_video.so
libva info: va_openDriver() returns -1
vaInitialize failed with error code -1 (unknown libva error),exit
My solution was to borrow nvidia_drv_video.so from moonlight, I have not idea why this was not installed with the proprietor nvidia drivers.
sudo snap install moonlight
sudo ln -s /snap/moonlight/current/usr/lib/x86_64-linux-gnu/dri/nvidia_drv_video.so /usr/lib/x86_64-linux-gnu/dri/nvidia_drv_video.so
It used to be part of the vdpau-va-driver package, but that is no longer available on 20.04. It’s replaced by the mesa-va-driver, which does not contain it.
Parsec Shortcuts
From: https://support.parsecgaming.com/hc/en-us/articles/115003632451-Parsec-Shortcuts
CLIENT MENU OPTIONS
- Interact with chat – ctrl + shift + c
- Toggle menu – ctrl + shift + m
- Toggle windowed mode – ctrl + shift + w
- Detach mouse – ctrl + alt + z
- Immersive mode – ctrl + shift + i
EXITING THE STREAM
- Quitting the Mac Application – command + Q or command + W
- Quitting the Windows Application – alt + F4
- Quitting the Raspberry Pi Application – ctrl + alt + ~
- Quitting the Linux Application – ctrl + alt + ~
FRIEND SHORTCUTS
- Allowing access to a friend trying to make a connection who doesn’t have admin access – ctrl + F1 when they try to connect
- Kick everyone from the stream all at once (the panic button!) – ctrl + F3
IMMERSIVE MODE
- Toggling the Windows hotkey passthroughs – ctrl + shift + i
- This allows you to send data to the host when you use ctrl + alt + delete, the Windows button, alt + tab
Good too: https://github.com/mcblum/ddclient-cloudflare-ubuntu
Prepare
- Create the subdomain in Cloudflare, and set to DNS only. Unless you are hosting a website at that subdomain.
- Grab your Global API found under “My profile –> API tokens”
- On the server install ddclient.
sudo apt install ddclient libdata-validate-ip-perlGrab the latest version (No longer needed in 22.04)
wget https://github.com/ddclient/ddclient/archive/v3.9.1.tar.gz
tar -xf v3.9.1.tar.gz
sudo cp ddclient-3.9.1/ddclient /usr/sbin/ddclient
rm -rf v3.9.1.tar.gz ddclient-3.9.1/
sudo mkdir /etc/ddclient
sudo mv /etc/ddclient.conf /etc/ddclient/
Configuration
sudo nano -w /etc/ddclient.conf
# Configuration file for ddclient generated by debconf
#
# /etc/ddclient.conf
# Configuration file for ddclient

##
## Global Config
##
daemon=500
ssl=yes

##
## sub.domain.tld - Cloudflare ## Update Me
##
protocol=cloudflare
use=web
[email protected] ## Update Me with cloudflare login email
password=abcredactedxyz ## Update Me with cloudflare Global API found under "My profile --> API tokens"
zone=domain.tld ## Update Me with the domain
sub.domain.tld ## Update Me with the subdomain
To test:
sudo ddclient -query
sudo ddclient -daemon=0 -verbose -noquiet
sudo service ddclient status