Route an entire VLAN through a WireGuard tunnel to an Azure VM, so every device on that network exits the internet from a cloud IP — with ad blocking, DNS encryption, and a kill switch. No split tunneling, no DNS leaks, no IPv6 leaks.
The result: connect to a dedicated “vpn” WiFi SSID at home, and all your traffic exits through Azure. Disconnect, and you are back on your normal internet. Simple for the user, robust underneath.
Architecture
Devices on VLAN 9 ("vpn" WiFi)
       ↓ (policy routing)
OpenWrt router (gatekeeper) ──WireGuard──→ Azure VM (gig)
       ↓                                      ↓
  AdGuard Home (LAN DNS)              AdGuard Home (VPN DNS)
  Cloudflare DoT upstream             Cloudflare DoT upstream
Key components:
- gatekeeper — OpenWrt 24.10 router (x86, i7, 16GB RAM) handling all VLANs, firewall, and policy routing
- gig — Azure Ubuntu 24.04 VM acting as the WireGuard exit node
- VLAN 9 — Dedicated VPN network (10.0.9.0/24) with its own WiFi SSID, DHCP, and firewall zone
- AdGuard Home — Network-wide ad blocking on both ends, with encrypted DNS upstream
Step 1: WireGuard Tunnel
Azure VM (gig)
Install WireGuard and enable IP forwarding:
sudo apt install wireguard
sudo sysctl -w net.ipv4.ip_forward=1
echo "net.ipv4.ip_forward=1" | sudo tee -a /etc/sysctl.conf
Generate keys and create /etc/wireguard/wg0.conf:
[Interface]
Address = 10.5.34.1/24
ListenPort = 51820
PrivateKey = <server-private-key>
PostUp = iptables -t nat -A POSTROUTING -o eth0 -j MASQUERADE
PostDown = iptables -t nat -D POSTROUTING -o eth0 -j MASQUERADE

[Peer]
# gatekeeper
PublicKey = <gatekeeper-public-key>
AllowedIPs = 10.5.34.10/32
Enable and start:
sudo systemctl enable wg-quick@wg0
sudo systemctl start wg-quick@wg0
Open UDP port 51820 in the Azure Network Security Group and in UFW:
sudo ufw allow 51820/udp
sudo ufw allow in on wg0 from 10.5.34.0/24
OpenWrt Router (gatekeeper)
Install WireGuard:
opkg update
opkg install wireguard-tools kmod-wireguard
Configure the interface via UCI:
uci set network.wireguardgig=interface
uci set network.wireguardgig.proto=wireguard
uci set network.wireguardgig.private_key=<gatekeeper-private-key>
uci add_list network.wireguardgig.addresses=10.5.34.10/24
uci set network.wireguardgig.mtu=1420
uci set network.wireguardgig.metric=90

uci add network wireguard_wireguardgig
uci set network.@wireguard_wireguardgig[-1].public_key=<server-public-key>
uci set network.@wireguard_wireguardgig[-1].endpoint_host=<your-vm-hostname>
uci set network.@wireguard_wireguardgig[-1].endpoint_port=51820
uci set network.@wireguard_wireguardgig[-1].persistent_keepalive=25
uci add_list network.@wireguard_wireguardgig[-1].allowed_ips=0.0.0.0/0

uci commit network
/etc/init.d/network restart
Important: Add a static route to pin the WireGuard endpoint through your real WAN, so the tunnel does not try to route itself through itself:
uci add network route
uci set network.@route[-1].interface=wan
uci set network.@route[-1].target=<azure-vm-public-ip>/32
uci set network.@route[-1].gateway=<your-wan-gateway>
uci commit network
Step 2: VLAN 9 and Policy Routing
Create a dedicated VPN network on VLAN 9. On OpenWrt:
# Bridge and VLAN interface
uci set network.vpn=interface
uci set network.vpn.proto=static
uci set network.vpn.ipaddr=10.0.9.1
uci set network.vpn.netmask=255.255.255.0
uci set network.vpn.device=br-lan.9
Set up policy routing so VLAN 9 traffic uses the WireGuard tunnel instead of the normal WAN:
# Default route through tunnel in table 2
uci add network route
uci set network.@route[-1].interface=wireguardgig
uci set network.@route[-1].target=0.0.0.0/0
uci set network.@route[-1].table=2

# Rule: traffic from VPN zone uses table 2
uci add network rule
uci set network.@rule[-1].src=10.0.9.0/24
uci set network.@rule[-1].lookup=2

uci commit network
/etc/init.d/network restart
Devices on VLAN 9 now exit through Azure. Devices on every other VLAN are unaffected.
Step 3: Firewall — Kill Switch and Leak Prevention
The firewall is critical. If the tunnel drops, VPN traffic must NOT fall back to the regular WAN.
# VPN zone — devices on VLAN 9
uci add firewall zone
uci set firewall.@zone[-1].name=vpn
uci set firewall.@zone[-1].input=REJECT
uci set firewall.@zone[-1].output=ACCEPT
uci set firewall.@zone[-1].forward=REJECT
uci add_list firewall.@zone[-1].network=vpn

# WAN guard zone — the WireGuard tunnel exit
uci add firewall zone
uci set firewall.@zone[-1].name=wanguard
uci set firewall.@zone[-1].input=REJECT
uci set firewall.@zone[-1].output=ACCEPT
uci set firewall.@zone[-1].forward=REJECT
uci add_list firewall.@zone[-1].network=wireguardgig
uci set firewall.@zone[-1].masq=1
uci set firewall.@zone[-1].mtu_fix=1

# Only forwarding: vpn → wanguard (kill switch)
uci add firewall forwarding
uci set firewall.@forwarding[-1].src=vpn
uci set firewall.@forwarding[-1].dest=wanguard

# Allow DNS and DHCP into VPN zone
# ... (DNS on port 53, DHCP on port 67)

# Drop all IPv6 from VPN zone
uci add firewall rule
uci set firewall.@rule[-1].name=VPN-Drop-IPv6
uci set firewall.@rule[-1].src=vpn
uci set firewall.@rule[-1].family=ipv6
uci set firewall.@rule[-1].proto=all
uci set firewall.@rule[-1].target=DROP

uci commit firewall
/etc/init.d/firewall restart
There is no vpn → wan forwarding. If the tunnel is down, traffic is dropped — not leaked.
Step 4: DNS — No Leaks, With Ad Blocking
DNS is the most common VPN leak. We handle it in layers.
AdGuard Home on gig (VPN DNS)
Install AdGuard Home on the Azure VM, listening only on the WireGuard address:
curl -s -S -L https://raw.githubusercontent.com/AdguardTeam/AdGuardHome/master/scripts/install.sh | sh
Configure via the web UI at http://10.5.34.1:3000:
- DNS listen address:
10.5.34.1:53 - Upstream DNS:
tls://1.1.1.1andtls://1.0.0.1(Cloudflare DNS-over-TLS) - Enable DNSSEC and optimistic caching
- Enable the AdGuard DNS filter (~163K rules), AdAway, and Peter Lowe blocklists
Both the web UI and DNS are bound to the WireGuard interface only — not accessible from the public internet.
AdGuard Home on gatekeeper (LAN DNS)
Install from opkg and configure to listen on 127.0.0.1:5353, then point dnsmasq at it:
opkg install adguardhome

# Point dnsmasq at AdGuard Home instead of Stubby
uci add_list dhcp.@dnsmasq[0].server='127.0.0.1#5353'
uci set dhcp.@dnsmasq[0].noresolv=1
uci commit dhcp
/etc/init.d/dnsmasq restart
This replaces Stubby — AdGuard Home handles DNS-over-TLS upstream natively. The DNS chain becomes: dnsmasq (:53) → AdGuard Home (:5353) → Cloudflare DoT.
DHCP: Force VPN Clients to Use Tunnel DNS
uci set dhcp.vpn.dhcp_option='6,10.5.34.1'
uci commit dhcp
VPN clients receive 10.5.34.1 as their DNS server. Since this IP is on the WireGuard subnet, all DNS queries go through the tunnel to AdGuard Home on gig.
DNS Intercept: Catch Hardcoded DNS
Some devices (Chromecast, Android) ignore DHCP and hardcode DNS servers like 8.8.8.8. A firewall DNAT redirect catches them:
uci add firewall redirect
uci set firewall.@redirect[-1].target=DNAT
uci set firewall.@redirect[-1].name='Intercept DNS VPN'
uci set firewall.@redirect[-1].src=vpn
uci set firewall.@redirect[-1].src_dport=53
uci set firewall.@redirect[-1].dest=wanguard
uci set firewall.@redirect[-1].dest_ip=10.5.34.1
uci set firewall.@redirect[-1].dest_port=53
uci set firewall.@redirect[-1].proto='tcp udp'
uci commit firewall
/etc/init.d/firewall restart
Any DNS query leaving the VPN zone gets redirected to AdGuard Home on gig, through the tunnel. No exceptions.
IPv6 Leak Prevention
IPv6 can leak your real address even when IPv4 is tunneled. Disable it at four layers:
- Sysctl:
net.ipv6.conf.br-lan/9.disable_ipv6=1 - DHCP: RA disabled, DHCPv6 disabled on VPN interface
- Firewall: DROP all IPv6 from VPN zone
- DHCP options: No IPv6 DNS servers advertised
Step 5: Performance Tuning
Out of the box, the tunnel achieved ~305/332 Mbps (up/down). After tuning: ~390/453 Mbps.
Both Sides
- BBR congestion control — Replaces CUBIC. Better throughput on high-latency links.
net.ipv4.tcp_congestion_control=bbr - TCP buffer tuning — Scale rmem_max/wmem_max for the bandwidth-delay product
- ECN — Reduces retransmits.
net.ipv4.tcp_ecn=1 - MTU 1420 — Standard for WireGuard over Ethernet
Azure VM (gig)
fqqdisc on eth0 and wg0 — BBR needs a pacing-aware qdisc. Without it, BBR falls back to burst-based sending which causes buffer bloat- TCP Fast Open —
net.ipv4.tcp_fastopen=3 - 26MB socket buffers — Sized for the bandwidth-delay product of a ~12ms RTT gigabit link
OpenWrt Router (gatekeeper)
- CAKE SQM on the WAN link — 500/500 Mbps with
natandack-filter. Prevents buffer bloat - CAKE SQM on wireguardgig — Per-flow fairness inside the tunnel. Prevents one bulk download from starving interactive traffic
- RPS (Receive Packet Steering) — Spread softirq across all CPU cores. Persistent via
/etc/hotplug.d/net/99-rps
Step 6: Dedicated VPN WiFi SSID
On an OpenWrt access point, create a 5GHz SSID that bridges to VLAN 9:
uci set wireless.vpn_5g=wifi-iface
uci set wireless.vpn_5g.device=radio2
uci set wireless.vpn_5g.mode=ap
uci set wireless.vpn_5g.ssid=vpn
uci set wireless.vpn_5g.encryption=psk2
uci set wireless.vpn_5g.key=<your-password>
uci set wireless.vpn_5g.network=vpn
uci commit wireless
wifi reload
The AP bridges the “vpn” SSID to VLAN 9. Connect to this SSID and all traffic routes through Azure.
Verifying It Works
From a device on the VPN WiFi:
# Check your exit IP — should be the Azure VM
curl ifconfig.me

# Check DNS — ad domains should be blocked
nslookup ads.google.com
# Expected: 127.0.0.1

# Check for DNS leaks at https://www.dnsleaktest.com
# Should show Cloudflare, not your ISP

# Check for IPv6 leaks at https://ipv6leak.com
# Should show no IPv6 connectivity
Easy Ad Blocking Toggle
AdGuard Home includes a web dashboard with a full query log. You can:
- One-click whitelist any blocked domain from the query log
- Disable protection globally for 10 seconds, 30 seconds, 1 minute, etc.
- Per-client rules for different filtering per device
Access the dashboards at:
- LAN:
http://<router-ip>:3000 - VPN:
http://10.5.34.1:3000(through the tunnel)
For even quicker toggling, the AdGuard Browser Extension lets you disable filtering per-site from the toolbar.
Summary
| Layer | What |
|---|---|
| Tunnel | WireGuard, MTU 1420, BBR, 25s keepalive |
| Routing | VLAN 9 → policy route table 2 → wireguardgig |
| Kill switch | vpn → wanguard only, no vpn → wan forwarding |
| DNS | AdGuard Home on both ends, Cloudflare DoT upstream |
| DNS leak prevention | DHCP option 6 + DNAT intercept for hardcoded DNS |
| IPv6 leak prevention | Disabled at sysctl, DHCP, RA, and firewall |
| Ad blocking | ~173K rules (AdGuard DNS + AdAway + Peter Lowe) |
| Performance | CAKE SQM, RPS, fq qdisc, tuned TCP buffers |
| Access | Dedicated 5GHz WiFi SSID — connect and go |
The whole setup was built and tuned in a single session with Claude Code handling the configuration across both hosts simultaneously — SSH into the router and VM, running commands, testing, and fixing issues in real time.
]]>The most common type of charitable nonprofit organization is a 501(c)(3) organization, also known as a public charity. These organizations are exempt from federal income tax and are eligible to receive tax-deductible donations. The most common type of 501(c)(3) organizations are those that focus on providing education, health care, social services, or other types of charitable work.
Cost
For small starting organizations, the actual fees for starting a nonprofit can be relatively low, especially if the organization takes advantage of online filing options and does not require extensive legal or tax services. However, it’s important to keep in mind that even small nonprofits must still comply with all applicable laws and regulations, and it may be necessary to invest in professional services to ensure compliance and ensure the long-term success of the organization.
| Fee | Description | Amount |
|---|---|---|
| Domain name registration | Fees for registering a domain name for the nonprofit’s website | $10 per year |
| Secretary of State name reservation fee (optional) | Fees for reserving the name of the nonprofit with the California Secretary of State | $10 |
| State filing fee (online) | Filing fee for registering the nonprofit with the California Secretary of State (online) | Free |
| State filing fee (paper copy) (optional) | Filing fee for registering the nonprofit with the California Secretary of State (paper copy) | $5 |
| Employer Identification Number (EIN) | Federal tax ID number required for opening a bank account and filing taxes | Free |
| Bank account setup | Fees for opening a business bank account for the nonprofit | Free |
| Form 1023 filing fee | Filing fee for obtaining tax-exempt status from the IRS | $0 (for most small nonprofits) or $600 |
| California Franchise Tax Board fee | Filing fee for obtaining tax-exempt status from the California Franchise Tax Board | $25 |
| Filing a Statement of Information (Form SI-100) | For providing updated information about your nonprofit to the California Secretary of State. You have 90 days to do this. | $20, every two years |
Making Decisions and Filling out Forms
Establish your mission
How are you going to help? Your business may not engage in political activities and must not overcompensate its members. For Example:
“Our mission is to empower youth in underserved communities by providing access to education, mentorship, and leadership development opportunities. We believe that every young person has the potential to succeed and make a positive impact in their communities, and we strive to create a supportive and inclusive environment that helps them achieve their goals. Through our programs and partnerships, we aim to break down barriers to success and create a more equitable and just society for all.”
Take the nonprofit startup assessment tool
The Nonprofit Startup Assessment Tool is a resource provided by Candid, a nonprofit organization that provides tools and information for nonprofits and philanthropy. The tool is designed to help individuals and organizations that are considering starting a nonprofit understand the steps and considerations involved in the process.
To access the tool, simply follow the link below and scroll down to the “Nonprofit Startup Resources” section. From there, you can click on the “Startup Assessment Tool” link to begin the assessment. The tool will walk you through a series of questions about your organization and provide customized guidance based on your responses.
https://learning.candid.org/resources/nonprofit-startup-resources/
Remember that the tool is just a starting point, and there are many other resources available to help you start and run a successful nonprofit. Good luck on your nonprofit journey!
Find a mentor
 Looking for expert guidance in starting or growing your nonprofit organization? SCORE.org can help!

SCORE is a national nonprofit organization that provides free mentoring services to small business owners and entrepreneurs, including those in the nonprofit sector. Their experienced mentors can offer valuable insights and guidance on a wide range of topics, from business planning and fundraising to marketing and strategic growth.
To request a mentor for your nonprofit organization, simply visit their website and fill out the Mentor Request Form. This form will help pair you with the best mentor based on your specific needs and goals.
Don’t navigate the world of nonprofit entrepreneurship alone – let SCORE help you achieve your goals! Contact them today to get started. 
Visit their website to learn more and fill out the form: https://www.score.org/find-mentor/request-mentor
Create a nonprofit ecosystem blueprint
 A nonprofit ecosystem blueprint is like a business model canvas for nonprofits

It helps break down key components such as  value proposition,
 target beneficiaries,
 key activities,
 revenue streams and
 partnerships. This helps develop a more comprehensive understanding of the organization and create a clear vision, well-designed strategy, and necessary resources to achieve your goals.
| Category | Description |
|---|---|
| KEY PARTNERS | List of organizations, gov’t offices, or individuals to partner with |
| PROGRAMMING | Details on the programming provided to fulfill the mission |
| ORGANIZATIONAL VALUE | Explanation of why the organization is uniquely suited to fulfill its mission and the problems it’s trying to solve |
| CONSUMER RELATIONSHIPS | Strategies for finding consumers to access the programming |
| CONSUMER SEGMENTS | Description of the key demographic for the programming |
| KEY RESOURCES | Physical space, staff, and tools needed to fulfill the mission |
| OUTREACH | Strategies for marketing the organization to consumers and funders |
| COST STRUCTURE | Description of the most expensive elements of the organization and costs that vary with consumer volume |
| FUNDING | Overview of the organization’s funding sources, including committed funding, grants, contracts, and consumer payments |
 Check out this free PDF template to create your own nonprofit ecosystem blueprint: https://drive.google.com/file/d/1mL7Y2UI-Axr50HB95T2imbid9TC5gc1O/view?usp=sharing
This is a presentation: https://prezi.com/wwlfmc-poqfn/nonprofit-ecosystem-blueprint/#
Creating a nonprofit ecosystem blueprint can help you communicate your organization’s vision and strategy to stakeholders and ensure that you have a clear path forward for success. 
Choose a name
- Choose a name for your nonprofit : Make sure the name you choose is not already in use by another organization in California by checking the California Secretary of State’s database:
https://bizfileonline.sos.ca.gov/search/business
- Optional: Reserve your chosen name with the California Secretary of State
 : If the name you’ve chosen is available, you can reserve it with the California Secretary of State by filing a name reservation request. This will prevent someone else from using the same name while you’re completing the other steps in creating your nonprofit. The fee for reserving a name in California is currently $10.00.
- To reserve your chosen name with the California Secretary of State, you’ll need to follow these steps:
- a. Complete the Name Reservation Request form: You can find the form on the California Secretary of State’s website:
https://bizfileonline.sos.ca.gov/forms/business - b. Submit the form and fee: You can submit the form and fee by mail or in person at the California Secretary of State’s office. You can find more information on submitting the form and fee on the California Secretary of State’s website.
- Once your name reservation request is approved, your chosen name will be reserved for 60 days, giving you time to complete the other steps in creating your nonprofit.
- You’ll also want to make sure that the website domain name is available, so you can check availability on a domain registrar such as Google Domains:
https://domains.google.com/registrar/search
To register your domain name, you’ll need to follow these steps:- a. Search for your desired domain name: Use the search function on the domain registrar’s website to check if your desired domain name is available.
- b. Choose a domain extension: Choose a domain extension, such as .org, .com, .net, etc.
- c. Complete the registration process: Fill out the necessary information and complete the registration process by paying the fee.
- Once your domain name is registered, you’ll have a unique web address for your nonprofit, which you can use to create a website and establish an online presence.
File
File the Articles of Incorporation with the California Secretary of State  : To officially create your Nonprofit Public Benefit Corporation in California, you’ll need to file Articles of Incorporation with the California Secretary of State. The Articles of Incorporation must include specific information about your nonprofit, including its name, purpose, and the names and addresses of the incorporators. You can find the form for the Articles of Incorporation on the California Secretary of State’s website:
https://www.sos.ca.gov/business-programs/business-entities/forms/
Once you’ve completed the Articles of Incorporation and submitted them along with the required fee to the California Secretary of State, your Nonprofit Public Benefit Corporation will be officially recognized in California.
The next steps are:
- Obtain an Employer Identification Number (EIN) from the IRS : Your nonprofit will need an EIN, also known as an Employer Identification Number, in order to open a bank account, file taxes, and engage in other financial transactions. You can obtain an EIN from the IRS for free by completing Form SS-4: https://www.irs.gov/forms-pubs/about-form-ss-4 or online at https://sa.www4.irs.gov/modiein/individual/index.jsp
- Open a bank account for your nonprofit : Once you have obtained an EIN, you can open a bank account for your nonprofit. You’ll need to provide the bank with your nonprofit’s name, EIN, and formation documents, as well as the names and addresses of the individuals who will have signing authority on the account.
- File for tax-exempt status with the IRS
 : To be recognized as a tax-exempt nonprofit by the IRS, you’ll need to file for tax-exempt status. The type of form you’ll need to file will depend on the type of nonprofit you’re forming, but the most common form for a 501(c)(3) organization is Form 1023:
https://www.irs.gov/forms-pubs/about-form-1023 More info: http://www.501c3book.com/www.form1023help.com.html and https://form1023.org/ - File for tax-exempt status with the California Franchise Tax Board : If your nonprofit is exempt from federal income tax, you may also be exempt from paying the annual franchise tax fee in California. To claim this exemption, you’ll need to file for tax-exempt status with the California Franchise Tax Board. The fee for filing for tax-exempt status with the California Franchise Tax Board is $25.00. You can find more information on the process of obtaining tax-exempt status in California, including the required forms and fees, on the California Franchise Tax Board website:
https://www.ftb.ca.gov/forms/misc/927.html - File Statement of a nonprofit corporation is required to file an initial Statement of Information (Form SI-100) within 90 days of filing the Articles of Incorporation with the California Secretary of State. This statement must include information such as the name of the nonprofit, the registered agent’s name and address, the names and addresses of the directors, and the address of the principal office and mailing address of the business.
Note: Charitable organizations that are exempt from federal income tax under section 501(c)(3) of the Internal Revenue Code and that have annual gross receipts that are normally less than or equal to $50,000 are exempt from the $800 state tax minimum, but you must file an exemption detailed above.
Governance
Step 2 in creating a nonprofit organization in California involves establishing the governance structure of your nonprofit. This includes creating bylaws and electing a board of directors. Here are the steps involved in step 2:
- Draft bylaws : Bylaws are the internal rules and regulations that govern the operation of your nonprofit. They outline the responsibilities of the board of directors, the duties of the officers, and the procedures for conducting meetings, voting, and making decisions. You can find sample bylaws for nonprofits online or work with an attorney to draft custom bylaws for your organization.
- Elect a board of directors
 : The board of directors is the governing body of your nonprofit. It is responsible for setting policies, making decisions, and overseeing the operations of the organization. The size of the board, the qualifications for serving on the board, and the terms of office for directors are all outlined in the bylaws.
- Hold an organizational meeting
 : After the bylaws have been adopted and the board of directors has been elected, the board should hold an organizational meeting to adopt policies, elect officers, and make any other decisions necessary to begin the operations of the nonprofit.
Annual Reports and Taxes
I can provide you with a step-by-step explanation of filing annual reports for a nonprofit in California:
- Determine the filing deadline: Most states, including California, require nonprofits to file an annual report with the Secretary of State. The due date for filing the annual report in California is the 15th day of the 4th month after the close of the fiscal year.
- Gather information: Before filing the annual report, gather information about the organization’s activities and financial information for the previous year. This information should be accurate and up-to-date.
- File the report: The annual report can be filed online through the California Secretary of State’s website. The fee for filing an annual report in California is $30.
- Confirm receipt: After filing the annual report, wait for confirmation from the California Secretary of State that the report has been received and processed.
It is important to note that the annual report is a critical document for maintaining a nonprofit’s good standing with the state. Filing the report on time and with accurate information is essential to preserving the organization’s tax-exempt status. More info here: https://calnonprofits.org/resources/nonprofit-compliance-checklist and here: https://www.irs.gov/pub/irs-pdf/p4221pc.pdf
Taxes
Filing your first tax return as a nonprofit can be a complex process, but with the right preparation and guidance, it can be manageable. Here is a step-by-step guide to help you file your first tax return as a nonprofit:
- Determine your tax-exempt status: The first step in filing your tax return is to determine your tax-exempt status. Most nonprofits are exempt from federal income tax under section 501(c)(3) of the Internal Revenue Code.
- Choose a tax year: Nonprofits must choose a tax year, which is the 12-month period used to calculate the organization’s taxable income. The most common tax year for nonprofits is the calendar year (January 1 to December 31).
- Gather financial information: Before you can file your tax return, you will need to gather financial information for the tax year, including revenue, expenses, and any other financial transactions.
- Choose the right form: The most common tax form for nonprofits is Form 990. This form provides information about the organization’s activities, financial information, and governance. Depending on the size of the organization, you may need to file a different form, such as Form 990-EZ or Form 990-N (also known as the e-Postcard).
- Complete the form: Complete the form with the financial information and other required information. You may need to consult with an accountant or tax professional to help you complete the form.
- File the return: File the tax return with the IRS by the deadline, which is usually 5 months after the end of the tax year.
- Maintain records: Keep a copy of the tax return and any supporting documentation for at least 3 years in case the IRS needs to review your return.
By following these steps, you can successfully file your first tax return as a nonprofit and maintain your tax-exempt status. It’s important to note that the specific requirements and procedures may vary depending on the specifics of your organization, so it’s always a good idea to consult with a professional or an attorney to ensure that you are meeting all the necessary requirements.
Support
Nevada County
The Community Foundation of Nevada County https://www.nevcofoundation.org/ is a nonprofit organization that supports community organizations, schools, and individuals in the Nevada County area of California. 


 Sierra Small Business Development Center’s webinars! https://www.sierrasbdc.com/webinars/ Sierra SBDC offers a variety of free online webinars that cover topics such as business planning, social media marketing, and financial management. These webinars are designed to help small business owners and entrepreneurs develop the knowledge and skills they need to succeed. With expert instructors and a wealth of practical insights, Sierra SBDC’s webinars are a great way to stay up-to-date with the latest best practices and trends. Visit their website to see the upcoming schedule and register for a webinar today!

California
- California Association of Nonprofits https://calnonprofits.org/ : The California Association of Nonprofits provides advocacy, resources, and training to help nonprofits succeed in California.
- Northern California Grantmakers https://ncg.org/ : Northern California Grantmakers provides resources and support to help nonprofits in Northern California.
- Philanthropy California https://www.philanthropyca.org/ : Philanthropy California provides resources and support to help nonprofits and foundations in California.
- The Law Foundation of Silicon Valley https://www.lawfoundation.org/ : The Law Project of Silicon Valley provides legal services and support to help nonprofits and other community organizations.
- Center for Volunteer & Nonprofit Leadership https://www.cvnl.org/ : The Center for Volunteer & Nonprofit Leadership provides training, resources, and support to help nonprofits in Northern California.
- Silicon Valley Council of Nonprofits https://svcn.org/ : The Silicon Valley Council of Nonprofits provides advocacy, resources, and support to help nonprofits in the Silicon Valley region.
- Center for Nonprofit Management https://cnmsocal.org/ : The Center for Nonprofit Management provides training, resources, and support to help individuals and organizations start and manage nonprofits in Southern California. They offer a variety of resources and services, including in-person training, consulting, and online resources.
These are just a few examples of nonprofits that offer resources and support to help people start and run nonprofits in California. The specific resources and services offered may vary, but these organizations can be a helpful starting point for those seeking support in California.
Nationwide
- Candid https://candid.org/ : Candid (formerly known as GuideStar and Foundation Center) is a nationwide nonprofit that provides resources and tools to help individuals and organizations start and manage nonprofits. They offer a variety of training and support programs, including webinars, in-person workshops, and a library of online resources.
- SCORE https://www.score.org/ : SCORE is a national nonprofit that provides mentoring and resources to help small businesses and nonprofits succeed. They offer free workshops, mentoring, and online resources to help people start and grow nonprofits.
- Nonprofit Ready https://www.nonprofitready.org/ : Nonprofit Ready is an online platform that provides free training and resources to help individuals and organizations build and strengthen their nonprofits. They offer courses on topics such as fundraising, board governance, and financial management.
- Taproot Foundation https://taprootfoundation.org/ : Taproot Foundation is a nonprofit organization that connects skilled volunteers with other nonprofits in need of pro bono services. From website design to marketing strategy, Taproot volunteers offer their expertise to help organizations make a bigger impact. Whether you’re a professional looking to give back or a nonprofit in need of support, Taproot Foundation is a fantastic resource. Visit their website to learn more and get involved!
- Hurwit & Associates https://www.hurwitassociates.com/ :Hurwit & Associates is a leading law firm that specializes in nonprofit law, and their Q&A page is a great resource for anyone looking to start a nonprofit foundation. The page covers a wide range of topics, including incorporation, tax-exempt status, fundraising, and governance.The Q&A format is user-friendly and provides clear, concise answers to some of the most common questions about starting up a nonprofit foundation. Whether you’re just getting started or looking to refine your existing foundation, Hurwit & Associates’ Q&A page is a valuable resource to have on hand.
- Nonprofit Technology Network https://www.nten.org/ : The Nonprofit Technology Network provides resources, training, and support to help nonprofits use technology effectively. They offer a variety of resources and tools, including webinars, online courses, and an annual conference.
- National Council of Nonprofits https://www.councilofnonprofits.org/ : The National Council of Nonprofits is a nationwide nonprofit that provides advocacy, education, and resources to help nonprofits thrive. They offer a variety of resources and guides on topics such as starting a nonprofit, fundraising, and board governance.
- Independent Sector https://independentsector.org/ : Independent Sector is a national nonprofit that provides advocacy, resources, and support to help nonprofits succeed. They offer a variety of resources and tools, including research, policy analysis, and webinars.
- BoardSource https://boardsource.org/ : BoardSource is a national nonprofit that provides training, resources, and support to help nonprofit boards and board members. They offer a variety of resources and tools, including online courses, publications, and consulting services.
- Nonprofit Finance Fund https://nff.org/ : The Nonprofit Finance Fund provides financing, consulting, and support to help nonprofits achieve financial sustainability. They offer a variety of financial products and services, including loans, lines of credit, and financial management consulting.
- United Way https://www.unitedway.org/ : United Way is a national nonprofit that provides resources and support to help individuals and organizations create positive community change. They offer a variety of programs and initiatives, including fundraising campaigns, community engagement programs, and advocacy efforts.
The types of support and resources provided by these nonprofits vary, and not all of the support may be free. Some nonprofits may offer free resources and services, while others may charge a fee for certain programs or services.
For example, some of the resources and training offered by Foundation Center, Nonprofit Ready, and TechSoup are free of charge. Others, such as consulting services or in-depth training programs, may have a fee associated with them.
It’s important to research each nonprofit and the specific resources or programs they offer to determine if there are any associated costs. Some nonprofits may offer scholarships or other forms of financial assistance to help cover the costs of their programs or services.
In general, many nonprofits that offer support to help people start and run nonprofits are committed to providing accessible resources and services to help strengthen the nonprofit sector, so it’s worth exploring the available options to find the best fit for your organization and budget.
More guides
https://www.canva.com/design/DAEBTDbDsFc/IJ698pBYbkcK4rbGdb3Lkw/view#1
https://learning.candid.org/resources/knowledge-base/starting-a-nonprofit/
https://www.score.org/philadelphia/resource/article/nonprofit-resources
]]>Preparation:
- Sign up for a free Gmail.com account
- Sign up for Cloudflare.com
Steps:
- Register your domain with Cloudflare
- Add your website to Cloudflare
- Configure DNSEC, SPF, DKIM, and DMARC with Cloudflare
- DNSEC is easy if your domain is registered with Cloudflare
- Configure SPF to include Google (support.google.com/googleapps), and your own website IP address.
- Set up DKIM
- Set up DMARC
- Set up email forwarding in Cloudflare to your Gmail account
- Set up “send as” address in Gmail
- Test sending and receiving email with your custom domain through your Gmail account
- Check your email deliverability score at mail-tester.com
More Reading:
- help.17hats.com/en/articles/2933143-how-to-set-up-email-forwarding-with-cloudflare
- dmarcly.com/blog/how-to-use-dmarc-to-protect-your-domain
Note: This guide assumes that you have already signed up for a Gmail account and Cloudflare account.
Email security is important to protect your organization from phishing attacks and email fraud. There are several email security features that you can enable for your custom domain, including DNSSEC, SPF, DKIM, and DMARC. DNSSEC is a security protocol that authenticates DNS data and can help prevent DNS spoofing attacks. SPF is a security protocol that helps to prevent email spoofing by verifying that email messages come from authorized senders. DKIM is a security protocol that uses digital signatures to verify the authenticity of email messages. DMARC is a security protocol that helps to prevent email spoofing by verifying the alignment of SPF and DKIM policies. Enabling these email security features for your custom domain can help to protect you from email fraud and phishing attacks. As well as make sure that your legitimate email is not marked as spam.

Preparation
Sign up for a free gmail.com account. Google has the best deliverability, and spam filters in my experience. I’d recommend signing up for cloudflare.com as well. They have the lowest cost domain registration as well. $8/year. They have a really good free account for everything else. They can help you set up the below domain, and email settings:
- DNSSEC
- SPF
- DKIM
- DMARC
- Email forwarding to your gmail account.
Steps
- Sign up for gmail.com, protonmail.com, or your own mail server.
- Sign up for cloudlfare.com
- Register your domain with cloudflare
- Add your website to cloudflare
- Configure DNSEC, DKIM, SPF, and DMARC with cloudflare.
- DNSEC is easy if domain is registered with cloudflare.
- DKIM
- SPF (make sure to include google in your SPF) https://support.google.com/googlecloud/answer/10756302
- DMARC
- Set up email forwarding in cloudflare to your gmail account
- Set up “send as” address in Gmail
- Test
- Test sending and receiving email with your custom domain through your gmail account.
- Test email deliverability score at https://www.mail-tester.com/
More reading
https://help.17hats.com/en/articles/865530-how-to-ensure-emails-do-not-end-up-in-spam
]]>Some advantages of hosting your own custom WordPress website with Docker include: – You have full control over your website and can customize it however you want. – Docker makes it easy to set up and maintain your website. – You can run your website on any platform that supports Docker. – Your website will be more scalable and reliable than if it were hosted on a traditional web server.

Set up cloudflare
Create account, and add domains.
Set up google free tier instance:
From: https://cloud.google.com/free/docs/free-cloud-features
Set up billing notifications if it goes over $0.03
Compute Engine free tier
1 non-preemptible e2-micro VM instance per month in one of the following US regions:
Oregon: us-west1
Iowa: us-central1
South Carolina: us-east1

30 GB-months standard persistent disk

5 GB-month snapshot storage in the following regions:
Oregon: us-west1
Iowa: us-central1
South Carolina: us-east1
Taiwan: asia-east1
Belgium: europe-west1

1 GB network egress from North America to all region destinations (excluding China and Australia) per month
Your Free Tier e2-micro instance limit is by time, not by instance. Each month, eligible use of all of your e2-micro instance is free until you have used a number of hours equal to the total hours in the current month. Usage calculations are combined across the supported regions.

Compute Engine free tier does not charge for an external IP address.

GPUs and TPUs are not included in the Free Tier offer. You are always charged for GPUs and TPUs that you add to VM instances.

Learn more- Modify firewall
- remove rdp allow firewall rule
- modify ssh to only accept connections from cloudshell: 35.235.240.0/20
- allow from anywhere to ports 80,443
- (optional) allow port 51820 for wireguard
- Make swap file, and add to fstab: https://www.digitalocean.com/community/tutorials/how-to-add-swap-space-on-ubuntu-16-04
- (Optional) Install wireguard for VPN access: How to set up your own VPN using WireGuard on Ubuntu 21.10
Setup Dynamic DNS with Cloudflare
From: How to use Cloudflare for Dynamic DNS on Ubuntu 22.04
Install docker, and dependencies
From: https://docs.docker.com/engine/install/ubuntu/
##Set up the repository
#Update the apt package index and install packages to allow apt to use a repository over HTTPS:

sudo apt-get update

sudo apt-get install
    ca-certificates
    curl
    gnupg
    lsb-release

##Add Docker’s official GPG key:

sudo mkdir -p /etc/apt/keyrings
curl -fsSL https://download.docker.com/linux/ubuntu/gpg | sudo gpg --dearmor -o /etc/apt/keyrings/docker.gpg
#Use the following command to set up the repository:

echo
  "deb [arch=$(dpkg --print-architecture) signed-by=/etc/apt/keyrings/docker.gpg] https://download.docker.com/linux/ubuntu
  $(lsb_release -cs) stable" | sudo tee /etc/apt/sources.list.d/docker.list > /dev/null

#Install Docker Engine
#Update the apt package index, and install the latest version of Docker Engine, containerd, and Docker Compose, or go to the next step to install a specific version:

sudo apt-get update
sudo apt-get install docker-ce docker-ce-cli containerd.io docker-compose-plugin docker-compose
Install configurations
From: https://carlwillimott.medium.com/quickly-setup-wordpress-ssl-via-lets-encrypt-and-certbot-b29e8abf2072
git clone https://github.com/carlwillimott/docker-compose-wordpress-ssl.git
cd docker-compose-wordpress-ssl
nano -w docker-compose.yml
version: '3.3'

services:

  swag:
    image: linuxserver/swag
    container_name: swag
    restart: always
    depends_on:
      - wordpress
    volumes:
      - ./config:/config
      - ./default:/config/nginx/site-confs/default
    environment:
      - [email protected]
      - URL=blog.jphein.com
      - VALIDATION=http
      - TZ=America/Los_Angeles
      - PUID=1001
      - PGID=1002
    ports:
      - "443:443"
      - "80:80"

  wordpress:
    image: wordpress:latest
    container_name: wordpress
    hostname: wordpress
    depends_on:
      - db
    restart: always
    ports:
      - "8080:80"
    volumes:
      - ./www/:/var/www/html/
      - ./custom.ini:/usr/local/etc/php/conf.d/custom.ini
    environment:
      WORDPRESS_DB_HOST: db
      WORDPRESS_DB_USER: wp_db_user
      WORDPRESS_DB_PASSWORD: wp_db_pass
      WORDPRESS_DB_NAME: wp_db
      WORDPRESS_CONFIG_EXTRA: |
        define( 'WP_MEMORY_LIMIT', '96M' );

  db:
    image: mysql:5.7
    container_name: db
    volumes:
      - /var/lib/mysql:/var/lib/mysql
    restart: always
    ports:
      - "3306:3306"
    environment:
      MYSQL_ROOT_PASSWORD: mysql_root_pass
      MYSQL_DATABASE: wp_db
      MYSQL_USER: wp_db_user
      MYSQL_PASSWORD: wp_db_pass
Bring up the containers
docker-compose up -dMake the containers come up on boot
From: https://bootvar.com/systemd-service-for-docker-compose/
# Write systemd service in
nano -w /etc/systemd/system/mysite.service
[Unit]
Description=Service for mysite
Requires=docker.service
After=docker.service
[Service]
Type=oneshot
WorkingDirectory=/home/jp/jphein.com
Environment=COMPOSE_HTTP_TIMEOUT=600
ExecStart=/usr/bin/env /usr/bin/docker-compose -f /home/jp/jphein.com/docker-compose.yml up -d
ExecStop=/usr/bin/env /usr/bin/docker-compose -f /home/jp/jphein.com/docker-compose.yml stop
StandardOutput=syslog
RemainAfterExit=yes
[Install]
WantedBy=multi-user.targetNow you have created the systemd service, enable it and start the service. Enabling service will make sure to start this service at server startup.
# will enable service to start at server bootup
systemctl enable mysite

# start service ( Executes ExecStart command )
systemctl start mysite
Enable PageSpeed in WordPress docker
To be continued…
Configure WordPress
Go to yourdomain.com
Install WordPress Plugins
- Jetpack
- Jetpack boost
- Google Sitekit
- Cloudflare?
- Varnish? https://www.varnish-software.com/developers/tutorials/running-varnish-docker/
Test
Test SSL: www.ssllabs.com/ssltest/…
Test Pagespeed module: ismodpagespeedworking.co…
Test Varnish: https://isvarnishworking.uk/
Test your server response time: www.bytecheck.com
Should be 500ms or under. Ideally under 200ms.
Test email: https://www.mail-tester.com/
Forward your custom domain email to your gmail account
Cloudflare offers this service for free
Automated backups to Cloud storage bucket
Free tier
| Cloud Storage | 5 GB-months of regional storage (US regions only)5,000 Class A Operations per month50,000 Class B Operations per month1 GB network egress from North America to all region destinations (excluding China and Australia) per month |
|---|---|
Free Tier is only available in us-east1, us-west1, and us-central1 regions. Usage calculations are combined across those regions. |
Create a bucket in the google cloud console or terminal.
Install gcsfuse
Download .deb package frome: https://github.com/GoogleCloudPlatform/gcsfuse/releases
wget https://github.com/GoogleCloudPlatform/gcsfuse/releases/download/v0.41.6/gcsfuse_0.41.6_amd64.deb
sudo dpkg -i gcsfuse_0.41.6_amd64.deb
Permissions
You may need to run “gcloud init” if your permissions aren’t set up correctly. You may also need to edit your bucket permissions as well.
Mount bucket
From: https://github.com/GoogleCloudPlatform/gcsfuse/blob/master/docs/mounting.md
gcsfuse bucket_name mount_point
#unmount
fusermount -u /path/to/mount/point
Add to fstab to mount on boot
sudo echo "jphfree /home/jp/jphfree gcsfuse rw,_netdev,allow_other,uid=1001,gid=1002" >> /etc/fstab#Backup script
NOTE: If you want to use duplicity gs: urls then you should follow this guide: https://jphein.com/how-to-use-duplicity-to-backup-directly-to-a-google-cloud-storage-bucket-to-achieve-time-machine-like-incremental-backups-on-ubuntu-15-10-wily/
#Install mysqldump
sudo apt install mysql-client-core-8.0
#Install duplicity
sudo apt install duplicity
nano -w backup#!/bin/bash
#--A simple backup script
#----Change the variables below to reflect your information
echo "------------------------------------------------------------------"
echo " Website Backups"
echo "------------------------------------------------------------------"
echo "Creating variables..."
printf "$0 <-- Name and path of this script.n"
#Working directory
WD="/home/jp"
printf "$WD <-- Working Directory on local server.n"
echo "------------------------------------------------------------------"
#Google Cloud storage bucket"
printf "A Google Cloud storage bucket is used for longterm storage of incremental backups.n"
BUCKET="jphfree"
printf "$BUCKET <-- Google Cloud storage bucket namen"
echo "------------------------------------------------------------------"
#MySQL database
MYSQL_DB="wp_db"
MYSQL_USER="root"
MYSQL_PASS="db_root_pass"
printf "$MYSQL_DB <-- MySQL Database Namen"
printf "$MYSQL_USER <-- MySQL Database Usernamen"
echo "------------------------------------------------------------------"
#Google Cloud Storage Mount the storage bucket
printf "Mounting Google Cloud storage bucket...n"
gcsfuse $BUCKET $WD/$BUCKET
echo "------------------------------------------------------------------"
#MySQL dump
printf "Dumping MySQL database...n"
mysqldump --opt -h localhost --protocol=tcp --user=$MYSQL_USER --password=$MYSQL_PASS $MYSQL_DB > $WD/mysqldump/database.sql
echo "------------------------------------------------------------------"
#-------Duplicity Backup everything to the bucket
echo "------------------------------------------------------------------"
echo "Backing up data to a Google Gloud storage bucket using duplicity.."
echo "------------------------------------------------------------------"
echo "An incremental backup every day. A full backup every month."
echo "We keep 12 full backups and their corresponding incrementals."
echo "One year of daily back up data!"
echo "------------------------------------------------------------------"
#Clean up in case of aborted backups
duplicity cleanup --no-encryption file://$WD/$BUCKET/backups
#Backup data to bucket
duplicity --progress --no-encryption --exclude $WD/$BUCKET --full-if-older-than 1M $WD file://$WD/$BUCKET/backups
#Delete old backups
#duplicity remove-older-than 1Y --force $SYNC_DIR/$i gs://$BUCKET/$i
duplicity remove-all-but-n-full 12 file://$WD/$BUCKET/backups
#------------------------------------------------------------------------------chmod 700 backup#Add to crontab
crontab -e# Edit this file to introduce tasks to be run by cron.
#
# Each task to run has to be defined through a single line
# indicating with different fields when the task will be run
# and what command to run for the task
#
# To define the time you can provide concrete values for
# minute (m), hour (h), day of month (dom), month (mon),
# and day of week (dow) or use '*' in these fields (for 'any').
#
# Notice that tasks will be started based on the cron's system
# daemon's notion of time and timezones.
#
# Output of the crontab jobs (including errors) is sent through
# email to the user the crontab file belongs to (unless redirected).
#
# For example, you can run a backup of all your user accounts
# at 5 a.m every week with:
# 0 5 * * 1 tar -zcf /var/backups/home.tgz /home/
#
# For more information see the manual pages of crontab(5) and cron(8)
#
# m h dom mon dow command
0 0 * * * /home/jp/backup > /home/jp/backup.log 2>&1
Restore from Backups
duplicity restore file:///home/jp/jph-backups/backups /home/jp/restored/ --no-encryption
There are only three carriers that provide cellular networks: AT&T, Verizon, T-mobile.
After signing up you will receive a Verizon, T-mobile or AT&T SIM card depending on stock, and your zip code. You can tell by the first 5 numbers of the ICCD # on your phone box:
- 89148 Verizon
- 89012 T-Mobile
- 89014 AT&T
At my house all 3 networks report that I should have coverage. However, only AT&T actually works. When I signed up in the past they always sent me a T-mobile sim. Now that Verizon has purchased Movil, the parent company , I was sent a Verizon sim. In Either case I have to switch to AT&T to be able to use my cellphone at my house.
- Step 1 – Prepare
- Purchase an AT&T Net10 SIM kit for $1 through this link: https://shop.net10wireless.com/shop/en/net10store/net10-att-byop-sim-tri-punch
OR , if you need T-mobile here: https://shop.net10wireless.com/shop/en/net10store/net10-att-byop-sim-tri-punch
OR, if you need Verizon here: https://shop.net10wireless.com/shop/en/net10store/phones/net10-verizon-byop-sim-tri-punch - Make sure you have a small paperclip, or a SIM card removal tool.
- IMEI: Although it is not needed for this process, some agents will insist you provide the IMEI of your phone. So, they can verify it’s compatible with the network, and make sure the new VoLTE voice calling will work. Some agents will reject the transfer if your phone doesn’t pass this check. Unfortunately, they’re database isn’t good, so this may happen to you even if your phone is compatible. I’d suggest having multiple phones on hand, so you can use their IMEI instead. NOTE: This step is totally superfluous to this process, and should not be needed.
- Your cellular phone. It must be compatible with whichever network you are transferring to. Make sure your phone is charged.
- A stable phone, or internet service that is not the cellular line that we are transferring. With a headset. Make sure you can make hands free stable calls. You will need to turn off, and on your cellphone, and you don’t want to be disconnected from your agent. You will be on the phone with them through all 7 steps.
- Purchase an AT&T Net10 SIM kit for $1 through this link: https://shop.net10wireless.com/shop/en/net10store/net10-att-byop-sim-tri-punch
- Step 2 – Location
- Make sure you are somewhere that your current network has coverage, so you can receive verification text messages.
OR you can enable “Chat features” In the Google messages app to receive txt messages over wifi. https://messages.google.com/web/authentication
- Prepare to spend around 2hrs on the phone.
- Make sure you are somewhere that your current network has coverage, so you can receive verification text messages.
- Step 3 – Pray you get someone good at their job.
- It might be worth hanging up and calling back if they seem new to the job, or don’t know how to do it. It will take MUCH longer if they have to keep asking their supervisor.
- Step 4 – Call the porting department at Net10
- Call 866-806-1840 ref code 332264
Explain that you need to have your account transferred to this new SIM card, and it’s a different cellular network. Provide information as they need it.
- Call 866-806-1840 ref code 332264
- Step 5 – SIM swap
- Turn off your cell phone
- Take out the old SIM card, and put in the new one.
- Tun on your cell phone.
- Step 6 – Test all your features
- Data
- Speed test
- Hotspot (may or may not work)
- Calling
- Volte (may or may not work)
- Wifi calling (may or may not work)
- Google voice over cellular data, and wifi
- Texting
- Send, and receive test text
- Data
- Step 7 – Make sure they reattach your lifeline and/or ACP benefits
- Confirm that they have applied your benefits. Sometimes they can do it themselves. Sometimes they transfer you to the Safelink dept. Sometimes they schedule a callback especially if it’s after 5pm EST. IMPORTANT: Any time you are transferred to the Safelink department, you must press “3” VERY quickly. Otherwise, it will hang up on you.
- Send “USAGE” or “BAL” to 611611 to verify your account balance. Make sure it reflects what you should be getting from Safelink for Lifeline and/or ACP. 4GB for ACP, 6GB for Lifeline, and UNLIMITED for Lifeline AND ACP.
Apply here: https://www.safelinkwireless.com/
safelinkwireless.com by tracfone
There are many companies that provide lifeline cellular to people with low income, but in my opinion Safelink gives you the best plan. Tracfone like many cellular companies resell AT&T, Verizon, and T-mobile. In Nevada County they will send you a T-mobile SIM card by default. If you need AT&T, or Verizon you can call and get them to send you a new AT&T or Verizon SIM card. If you would prefer to use your existing phone instead of the cheap smart phone they send you, you can opt for the BYOD option.
Lifeline is the federal program that subsidizes phone service for people with low income. It was created quite a while ago for land line phones. Safelink offers that plus the new $50 pandemic subsidy for internet by removing the data limit.
SafeLink Wireless®
SAFELINK WIRELESS® is a program provided by TracFone Wireless, Inc. serving eligible households. To participate in the SAFELINK WIRELESS® service, certain eligibility requirements must be met, which are set by each State where the service is provided. These requirements are based on a person’s participation in state, Federal support programs, or by meeting the Income Poverty Guidelines as defined by the U.S. Government. SAFELINK WIRELESS® service is limited to one person per household.
TracFone Wireless is the largest “No-Contract” cellular service provider in the U.S. with over 20 million subscribers. It is also a subsidiary of América Móvil S.A.B. de C.V. (‘AMX’) (BMV: AMX; NYSE: AMX; Nasdaq: AMOV; LATIBEX: XAMXL), the 9th largest phone company in the world, as well as in all of the Americas, with more than 250 million wireless subscribers.
from: https://www.safelinkwireless.com/Enrollment/Safelink/en/Web/www/default/index.html#!/aboutUs
]]>heimdall flash --RECOVERY recovery.img --CACHE cache.img
Recoveries and Lineage here: http://andi34.github.io/
From: https://forum.xda-developers.com/t/root-quick-and-easy-twrp-recovery-supersu.2510669/
]]>Broadband: 25Mbps down, 3Mbps up, and less than 100ms latency.
Neither fiber nor cable is available where I live. All the fixed wireless providers in Nevada County don’t serve my property. AT&T will provide me a DSL line running at the insanely slow speed of 768kbps. That’s around 90 Kilobytes per second download, and don’t get me started on upload. Although, better than a 56K modem, it’s not fast enough for my needs. Geosynchronous satellite’s latency is too high for real time interaction. Low earth satellite is not available yet. AT&T is the only cellular provider with adequate coverage, however only on the new LTE band 14, all the other bands are spotty. FirstNet LTE Band 14 has been installed all over the Country by AT&T funded by a giant grant from the Federal government. My options are really quite limited. Luckily, I did eventually find something that works. Check out all the internet options in Nevada County here:
https://jphein.com/internet-options-in-nevada-county/
Here is a list of phones that have this LTE band 14:
https://www.firstnet.com/devices/phones.html
A complete list of devices is here:
https://www.firstnet.com/content/dam/firstnet/white-papers/firstnet-certified-devices.pdf
AT&T does not offer an inexpensive unlimited plan (<$100/month). Thus began my search for someone that did. I started out searching the Wiki article of all the MVNOs. (Mobile Virtual Network Operators) All the folks that resell time on the 4 major USA networks. I sorted it by the network column so I could filter all the AT&T MVNOs: https://en.wikipedia.org/wiki/List_of_United_States_mobile_virtual_network_operators
Then I found the article below,
https://www.rvmobileinternet.com/gear/att-unlimited-rental-plans/
which pointed me to:https://www.cgcellular.com/ Which provides unlimited data on AT&T for $60. Definitely the least expensive I’ve found. *No longer offering this. Instead check out how to get unlimted data for free here: jphein.com/lifeline
All AT&T Wireless unlimited plans supposedly deprioritize your data if your local cell tower is congested after 22GB. I don’t think it happens much in rural areas.
I purchase the Netgear Nighthawk M1 (MR1100) directly from my local AT&T store. Although, now you can buy one used on eBay.
Be sure to get the MR1100-2A1NAS model. The first consumer model does not support band 14. Read about it here: https://community.netgear.com/t5/Mobile-Routers-Hotspots-Modems/Pre-April-Nighthawk-and-band-14-and-46/m-p/1555303#M5746
It supports all LTE bands that AT&T uses. It was ~$270 with tax purchased outright. I put it on the $10/month for 100MB BYOD business plan. They waived any activation fee. I was able to unlock it after 60 days, and discontinued the original $10 plan.
https://www.att.com/deviceunlock/unlockstep1
Although, not necessary to unlock it for any AT&T reseller. I unlocked it in case in the future I need to use it with T-mobile, or Verizon.
Although currently locked to AT&T, I can use it with any AT&T MVNO by changing the APN setting from the web gui.
http://attwifimanager/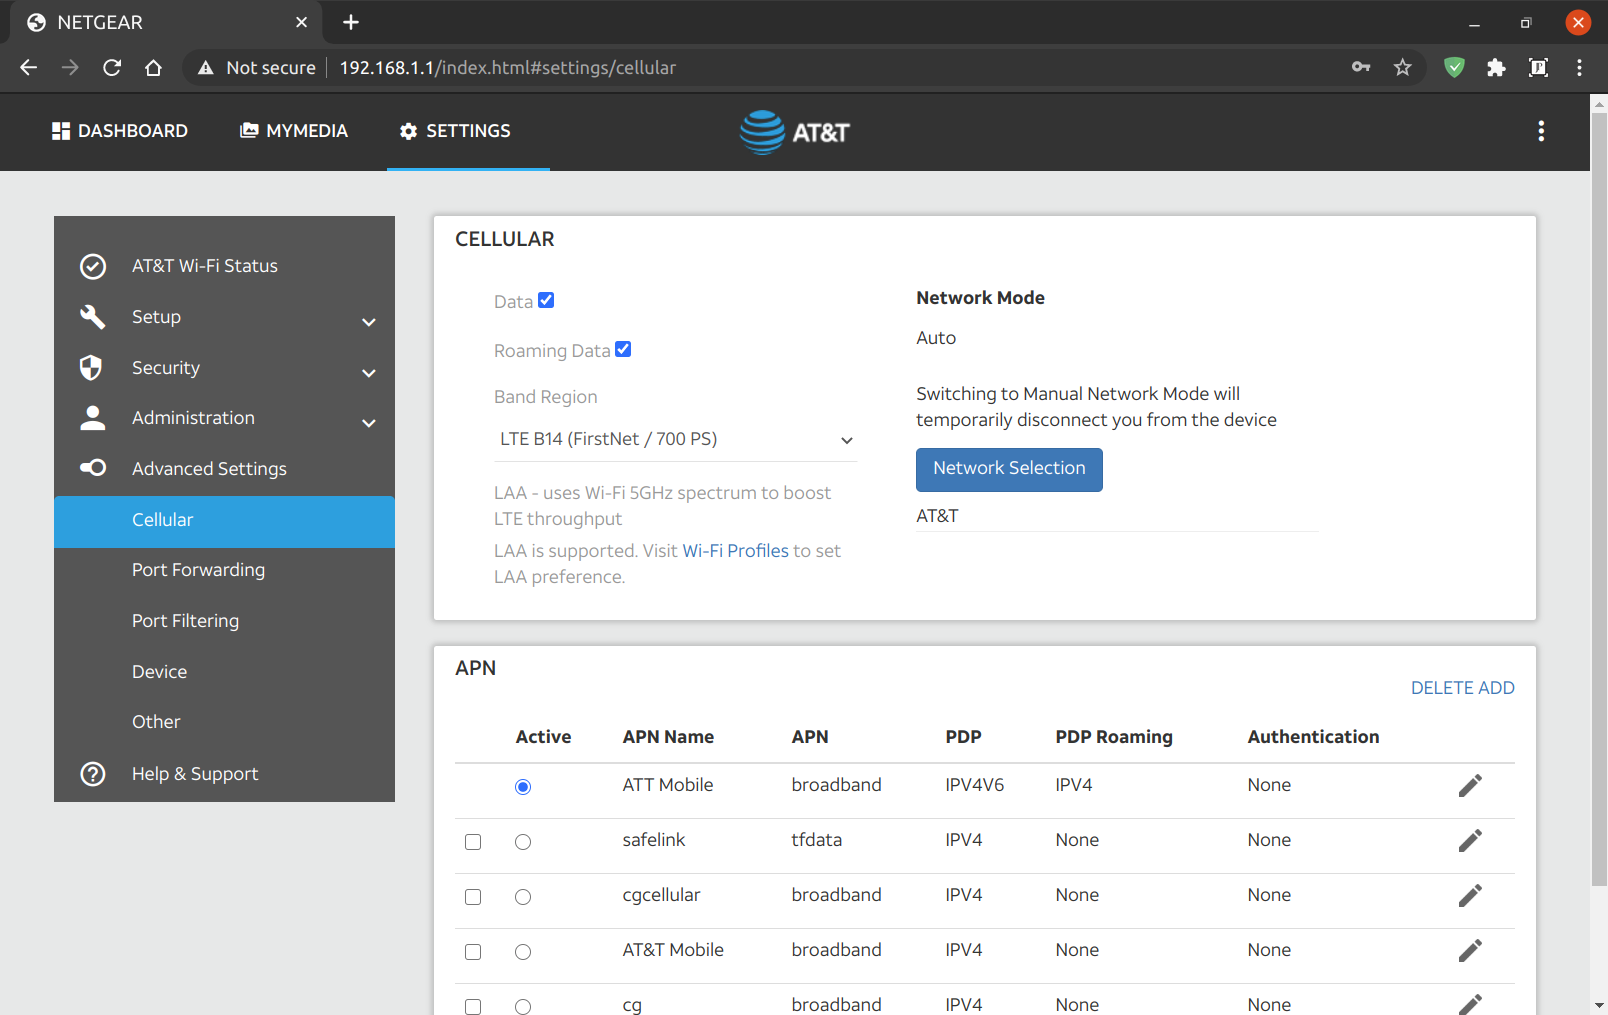
By plugging in the USB to my computer, and telnetting into the M1. I played around with the different LTE bands around my home, and various combinations using carrier aggregation.
#Open a terminal
telnet 192.168.1.1 5510
Edited the band selection dropdown:
AT!gstatus?
AT!band=?
AT!BAND=03,"LTE B2 (1900 MHz PCS)",           0,  2
AT!BAND=04,"LTE B4 (1700/2100 MHz AWS)",      0,  8
AT!BAND=05,"LTE B12 (700 MHz Lower B/C/A)",   0,  800
AT!BAND=06,"LTE B14 (FirstNet / 700 PS)",     0,  2000
AT!BAND=07,"LTE B30 (2300 MHz WCS)",          0,  20000000
AT!BAND=08,"LTE B66 (AWS-3)",                 0,  0,          2
AT!BAND=09,"LTE CA (B2+B4+B12+B14+B30)",      0,  2000280a
You need to reboot the router before the changes show up in the web gui.
I connected to each band individually, and ran a speed test. I then ran a speed test with all bands aggregated. Carrier aggregation with Band 14 doesn’t seem to work. Also, the builtin All LTE option doesn’t seem to choose Band 14. However, when I choose it manually, I get a great connection. Simply locking the device to use Band 14 gave me the best speeds.
LTE Band 14 with WiFi turned off sitting on my desk.

Much better than 0.768Mbps DSL, but not quite broadband.
I took it outside and set it facing the direction of the tower.

Sweet! Broadband Internet. I’ll make an enclosure for it, and run power and ethernet out to it.
I will order a pair of yagis. A type of directional antenna. For even faster speeds. FirstNet public safety LTE in the United States occupies two 10-MHz-wide blocks of spectrum at 758 MHz to 768 MHz (download), and at 788 MHz to 798 MHz (upload). So, I’ll be sure The antennas support those frequencies. The M1 has two external TS9 antenna ports.

Technical Specification
| Frequency Range | 698 – 894 MHz |
| Gain | 8dBi |
| Front to Back Ratio | bigger than 15dB |
| Impedance | 50 ohms |
| VSWR | Less than 1.5 |
| Cable Loss | 0.075 dB |
| Vertical Plane | 72°F ± 5°F |
| Horizontal Plane | 76°F ± 5°F |
| Polarization Type | Vertical or Horizontal |
| Connector Type | SMA Male |
| Number Of Element | 4 |
| Length without Cable | 37 cm |
| Weight | 0.7 Kg |
| Rated Wind Velocity | 150 Mile per Hour |
| Working temperature | -40°F ~ +140°F |
I had to order some SMA ends to shorten the antenna cable. You lose signal for every inch long your antenna cable is. I also ordered SMA to TS9 pigtails, and an outdoor enclosure.
I’ll set them up 90 degrees offset pointing at the same tower. I found my tower location using Opensignal app, then I used Google earth to find the heading. Which was for me 38 magnetic degrees from my house to the tower. I then used a compass app, or google maps to know where to point the antennas. I’m sure it will take some fine tuning. This is a great guide for doing line of sight with Google earth:
https://startyourownisp.com/posts/guide-to-google-earth/
{Speedtest}
There are three ways to use the M1 as a modem. You can connect via ethernet, USB, or WiFi. I found the best performance was wither USB or Ethernet with WiFi off.
#Check IMEI
ati#Restore corrupted IMEI
To unlock your NV:
https://github.com/bkerler/SierraWirelessGen
Installation
- Get python >=3.6 64-Bit~>
- git clone https://github.com/bkerler/edl/ ~>
- chmod +x edl/modem/sierrakeygen.py ~>
- cd edl/modem
- pip3 install -r requirements.txt
at!openlock?
./sierrakeygen.py -l <challenge> -d MDM9x40
AT!OPENLOCK="<generatedresponse>"
at!nvimeiunlock
#at!nvmeidunlock
at!nvencryptimei=xx,xx,xx,xx,xx,xx,xx,x0
#at!nvencryptmeid=xx,xx,xx,xx,xx,xx,xx
atiInstall and Configure WireGuard
From: https://www.stavros.io/posts/how-to-configure-wireguard/
Note: for the client configuration to work you must first have a working wireguard server.
#become root
sudo -i

#install wireguard
apt install wireguard

#create keys
cd /etc/wireguard
umask 077  # This makes sure credentials don't leak in a race condition.
wg genkey | tee privatekey | wg pubkey > publickey
#edit the config
nano -w wg0.conf
Client (Example config file) – wg0.conf
Add the client private key, the server public key, and the server IP address.
[Interface]
Address = 10.5.5.25
PrivateKey = client private key

#-------------DNS
#DNS = 10.5.5.1 #Server caching dnsmasq that forwards to azure in my case
#DNS = 168.63.129.16 #Azure
#DNS = 1.1.1.1 #Cloudflare
DNS = 176.103.130.130, 176.103.130.131 #AdGuard

#-------------MTU
MTU = 1280 #This may need to be changed depending on your connection to the internet.
#MTU = 1384
MTU = 1360

#-------------MSS Clamping
#PostUp = iptables -A FORWARD -p tcp --tcp-flags SYN,RST SYN -j TCPMSS --clamp-mss-to-pmtu
#PostDown = iptables -D FORWARD -p tcp --tcp-flags SYN,RST SYN -j TCPMSS --clamp-mss-to-pmtu


[Peer]
PublicKey = server public key
Endpoint = server IP address:51820
#AllowedIPs = 0.0.0.0/0 #Use this if you want all your traffic to pass through the VPN
AllowedIPs = 10.5.5.25/32

# This is for if you're behind a NAT and
# want the connection to be kept alive.
PersistentKeepalive = 25
Server (Example config file) – wg0.conf
Add the server private key, and each client’s public key.
[Interface]
Address = 10.5.5.1
PrivateKey =
ListenPort = 51820

[Peer]
PublicKey =
AllowedIPs = 10.5.5.5/32

[Peer]
PublicKey =
AllowedIPs = 10.5.5.25/32
Securing
After you’re done, run the following to make the directory and files readable only by administrators (it does contain secret keys, after all):
exit # exit rootsudo chown -R root:root /etc/wireguard/
sudo chmod -R og-rwx /etc/wireguard/*
Start and test wireguard
On both server, and client run:
sudo wg-quick up wg0; wg
#to bring it down
sudo wg-quick down wg0
Automatically run at startup
After you’ve created and secured the file, you can easily set WireGuard to initialize the VPN on startup if your OS is using systemd:
sudo systemctl enable [email protected]
Similarly, to start or stop the service:
sudo systemctl start [email protected]
sudo systemctl stop [email protected]
Android or iOS client
To turn your conf file into a qr code use:
qrencode -t ansiutf8 < wg0.confSet up DNS on the server
From: https://askubuntu.com/questions/1032450/how-to-add-dnsmasq-and-keep-systemd-resolved-18-04
Install openresolv on client
apt install openresolvInstall dnsmasq on server
apt install dnsmasq
nano -w /etc/dnsmasq.conf
server=168.63.129.16 #Azure
#server=176.103.130.130, 176.103.130.131 #Adguard
interface=lo
listen-address=10.5.5.1
bind-interfacesMake DNSMasq start after our wg-quick service:
systemctl edit dnsmasqpaste
[Unit]
[email protected]
[email protected]
Firewall on server
Allow udp port 51820 through your firewall in whatever cloud service you are using.
Allow Wireguard and DNS through local ufw firewall
ufw allow proto udp from any to any port 51820
ufw allow proto tcp from any to any port 53
From: https://ubuntu.com/server/docs/security-firewall
Make sure to edit the firewall policy’s in your cloud server’s management dashboard as well to allow port 52820. In my case, Azure.
sudo ufw status
Status: active

To                         Action      From
--                         ------      ----
22                         ALLOW       Anywhere
51820                      ALLOW       Anywhere
53                         ALLOW       Anywhere
/etc/default/ufw change the DEFAULT_FORWARD_POLICY to “ACCEPT”:
DEFAULT_FORWARD_POLICY="ACCEPT"
Then edit /etc/ufw/sysctl.conf and uncomment:
net/ipv4/ip_forward=1
Now add rules to the /etc/ufw/before.rules file. The default rules only configure the filter table, and to enable masquerading the nat table will need to be configured. Add the following to the top of the file just after the header comments:
# nat Table rules
*nat
:POSTROUTING ACCEPT [0:0]

# Forward traffic from eth1 through eth0.
-A POSTROUTING -s 10.5.5.0/24 -o eth0 -j MASQUERADE

# don't delete the 'COMMIT' line or these nat table rules won't be processed
COMMIT
sudo service ufw restartTest what is my ip, and dns leak
Gnome shell Indicator extension: https://extensions.gnome.org/extension/3160/wireguard-indicator/
Add a quicklaunch shortcut: https://blog.linuxserver.io/2019/11/24/connect-an-ubuntu-client-to-opnsense-wireguard-tunnel-with-a-gui-toggle-in-gnome/
]]>Open Terminal from dash:
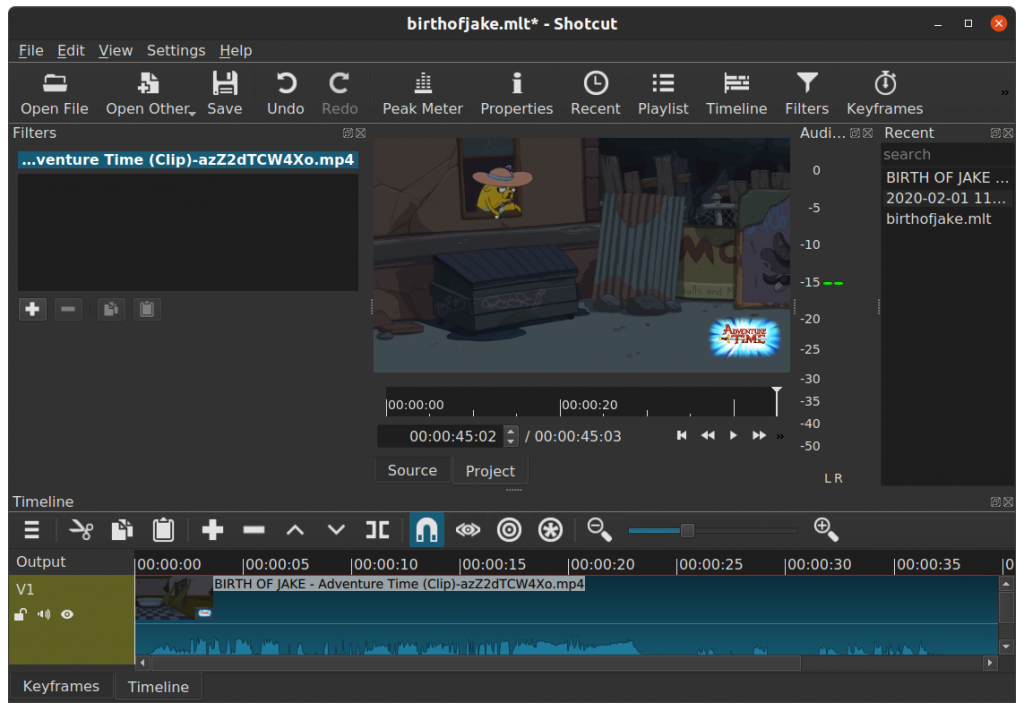
sudo apt install dl-youtube
dl-youtube YOUTUBE-URL #Copy and paste from your browser
sudo snap install shotcut --classic
shotcut &Shotcut Manual:
http://write.flossmanuals.net/introduction-to-video-editing-with-shotcut/about-this-guide/
dl-youtube supports many other sites. Visit list here:
https://ytdl-org.github.io/youtube-dl/supportedsites.html
Windows: Install kindle drivers, Root using windows bat file. Use option “3”.
Recovery
Terminal
From: https://forum.xda-developers.com/t/bootloader-2nd-bootloader-for-custom-roms-on-kfirehd-7-06-24-cm12-1-twrp-2-8-7-0.2128848/
adb push stack /sdcard/
adb shell su -c "dd if=/sdcard/stack of=/dev/block/platform/omap/omap_hsmmc.1/by-name/system bs=6519488 seek=1"
adb shell su -c "mount -o remount,rw ext4 /system"
adb shell su -c "mv /system/etc/install-recovery.sh /system/etc/install-recovery.sh.bak"
adb shell su -c "mount -o remount,ro ext4 /system"Fastboot cable, Motorola Factory development cable
fastboot -i 0x1949 flash bootloader kfhd7-u-boot-prod-7.2.3.bin
fastboot -i 0x1949 flash boot kfhd7-freedom-boot-7.4.6.img
fastboot -i 0x1949 flash recovery kfhd7-twrp-2.8.7.0-recovery.img
fastboot -i 0x1949 reboot
OS and GApps
Enter recovery by holding left volume button past the blue fire logo
to restore to stock
Copy Lineage and gapps to kindle; Install Lineage and Gapps
fastboot -i 0x1949 flash boot stock-boot.img
fastboot -i 0x1949 flash recovery stock-recovery.img
fastboot -i 0x1949 flash system stock-system.img # This one will take a few minutes
fastboot -i 0x1949 reboot