Bash – Jeffrey Pine Hein https://jphein.com Just plain helpful. Wed, 04 Nov 2026 15:40:34 +0000 en-US hourly 1 https://wordpress.org/?v=7.1.5 https://jphein.com/wp-content/uploads/2020/08/jphein-logo-cropped-100x100.png Bash – Jeffrey Pine Hein https://jphein.com 32 32 109828812 The status of short (3 character) .org domain names in 2023. What’s available? (Updated!) https://jphein.com/the-status-of-short-domain-names-in-2016/ https://jphein.com/the-status-of-short-domain-names-in-2016/#respond Tue, 03 Jan 2023 17:24:01 +0000 https://blog.jphein.com/?p=4035 Domain names

A domain name can contain all 26 letters, 10 numbers, and a hyphen (-). You cannot start or end a domain name with a hyphen. Domain names are not case sensitive, so you can use upper and lower case letters interchangeably. A domain name can be up to 67 characters long — including the 4 characters used to identify the Top Level Domain (.net, .com or .org).

A little known fact is that you CAN have multiple dashes right next to each other. (e.g. domain--names.com) Opened up a few more possibilities? There is one restriction: Double Hyphens in the third and fourth position are not allowed. e.g. XX--XXXXXXXX.com. This allows for IDNs and other encodings.

Results

All three letter .com domains are taken. However, there are still 3 character .net and .org domain names.

.com – All three character .com names are registered.

.net – All three letter, or all 3 number names are taken. All LLN (Letter Letter Number) or anything with a hyphen is taken.

.org – All three letter, or all three 3 number names are taken NNN.org, and LLL.org. All L-L.org domains are taken. Checked the N-L.org, L-N.org, and N-N.org. Looks like there are a number of hyphenated 3 charactor .org domains left, but they all contain numbers.

I just wrote and ran a bash scripts to check all three character .org domains.

#!/bin/bash
#All three character .org domains with a hyphen in the middle
for x in {0..9} {a..z}; do
	for y in "-"; do
		for z in {0..9} {a..z}; do
			domnf=""
			domnf=$(whois $x$y$z.org|grep "Domain not found.")
			if [ "$domnf" == "Domain not found." ]; then
				echo $x$y$z.org
			fi
			domnf=""
			sleep 1
		done
	done
done

Complete list of available hyphenated three character .org (N/L-N/L.org) domain names:

0-5.org
0-8.org
0-c.org
0-e.org
0-h.org
0-i.org
0-j.org
0-l.org
0-m.org
0-q.org
0-s.org
0-t.org
0-u.org
0-v.org
0-w.org
0-y.org
0-z.org
1-d.org
1-e.org
1-f.org
1-l.org
1-n.org
1-p.org
1-r.org
1-s.org
1-u.org
1-y.org
2-8.org
2-9.org
2-e.org
2-f.org
2-i.org
2-j.org
2-l.org
2-m.org
2-n.org
2-p.org
2-w.org
2-x.org
2-z.org
3-1.org
3-j.org
3-n.org
3-o.org
3-t.org
3-u.org
3-z.org
4-1.org
4-b.org
4-f.org
4-g.org
4-n.org
4-o.org
4-v.org
4-x.org
4-z.org
5-0.org
5-8.org
5-9.org
5-c.org
5-e.org
5-f.org
5-j.org
5-l.org
5-n.org
5-o.org
5-q.org
5-s.org
5-t.org
5-u.org
5-w.org
5-x.org
5-y.org
5-z.org
6-2.org
6-8.org
6-a.org
6-b.org
6-c.org
6-d.org
6-f.org
6-g.org
6-h.org
6-i.org
6-j.org
6-k.org
6-l.org
6-m.org
6-n.org
6-o.org
6-p.org
6-q.org
6-r.org
6-s.org
6-u.org
6-w.org
6-x.org
6-y.org
6-z.org
7-2.org
7-b.org
7-e.org
7-h.org
7-j.org
7-l.org
7-n.org
7-o.org
7-p.org
7-s.org
7-u.org
7-v.org
7-w.org
7-y.org
8-1.org
8-4.org
8-7.org
8-a.org
8-c.org
8-e.org
8-f.org
8-g.org
8-j.org
8-l.org
8-m.org
8-n.org
8-r.org
8-t.org
8-u.org
8-v.org
8-w.org
8-x.org
8-y.org
8-z.org
9-1.org
9-8.org
9-c.org
9-e.org
9-f.org
9-g.org
9-i.org
9-j.org
9-k.org
9-l.org
9-m.org
9-n.org
9-o.org
9-p.org
9-q.org
9-r.org
9-s.org
9-t.org
9-u.org
9-v.org
9-y.org
9-z.org
a-6.org
b-5.org
b-6.org
b-8.org
c-2.org
c-7.org
c-9.org
d-0.org
d-4.org
d-5.org
e-0.org
e-6.org
f-0.org
f-6.org
f-7.org
f-8.org
f-9.org
g-6.org
g-7.org
g-9.org
h-0.org
i-6.org
j-0.org
j-7.org
j-9.org
k-0.org
l-4.org
l-5.org
l-9.org
m-0.org
n-0.org
n-4.org
o-3.org
o-5.org
o-9.org
p-0.org
p-2.org
p-4.org
p-6.org
p-7.org
q-0.org
q-2.org
q-3.org
q-6.org
r-0.org
r-7.org
r-8.org
r-9.org
s-6.org
s-8.org
t-5.org
t-8.org
t-9.org
u-0.org
u-3.org
u-5.org
v-0.org
v-1.org
v-3.org
v-7.org
w-1.org
w-4.org
w-7.org
x-6.org
x-8.org
y-0.org
y-1.org
y-8.org
y-9.org
z-0.org
z-3.org
z-4.org
z-5.org

Looks like there are still LNL LLN and NLL .org domains left as well.

#!/bin/bash
#All three character .org domain names with numbers and letters.
for x in {0..9} {a..z}; do
	for y in {0..9} {a..z}; do
		for z in {0..9} {a..z}; do
			dom=""
			dom=$(whois $x$y$z.org|grep "Domain not found.")
			if [ "$dom" == "Domain not found." ]; then
				echo $x$y$z.org >> domainlist.txt
			fi
			dom=""
			sleep 1
		done
	done
done

inComplete list of available non-hyphenated three character .org domain names: closed my laptop after the letter n.

Resources

Here is a report of cost of 3 character domain names for .com .net .org, etc.. http://www.3character.com/price-guide.html

Here is an OK search tool: http://www.namestall.com/3-4-letter-domains

]]>
https://jphein.com/the-status-of-short-domain-names-in-2016/feed/ 0 4035
Smart Home Series – The Smart Tub https://jphein.com/smart-home-series-the-smart-tub/ https://jphein.com/smart-home-series-the-smart-tub/#respond Wed, 15 Jul 2020 04:48:26 +0000 https://blog.jphein.com/?p=6052 Source: https://atwing.net/home%20automation/shell-commands-assistant/
I’d like thank ANTHONY NGUYEN @ https://atwing.net for the above article. It really widened my perspective with what could be done with voice commands and smart devices. =] That is where I was introduced to IFTTT, MQTT, and Home Assistant. By connecting them to Google Assistant, you can do ANYTHING with your voice. Like execute bash commands. Adding Discord into the mix you can have all responses read back to you. This allows you to have complete hands free control.

However, The following article is about a simpler way of controlling smart devices. Specifically, a waterproof thermometer, and a smart plug.

I purchased the Unibot WS1 Wireless sensor. Thus creating my own smart weather station that can automatically react to temperature, humidity, ambient light and vibration. The optional UbiBot DS18B20 waterproof sensor allows you to monitor the temperature of liquids as well. If we add a few smart plugs and relays in the mix it will then be able to turn on and off heaters (120v, 240v, 24v, or old millivolt systems), fans, AC, humidifiers, lights, and anything else that can be plugged in. I purchased the https://amzn.to/36YCCdX. Simply because it was the least expensive smart plug on Amazon that was rated for 13 amps, and also supported IFTTT.

In my case, I’d like to use it to monitor my softub, and turn it off when it reaches a certain temperature. Normally this is accomplished by the integrated circuit of the hot tub. However, I had to bypass all that and wire the the 120v AC directly to the heat pump when my circuit boards kept burning out. This also allows me to create other conditions like only heat it during non-peak hours. I have PGE EV rates so it makes a HUGE difference when you use your power.

PG&E EV2-A electric vehicle rate plan chart with peak and off-peak hours

To accomplish all this I had to install the Ubitbot app, the smart life app. Then configure the two below cloud services:

If This Then That

IFTTT is the free way to do more with hundreds of the apps and devices you love, including Twitter, Dropbox, Evernote, Nest, Fitbit, Amazon Alexa, and Google Assistant.

https://ifttt.com/

Apilio

To extend IFTTT you may need to use this.

https://hackernoon.com/what-smart-home-iot-platform-should-you-use-2554ea213df1

We start with a local Ubuntu computer running homemate-bridge to connect to the MQTT broker. We will use Cloud MQTT as a broker to connect our plugs to our Home Assistant. We will be installing Home Assistant on an Ubuntu Google Cloud micro instance. We set up rules @ IFTTT.com to connect it all to Google assistant. A Google home mini is used to accept voice commands. Optionally, we can extend this setup to run any Linux bash command on the local machine. For example turning computers on using wake-on-lan, and off using SSH.

Yonomi

The simple smart home integration platform.

Yonomi makes it easy for innovators to build great apps and devices that connect with the smart home.

https://www.yonomi.co/

DIY

PlatformIO

Tasmota – ESP8266 firmware
https://github.com/arendst/Tasmota

https://cloud4rpi.io/

https://www.domoticz.com/

Jeedom
INNOVATIVE HOME AUTOMATION
GET JEEDOM

Losant

RemoteMe

Control and collect data from IoT devices from anywhere around the worldUsing web pages hosted for free and mobile applications fully customisable

Howto for ESP8266

https://remoteme.org/

EasyIOT Cloud

Our goal is to create secure, reliable and cheap platform for Internet of Things at your home. We will provide DIY tutorials to build IoT using components like Raspbery Pi, Arduino, NRF24L01+, ESP8266 and our EasyIoT Cloud. With help of EasyIoT community we will make IoT world Easy Internet of Things world (EasyIoT) .

EasyIoT framework is not home automation. Of course you can build home automation system, but you can build much more. Do you need advanced alarm system, remote plant irrigation system, solar cell charger control, SMS controlled heater,  door opener, hydroponic system or even automation process control system. All this you can easily build with EasyIoT framework.BlynkEasyIoT framework is not home automation. Of course you can build home automation system, but you can build much more. Do you need advanced alarm system, remote plant irrigation system, solar cell charger control, SMS controlled heater,  door opener, hydroponic system or even automation process control system. All this you can easily build with EasyIoT framework.

https://easyiot-cloud.com/

gBridge

gBridge.io: Control anything with voice commands
gBridge’s open interface allows you to integrate Google Home™ and Alexa easily in your Smart Home.

gBridge is…
…an application, that provides a Bridge between Google Assistant smart home devices and MQTT, an open and available messaging protocol that is supported by many smart home applications and devices.

https://about.gbridge.io/

CloudMQTT

Hosted message broker for the Internet of Things
Perfectly configured and optimized message queues for IoT, ready in seconds.

https://www.cloudmqtt.com/

Adafruit IOBlynkAdafruit IO

The internet of things for everyoneThe easiest way to stream, log, and interact with your data. We play nice with any device. Our simple client libraries work with the most popular devices such as the Adafruit Feather Huzzah, ESP8266, Raspberry Pi, Arduino, and more.

https://io.adafruit.com/

Selfhosted

Blynk

OpenHAB

Home Assistant

Scrypted

All product links are affiliate links.

]]>
https://jphein.com/smart-home-series-the-smart-tub/feed/ 0 6052
Linux Terminal Service Project (LTSP) Supports MANY Desktops https://jphein.com/linux-terminal-service-project-ltsp-supports-many-desktops/ https://jphein.com/linux-terminal-service-project-ltsp-supports-many-desktops/#respond Mon, 12 Nov 2018 08:33:23 +0000 https://blog.jphein.com/?p=5244 Ubuntu and LTSP can provide a platform for providing desktops environments in many different ways.

LTSP already comes with these client scripts:

  • kiosk – Firefox running locally on thin client.
  • ldm – Linux desktop running remotely on local server.
  • menu – Interactive Menu
  • shell – Drop to root bash shell running locally on thin client.
  • ssh – Secure Shell for remote terminal on local or remote server.
  • telnet – unsecure ssh 😉 running remotely on local or remote server.
  • xdmcp – Raw Xorg linux desktop running remotely on server.
  • xfreerdp – RDP for Windows desktop running remotely on local or cloud server.
  • xterm – xterm terminal running locally on thin client.

This has been furthered by my BoXen Linux project to include:

  • freerdp-nightly – Nightly builds of xfreerdp to take advantage of Microphone redirection and the latest graphics codecs.
  • rdpgui – Gui for displaying a welcome website, and to prompt for credentials when using xfreerdp-nightly.
  • vdi – KVM-VDI LTSP client, see https://github.com/Seitanas/kvm-vdi/
  • vnc – VNCviewer for remote desktop on local or remote Android or MacOS computers.
  • spice – virt-viewer for KVM Virtualization software. Can provide remote access to local or remote desktops of ANY kind you can virtualize.
  • X2go – remote Linux desktop on remote server

LTSP seems to be a very good way of serving desktops.

]]>
https://jphein.com/linux-terminal-service-project-ltsp-supports-many-desktops/feed/ 0 5244
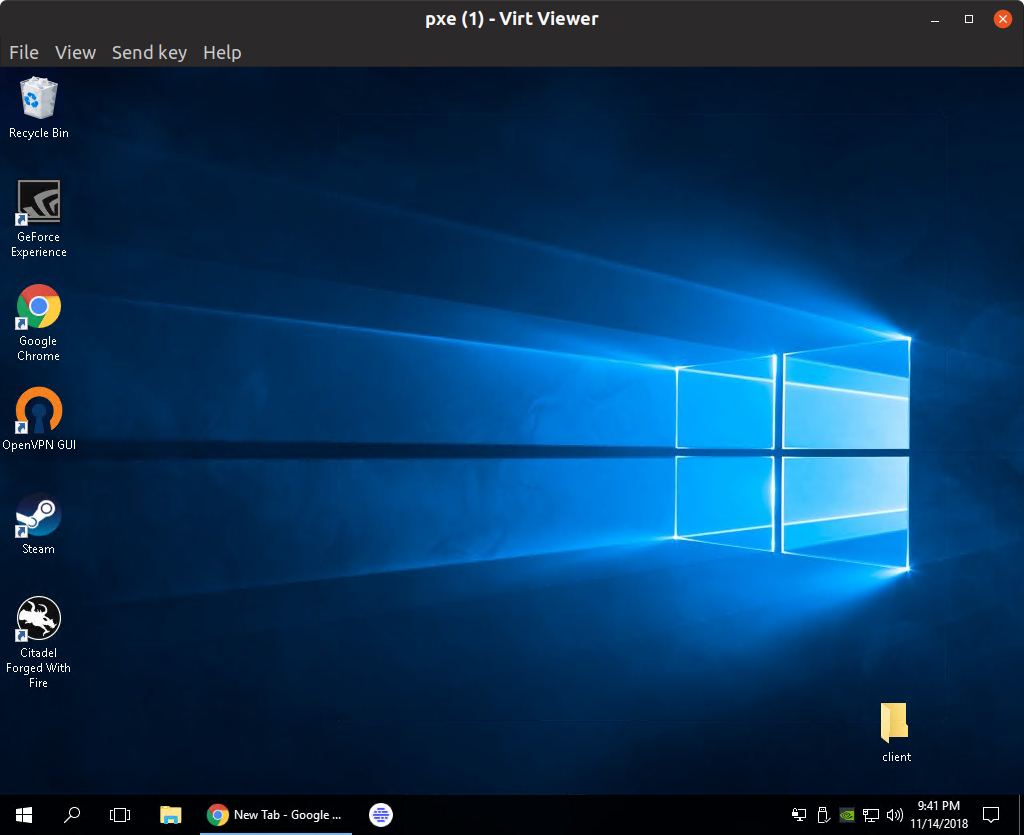
How To Create Infinite Windows Cloud Desktops for Your Nonprofit with BoXenLinux® https://jphein.com/how-to-create-infinite-windows-cloud-desktops-with-boxenlinux/ https://jphein.com/how-to-create-infinite-windows-cloud-desktops-with-boxenlinux/#respond Thu, 08 Nov 2018 02:47:01 +0000 https://blog.jphein.com/?p=5117 Running Windows allows you to easily access proprietary closed source vertical market software. Using  an Azure Nvidia Tesla virtual machine lets you run graphic intensive programs in the cloud. For instance 2D and 3D CAD Drafting, Video, and 3D educational tools. Even 3D games! O_O Coupled with BoXenLinux, and a decent Internet connection you can dramatically reduce hardware, software, maintenance, and energy costs. While still providing many clients Windows Desktop Experiences. To find out more about BoXenLinux visit the github project page here: https://github.com/jphein/boxen

As you can see from the matrix below there are MANY ways of providing desktops to your users.

However, I think this way has many advantages for a Nonprofit. I would recommend it generally, although of course other topographies are more useful in specific situations.

Benefits for a Nonprofit

  • Green computing – Thin clients use less power than traditional workstations.
  • Reduced maintenance costs – Thin client deployment means you’re only maintaining a couple servers, instead of multiple traditional workstations. Using Azure cloud means you don’t have to maintain server hardware.
  • 100% free horizontal software – Completely free Open Source horizontal market software.
  • Discounted vertical market software – Purchase heavily discounted MS remote desktop licenses at Techsoup. Along with anything else you might need. e.g. Quickbooks, MS Office, and any other vertical market software.  https://www.techsoup.org/
  • $3500 Azure Credit, Free Office 360 – Free cloud servers, Office.
    Apply for Microsoft Nonprofit here: https://nonprofit.microsoft.com/register
  • Free Voice,Gsuite,etc.. – Free cloud Telephony, calendaring, file management, and email with custom domain.
    Apply for Google Nonprofit here: https://www.google.com/nonprofits/
  • Free hardware; Nevada County among others will donate their old computers, and peripherals to any eligible local nonprofit. Perfect for blazingly fast thin clients. Bring your tax exempt paperwork to the warehouse on the last Friday of the month. Or, try Purchasing hardware from your local government entity here: https://www.publicsurplus.com/sms/nevadacounty,ca/list/current?orgid=315996 After that try eBay: https://rover.ebay.com/rover/1/711-53200-19255-0/1?mpre=https%3A%2F%2Fwww.ebay.com%2Fb%2FPC-Desktops-All-In-One-Computers%2F179%2Fbn_661752&campid=5337848787&toolid=20008
  • No taxes – If you use Comcast as your internet provider, make sure to file tax exemption paperwork with them to waive the applicable taxes. Email tax exempt certificate to: [email protected] . Include service address & account #.
  • 50% off internet – If you are school, or other eligible nonprofit in California sign up here for 50% off your internet bill. https://jphein.com/discounted-phone-and-internet-for-nonprofits-in-california/

Terms

  • [wiki]Vertical market software[/wiki] – https://en.wikipedia.org/wiki/Vertical_market_software
  • [wiki]Thin client[/wiki] – https://en.wikipedia.org/wiki/Thin_client
  • [wiki]Linux Terminal Server Project[/wiki] (LTSP) – https://en.wikipedia.org/wiki/Linux_Terminal_Server_Project
  • [wiki]Ubuntu[/wiki] – https://en.wikipedia.org/wiki/Ubuntu
  • [wiki]Remote Desktop[/wiki]

Guide

Follow along. At the end of this guide you should be able to plug in any number of old computers without hard drives into your local network. Then have them boot blazingly fast Windows based modern software. Wireless, and remote VPN clients are also supported.

In this setup all thin clients will be sharing a single Windows 2016 Datacenter instance. However, you can provide any number of environments using this method, including huge VDI deployments. My favorite is using LTSP Ubuntu fat client desktops with RemoteApps for seamless cloud integration of necessary windows based proprietary software.

I am using Ubuntu 18.04 Bionic Beaver for the LTSP server, because LTSP does not currently work with Ubuntu 18.10 Cosmic Cuttlefish.* In my case the entire setup was virtualized in the Azure cloud using KVM Virtual Machine Manager for virtual thin clients.

It might look like this:

[Azure Standard D4s v3[[PXE thin client – KVM guest] –> [Ubuntu 18.04] LTSP Server]] –>[Azure Standard NV6 [Windows 2016]]

In real life the more likely scenario would be to install Ubuntu on a bare metal server onsite. Then, install Ubuntu 18.04 inside a KVM vm. Plug a thin client into your network, and configure it for PXE boot in BIOS. It would look a little like this:

[PXE thin client] –> [[Ubuntu 18.10] [Ubuntu 18.04 KVM guest LTSP server]] –> [Firewall] –> [Internet] –> [Azure Standard NV6 [Windows 2016]]

In this guide I will be first showing you how to set up the virtualized system, and then go into some changes you’ll need to make in the field.

Requirements

  • An internet connection. 3MB/s or more recommended.
  • A computer with keyboard and display capable of running at least SSH. To issue the commands from.
  • A computer capable of running Ubuntu with at least one network card. Or a virtual machine capable of nested virtualization like the Azure Standard D4s v3. For the LTSP server.
  • A virtual or real windows machine locally or in the cloud. You’ll need Remote desktop licenses if you want to use microphone forwarding. If using Azure, not every region has the NVIDIA Tesla servers (NV6) for hardware graphics rendering. USA South Central is what I used. This is used for the desktop environment.

IPs

  • 10.0.0.1 – Gateway.
  • 10.0.0.5 – eth0 – Local interface on Ubuntu server – Connected to the Internet.
  • 192.168.122.1 – virbr0 – Virtual bridge on Ubuntu server for testing virtual thin clients.
  • 10.0.0.4 – Windows 2016 datacenter RDP server with NV6 Nvidia Tesla hardware.

Create your Azure Virtual Machines

After signing up and being accepted to Microsoft Nonprofit, verify your $3500 credit here: https://www.microsoftazuresponsorships.com/Balance

Create your virtual machines here: https://portal.azure.com
Note: DO NO USE accelerated networking on the Ubuntu Server.
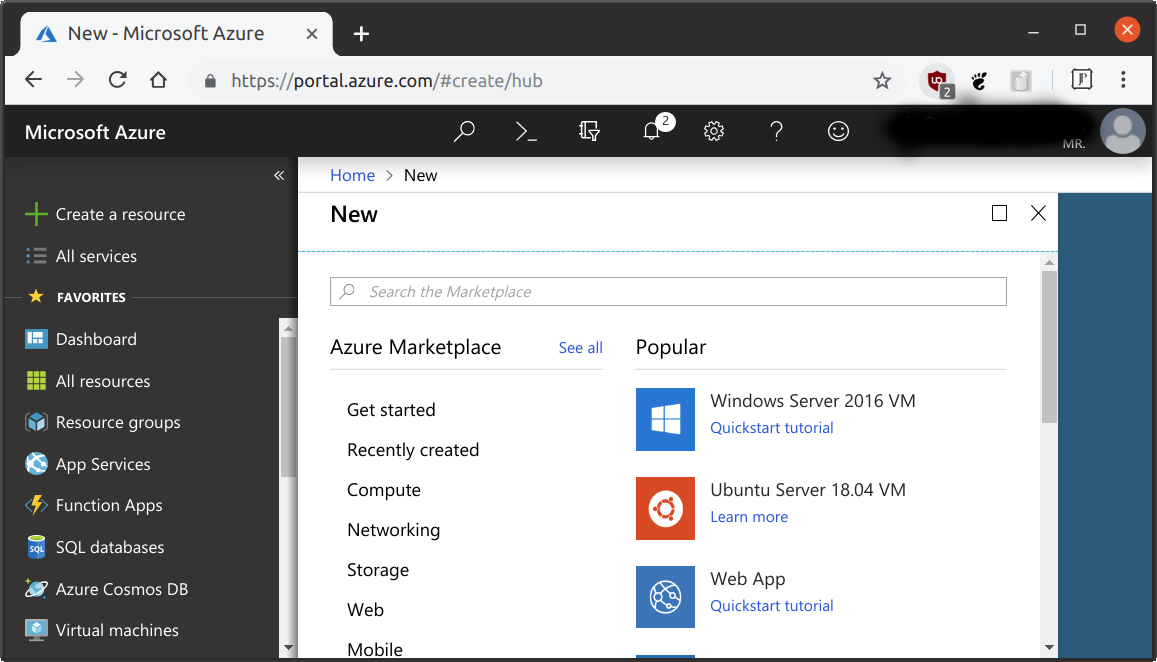
Screenshot from 2018-11-14 18-49-20

LTSP Server

  • Image type: Ubuntu 18.04
  • Size: Azure Standard D4s v3

Desktop Server

  • Image type: Windows 2016 Datacenter
  • Size: Azure Standard NV6

[jbox]Azure comes with a premade Ubuntu 18.04 image, but if you are doing this in the field you would need to install Ubuntu on your server:

Install Ubuntu 18.04.1 Desktop (Minimal)

If you decide to have a local Windows server instead or in addition to the Azure vm, you’ll need to install Windows locally.

Install Windows 2016 Datacenter

  • Download ISO from Microsoft Volume Licensing Center
  • Install

[/jbox]

Configure Windows 2016 Datacenter

Configure remote desktop for microphone redirection:

  • Install Remote Desktop Session Host
  • You’re either still inside the grace period OR have the Remote Desktop Licensing role installed and a valid CAL
  • Make sure the remote desktop group policy allows audio recording

Configure graphics acceleration: https://lg.io/2016/10/12/cloudy-gamer-playing-overwatch-on-azures-new-monster-gpu-instances.html

Configure the Ubuntu and install LTSP Server

[jbox]You can find a bash script automating all the below commands here: https://raw.githubusercontent.com/jphein/boxen/master/boxenbrain [/jbox]

To manually install BoXenLinux we will be configuring LTPS using the Chrootless Proxy mode for in the field. It is the easiest of the 4 ways to install LTSP. However, for the Azure cloud we’ll need to install using a chroot.

[jbox color=green]Set a static IP for your wired network interface in the field

Microsoft azure VM comes with the static IP set on your default interface. However, in the field you’ll need to set a static IP address.
https://www.itzgeek.com/how-tos/linux/ubuntu-how-tos/netplan-how-to-configure-static-ip-address-in-ubuntu-18-04-using-netplan.html

https://netplan.io/examples

[/jbox]

Optional: Install OpenSSH server
If using the Azure install as the LTSP server, you’ll want to overwrite the existing sshd_config so that you can using password login if you used a key when creating the VM.

sudo apt install ssh

Install LTSP and epoptes (epoptes lets you remote desktop in and help anyone using a thin client), Instructions from http://wiki.ltsp.org/wiki/Installation/Ubuntu:

sudo add-apt-repository --yes ppa:ts.sch.gr #The Greek Schools repository
sudo apt install --yes --install-recommends ltsp-server-standalone ltsp-client epoptes

Configure dnsmasq

Note: You may want to edit the /etc/dnmasq.d/ ltsp-server-dnsmasq.conf and add “dhcp-option=3,192.168.122.1” to set a different gateway, but probably not.

sudo ltsp-config dnsmasq --enable-dns
sudo service dnsmasq restart

Add yourself the epoptes group

sudo gpasswd -a ${SUDO_USER:-$USER} epoptes

Was told to remove these packages

sudo apt purge --yes --auto-remove mate-hud snapd

[jbox color=blue title=”Optional: Chroot Install”]

Build a chroot client for alternate arch, dekstop enviroment or package base

Grab freerdp’s key 

cd /etc/ltsp 
sudo wget http://pub.freerdp.com/repositories/ADD6BF6D97CE5D8D.asc
  • Option 1 – with command
sudo ltsp-build-client --purge-chroot --mount-package-cache --mirror 'http://azure.archive.ubuntu.com/ubuntu/' 
 --apt-keys '/etc/ltsp/ADD6BF6D97CE5D8D.asc, /etc/apt/trusted.gpg.d/ts_sch_gr_ubuntu_ppa.gpg' 
 --extra-mirror 'http://ppa.launchpad.net/ts.sch.gr/ppa/ubuntu bionic main, http://pub.freerdp.com/repositories/deb/bionic/ freerdp-nightly main' 
 --late-packages epoptes-client freerdp-nightly --prompt-rootpass --fatclient
  • OR, Option 2 – using my ltsp-build-client.conf
sudo wget https://github.com/jphein/boxen/raw/master/etc/ltsp/ltsp-build-client.conf
sudo ltsp-build-client --config ltsp-build-client.conf

You may want to install a new kernel like this one if the azure kernel doesn’t work with all of KVM’s input drivers:

sudo apt-get install linux-image-lowlatency

Then you have to edit the update-kernels.conf file, so that LTSP chooses that one to boot the client.

Create some symlinks so freerdp-nightly is more easy t my lazy scripting

sudo ltsp-chroot
ln -s /opt/freerdp-nightly/bin/xfreerdp /usr/bin/xfreerdp-nightly
ln -s /usr/share/ltsp/screen.d/xfreerdp /usr/share/ltsp/screen.d/xfreerdp-nightly
exit

Create GUI login screen for xfreerdp-nightly (Not updated!)

cd /opt/ltsp/amd64/usr/share/ltsp/screen.d/

sudo wget https://raw.githubusercontent.com/jphein/boxen/master/rdpgui

sudo wget https://raw.githubusercontent.com/jphein/boxen/master/xfreerdp-prompt

sudo chmod +x rdpgui xfreerdp-prompt
sudo ltsp-update-image

Note: You may get this error on Microsoft Azure VM! https://bugs.launchpad.net/ubuntu/+source/ltsp/+bug/1802707 hmmmm…. This script seems to fix it:

#!/bin/bash
# tadaen sylvermane | jason gibson
# configure locales for ubuntu bionic ltsp chroot creation


for var in LC_ALL= LANG= ; do
        export "$var"en_US.UTF-8
done
ltsp-build-client --chroot "$1"

[/jbox]

[jbox color=green title=”Local Chrootless Install”]

This is the recommended, and simplest install

Install FreeRDP-nightly and client zenity GUI

sudo sh -c 'echo "deb http://pub.freerdp.com/repositories/deb/$(lsb_release -cs)/ freerdp-nightly main" >> /etc/apt/sources.list.d/freerdp-nightly.list' 
wget -O - http://pub.freerdp.com/repositories/ADD6BF6D97CE5D8D.asc | sudo apt-key add - 
sudo apt update 
sudo apt install --yes freerdp-nightly
sudo ln -s /opt/freerdp-nightly/bin/xfreerdp /usr/bin/xfreerdp-nightly
cd /usr/share/ltsp/screen.d/
sudo ln -s xfreerdp xfreerdp-nightly
sudo wget https://raw.githubusercontent.com/jphein/boxen/master/usr/share/ltsp/screen.d/rdpgui 
sudo wget https://raw.githubusercontent.com/jphein/boxen/master/usr/share/ltsp/screen.d/xfreerdp-prompt 
sudo wget https://raw.githubusercontent.com/jphein/boxen/master/usr/share/ltsp/screen.d/launch
sudo mkdir boxen  
cd boxen
sudo wget https://raw.githubusercontent.com/jphein/boxen/master/usr/share/ltsp/screen.d/boxen/welcome 
cd ..
sudo ln -s launch welcome
sudo ln -s /sbin/shutdown shutdown
sudo chmod +x rdpgui xfreerdp-prompt launch boxen/welcome

Create LTSP client NBD image using the chrootless method of the servers root /

You need to run this any time you make changes to your filesystem you want to be updated in your LTSP client.

sudo ltsp-update-image --cleanup /

[/jbox]

Grab the lts.conf for our thin clients

cd /var/lib/tftpboot/ltsp/amd64/
sudo wget https://raw.githubusercontent.com/jphein/boxen/master/var/lib/tftpboot/amd64/lts.conf

Edit lts.conf to suit your needs

nano -w lts.conf

Test with KVM virtual pxe thin client

If you are already using KVM to install Ubuntu in a VM then you don’t need to install it again. However, if you are using a real bare metal server then you’ll need to run the install command.

sudo apt install virt-manager

[jbox]Libvirtd will run dnsmasq on virbr0 by default. We need to kill that instance and restart the global dnsmasq with our LTSP configs. You will need to killall and restart dnsmasq every time you reboot.

###dnsmasq hack for testing
sudo mv /etc/dnsmasq.d/libvirt-daemon /root/
sudo sh -c 'echo "dhcp-range=192.168.122.20,192.168.122.250,8h" >> /etc/dnsmasq.d/ltsp-server-dnsmasq.conf
#These steps will need to performed again if you reboot
sudo killall dnsmasq
sudo service dnsmasq restart

[/jbox]

#Create the PXE test KVM client
sudo virt-install 
  --name pxe 
  --memory 4096 
  --vcpus 2 
  --disk none 
  --pxe 
  --os-variant ubuntu17.10 
  --wait 0

Connect locally using very nice spice

virt-viewer --connect qemu:///system pxe

Connect remotely using spice

virt-viewer --connect qemu+ssh://[email protected]/system pxe

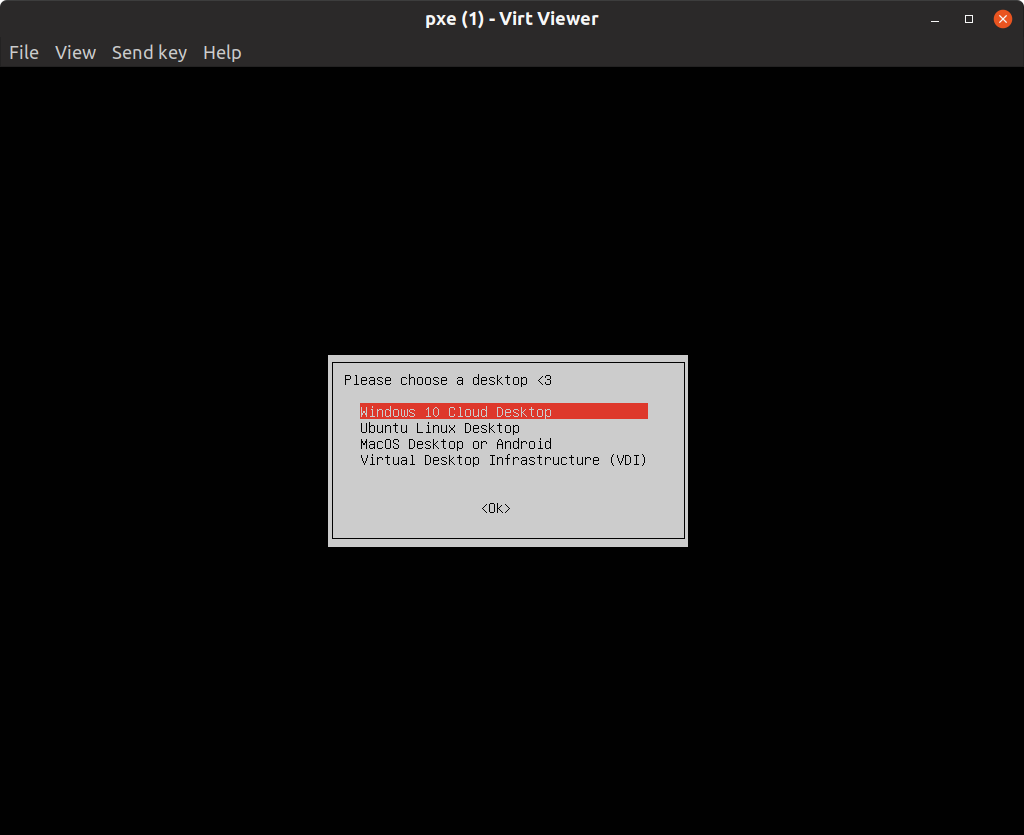
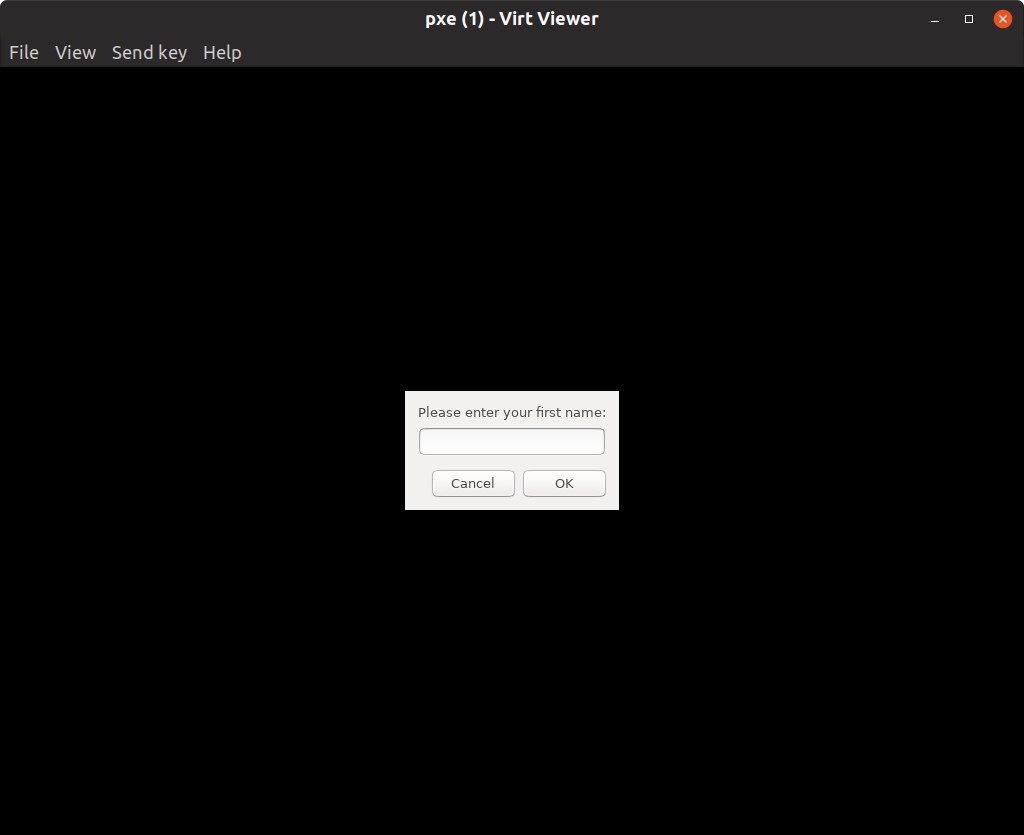
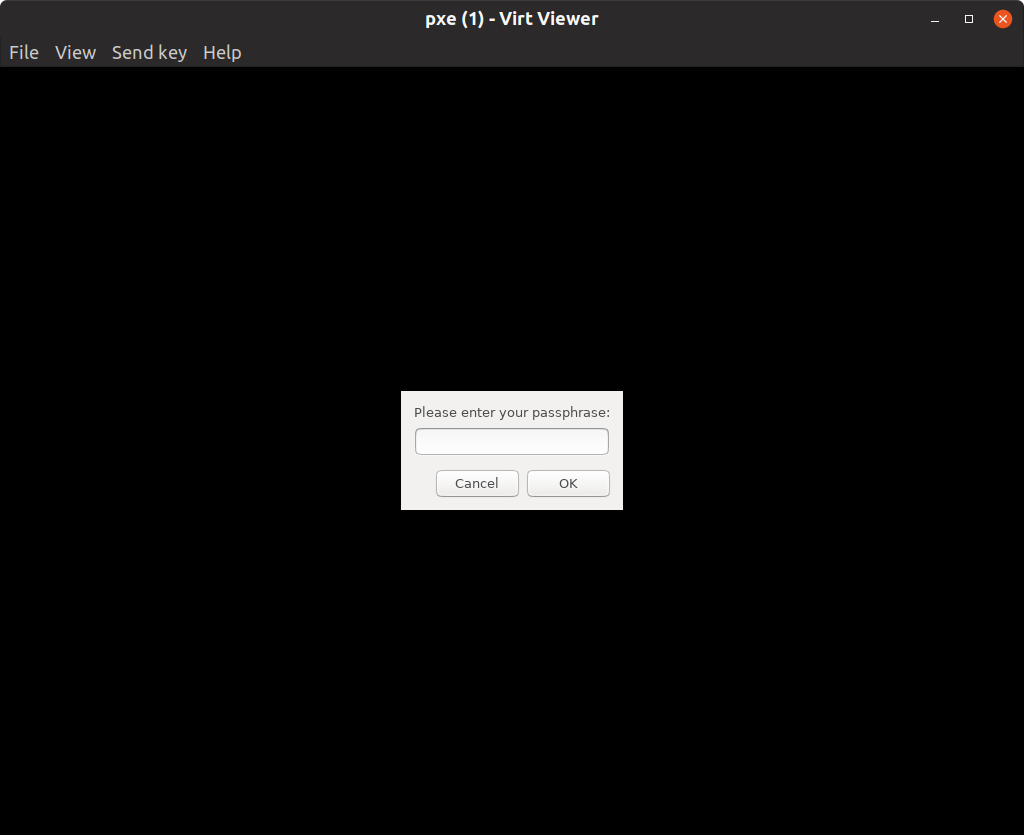
PXE boot menu in Virt Viewer: Welcome to BoXenLinux, type brain, baby or hdScreenshot from 2018-11-11 23-58-02


Screenshot from 2018-11-14 21-30-44 Screenshot from 2018-11-14 21-33-48 Screenshot from 2018-11-14 21-34-11 Screenshot from 2018-11-14 21-41-25 Tada!!!

See also

lts.conf manpage ltsp-build-client manpage ltsp-update-image manpage ltsp-config manpage ltsp-chroot manpage http://wiki.ltsp.org/wiki/Installation/Ubuntu https://help.ubuntu.com/community/HowToSetupLTSPDevelEnvironment https://github.com/wyllianbs/xfreerdp-gui https://unix.stackexchange.com/questions/119880/make-freerdp-prompt-user-for-username-and-password/187370 http://www.saminiir.com/debugging-pxe-boot/

* Ubuntu 18.10 I previously tried this with Ubuntu 18.10 Cosmic Cuttlefish, and ran into some issues. Mainly the maintainer of LTSP for Ubuntu does not fix anything that is not a LTS release.

Optional Install ltsp-manager


sudo add-apt-repository --yes ppa:franz-die/ltsp-manager; apt update

sudo apt install ltsp-manager

Optional: Install X2Go remote desktop software

sudo add-apt-repository ppa:x2go/stable
sudo apt-get update
sudo apt-get install x2goserver x2goserver-xsessions x2gomatebindings

Optional: Install Ubiquity to install Ubuntu on PXE booted clients or servers

sudo apt-get install ubiquity ubiquity-frontend-gtk

Running it is a manner of running from the client

ubiquity gtk_ui

Optional: Add iPXE to grub menu

apt install grub-ipxe

[jbox]Optional: Set up Firewall with IP Masquerading 

Probably won’t need to do this.

First, packet forwarding needs to be enabled in ufw. Two configuration files will need to be adjusted, in /etc/default/ufw change the DEFAULT_FORWARD_POLICY to “ACCEPT”:

sudo nano -w /etc/default/ufw #change DEFAULT_FORWARD_POLICY="ACCEPT"

Then edit /etc/ufw/sysctl.conf,

sudo nano -w /etc/ufw/sysctl.conf

and uncomment:

net/ipv4/ip_forward=1
net/ipv6/conf/default/forwarding=1

Now add rules to the /etc/ufw/before.rules file. The default rules only configure the filter table, and to enable masquerading the nat table will need to be configured. Add the following to the top of the file just after the header comments:

sudo nano /etc/ufw/before.rules
# nat Table rules
*nat
:POSTROUTING ACCEPT [0:0]

# Forward traffic from eth1 through eth0.
-A POSTROUTING -s 192.168.122.0/24 -o eth0 -j MASQUERADE

# don’t delete the ‘COMMIT’ line or these nat table rules won’t be processed
COMMIT

Allow SSH

sudo ufw allow 22
sudo ufw allow from 192.168.122.0/24 
sudo ufw enable

[jbox]

Optional: Install apt-cacher

apt-cacher will cache packages so you don’t waste your time downloading them again again.

sudo apt install apt-cacher
sudo nano /etc/apt-cacher/apt-cacher.conf #Uncomment allowed_hosts= *
sudo ufw allow 3142/tcp
sudo sh -c 'echo "Acquire::http::Proxy "http://10.0.0.5:3142"";' > /etc/apt/apt.conf.d/01proxy
sudo /usr/share/apt-cacher/apt-cacher-import.pl -l /var/cache/apt/archives
sudo service apt-cacher restart

Optional: Test with QEMU

Set up virtual bridge for client networking

On the azure VM I was able to use the default virtual bridge virbr0. Just commented out the dnsmasq.d/ file libvirt that prevented dnsmasq from serving IPs on that network. However, testing on a real server I needed to make my own bridge. These commands should not be issued if working on your server remotely. Only a local bare metal install should issue these commands.

sudo ip tuntap add dev virttap mode tap user $USER
sudo brctl addbr virtbr
sudo brctl addif virtbr eth0 # your LAN interface
sudo brctl addif virtbr virttap
sudo ip link set virtbr up
sudo ip link set eth0 up
sudo ip link set virttap up
dhclient virtbr

You may need to restart dnsmasq again

sudo service dnsmasq restart

Run QEMU to test your LTSP setup

cd
qemu-img create -f vmdk testpxe.vmdk 10
/usr/bin/qemu-system-x86_64 -m 1024 -hda testpxe.vmdk 
                              -boot n 
                              -option-rom /usr/share/qemu/pxe-rtl8139.rom 
                              -net nic 
                              -net tap,ifname=virttap,script=no,downscript=no


]]>
https://jphein.com/how-to-create-infinite-windows-cloud-desktops-with-boxenlinux/feed/ 0 5117
What I’m writing about: https://jphein.com/what-im-writing-about/ https://jphein.com/what-im-writing-about/#respond Sat, 03 Nov 2018 20:49:36 +0000 https://blog.jphein.com/?p=5024

created at TagCrowd.com

]]>
https://jphein.com/what-im-writing-about/feed/ 0 5024
How to Build a LTSP chroot client image with the latest Greek schools PPA, and XfreeRDP Nightly https://jphein.com/how-to-build-a-ltsp-chroot-client-image-with-the-latest-greek-schools-ppa-and-xfreerdp-nightly/ https://jphein.com/how-to-build-a-ltsp-chroot-client-image-with-the-latest-greek-schools-ppa-and-xfreerdp-nightly/#respond Thu, 13 Sep 2018 07:57:35 +0000 https://blog.jphein.com/?p=5257 Build a chroot client

The Greek Schools repository 

sudo add-apt-repository --yes ppa:ts.sch.gr

Grab freerdp’s key 

cd /etc/ltsp 
sudo wget http://pub.freerdp.com/repositories/ADD6BF6D97CE5D8D.asc
  • Option 1 – with command
sudo ltsp-build-client --purge-chroot --mount-package-cache --mirror 'http://azure.archive.ubuntu.com/ubuntu/' \
 --apt-keys '/etc/ltsp/ADD6BF6D97CE5D8D.asc, /etc/apt/trusted.gpg.d/ts_sch_gr_ubuntu_ppa.gpg' \
 --extra-mirror 'http://ppa.launchpad.net/ts.sch.gr/ppa/ubuntu bionic main, http://pub.freerdp.com/repositories/deb/bionic/ freerdp-nightly main' \
 --late-packages epoptes-client freerdp-nightly --prompt-rootpass \
  • OR, Option 2 – using my ltsp-build-client.conf
sudo wget https://github.com/jphein/boxen/raw/master/etc/ltsp/ltsp-build-client.conf
sudo ltsp-build-client --config ltsp-build-client.conf

Create some symlinks so freerdp-nightly is more easy t my lazy scripting

sudo ltsp-chroot
ln -s /opt/freerdp-nightly/bin/xfreerdp /usr/bin/xfreerdp-nightly
ln -s /usr/share/ltsp/screen.d/xfreerdp /usr/share/ltsp/screen.d/xfreerdp-nightly
exit

Create GUI login screen for xfreerdp-nightly

cd /opt/ltsp/amd64/usr/share/ltsp/screen.d/

sudo wget https://raw.githubusercontent.com/jphein/boxen/master/rdpgui

sudo wget https://raw.githubusercontent.com/jphein/boxen/master/xfreerdp-prompt

sudo chmod +x rdpgui xfreerdp-prompt

sudo ltsp-update-image

[jbox]You may get this error on Microsoft Azure VM! https://bugs.launchpad.net/ubuntu/+source/ltsp/+bug/1802707 hmmmm…. This script seems to fix it:

#!/bin/bash
# tadaen sylvermane | jason gibson
# configure locales for ubuntu bionic ltsp chroot creation


for var in LC_ALL= LANG= ; do
        export "$var"en_US.UTF-8
done
ltsp-build-client --chroot "$1"

[/jbox]

  • End of Option 2
]]>
https://jphein.com/how-to-build-a-ltsp-chroot-client-image-with-the-latest-greek-schools-ppa-and-xfreerdp-nightly/feed/ 0 5257
How to batch optimize all jpgs using a bash script to speed up your site https://jphein.com/how-to-batch-optimize-all-jpgs-jpegs-using-bash-script/ https://jphein.com/how-to-batch-optimize-all-jpgs-jpegs-using-bash-script/#respond Thu, 15 Feb 2018 18:31:04 +0000 https://blog.jphein.com/?p=4799 Based on Google Insights article here:

https://developers.google.com/speed/docs/insights/OptimizeImages

JPEG is a lossy format. The compression process removes visual details of the image, but the compression ratio can be 10x larger than GIF or PNG.

  • Reduce quality to 85 if it was higher. With quality larger than 85, the image becomes larger quickly, while the visual improvement is little.
  • Reduce Chroma sampling to 4:2:0, because human visual system is less sensitive to colors as compared to luminance.
  • Use progressive format for images over 10k bytes. Progressive JPEG usually has higher compression ratio than baseline JPEG for large image, and has the benefits of progressively rendering.
  • Use grayscale color space if the image is black and white.


The following code will recursively optimize every .jpg file in your working directory.

#!/bin/bash
find . -iname "*.jpg" | xargs -n1 -P8 -I{} convert -sampling-factor 4:2:0 -strip -quality 85 -interlace JPEG -colorspace sRGB "{}" "{}"


Code from below.

https://superuser.com/questions/790902/how-to-batch-compress-images-with-imagemagick-or-similar-command-or-program-in-l

Using a ‘for’ loop will definitely work – and is a good general technique – but you almost certainly have more than 1 processor on your machine, so why do just one conversion at a time?

You can get things moving a lot quicker if you do:

find *.jpg | xargs -n1 -P8 -I{} convert -resize 20% "{}" "opt-{}"

The arguments to xargs are:

n1  - Only give 'convert' one file at a time
P8  - Use 8 processes
I{} - Replace {} with the filename given by 'find'

And then the convert command is given afterwards.

shareimprove this answer
]]>
https://jphein.com/how-to-batch-optimize-all-jpgs-jpegs-using-bash-script/feed/ 0 4799
How to find any file or folder with a trailing space in it’s name, and delete the trailing space https://jphein.com/how-to-find-any-file-or-folder-with-a-trailing-space-in-its-name-and-delete-the-trailing-space/ https://jphein.com/how-to-find-any-file-or-folder-with-a-trailing-space-in-its-name-and-delete-the-trailing-space/#respond Mon, 13 Nov 2017 23:26:09 +0000 https://blog.jphein.com/?p=4758 Windows does not know how to handle files or folders whos name ends in a space. Usually Windows won’t allow you to delete these files, and other bizarre behavior.

This is a simple bash command to fix that.


find . -name '* ' -exec sh -c 'x="{}"; mv "$x" "${x%?}"' \;
]]>
https://jphein.com/how-to-find-any-file-or-folder-with-a-trailing-space-in-its-name-and-delete-the-trailing-space/feed/ 0 4758
Ubuntu Bash is now included in Windows 10! o_o https://jphein.com/bash-is-now-included-in-windows-10/ https://jphein.com/bash-is-now-included-in-windows-10/#respond Thu, 28 Apr 2016 08:30:27 +0000 https://blog.jphein.com/?p=3338 https://en.wikipedia.org/wiki/Bash_(Unix_shell)

Windows 10 has added a Linux subsystem which fully supports Bash and other Ubuntu binaries running natively in Windows.[9]

https://blogs.windows.com/buildingapps/2016/03/30/run-bash-on-ubuntu-on-windows/

]]>
https://jphein.com/bash-is-now-included-in-windows-10/feed/ 0 3338
The best Bash backup script ever! ~ Jeffrey Pine Hein https://jphein.com/the-best-backup-script-ever/ https://jphein.com/the-best-backup-script-ever/#respond Thu, 28 Apr 2016 08:12:02 +0000 https://blog.jphein.com/?p=3329 This script for backing up websites securely using Google Cloud Storage (Nearline)
Cost: $0.01 per GB per month

You will need to read these guides before starting with this one:

/install-gcsfuse-inside-a-google-cloud-compute-engine-running-ubuntu-15-10/

/how-to-mount-a-google-cloud-storage-bucket-as-a-drive-in-ubuntu-15-10-wily-using-fuse/

/how-to-mount-a-google-drive-as-a-drive-in-ubuntu-15-10-wily-using-fuse/

/how-to-fix-the-device-or-resource-busy-error-when-trying-to-mount-your-google-drive-on-your-headless-google-cloud-compute-engine-server-running-ubuntu-15-10-wily/

/how-to-use-duplicity-to-backup-directly-to-a-google-cloud-storage-bucket-to-achieve-time-machine-like-incremental-backups-on-ubuntu-15-10-wily/

Install in home directory

~/backups

Run as a normal user:

~/backups/bin/backup > backuplog.txt 2> errorlog.txt
#!/bin/bash
#Change the variables below to reflect your information
echo "------------------------------------------------------------------"
echo "                 Hang Left Hosting Client Backups"
echo "------------------------------------------------------------------"
echo "------------------------------------------------------------------" >&2
echo "          Hang Left Hosting Client Backups Error Log" >&2
echo "------------------------------------------------------------------" >&2

echo "Creating variables..."

#Create variables
#GREEN='\033[0;32m'
#NC='\033[0m' # No Color
printf "$0 <-- Name and path of this script.\n"
WD="/opt/backups" #Working directory
printf "$WD <-- Working Directory on local server.\n"
BIN_DIR="$WD/bin"
printf "$BIN_DIR/ <-- Script directory on local server.\n"
DOMAIN="example.com"
printf "$DOMAIN <-- Hostname or IP of server that has clients' live data (Data we are backing up)\n"
DIR_LIST="*"
printf "$DIR_LIST <-- Directories we are backing up under /home/{client}/ on $DOMAIN.\n"
echo "If a wildcard \"*\" is used, we will backup every file and folder in their home directory."
shopt -s dotglob #This is needed incase you use the wildcard, and you want it to back up hidden files like .htaccess
echo "------------------------------------------------------------------"

#Google Cloud storage bucket
echo "A Google Cloud storage bucket is used for longterm storage of incremental backups."
BUCKET="$DOMAIN-backups"
printf "$BUCKET <-- Google Cloud storage bucket name\n"
BUCKET_DIR="$WD/$BUCKET"
printf "$BUCKET_DIR <-- Google Cloud storage bucket mount point\n"
echo "------------------------------------------------------------------"

#Google Drive
echo "Google Drive is used for secure shared access to the SSH key directory"
GDRIVE="$WD/google-drive"
printf "$GDRIVE <-- Google Drive mount point\n"
KEY_DIR_SYNC="$GDRIVE/keys"
PASS_DIR_SYNC="$GDRIVE/passwords"
TEST_KEY_DIR_SYNC="/home/$username/keys"
printf "$KEY_DIR_SYNC <-- Path to directory of SSH keys on Google Drive\n"
KEY_DIR="$WD/keys"
printf "$KEY_DIR <-- Path to local mirror of SSH keys\n"
echo "------------------------------------------------------------------"

#Google Cloud compute presistant disks
#The name of the persistant disk mkfs.ext4 -L <label>
echo "A Google Cloud compute disk is used to store a local mirror of clients' data"
PDISK="clients"
printf "$PDISK <-- Google Cloud compute persistant disk name (mkfs.ext4 -L <label>)\n"
SYNC_DIR="/mnt/$PDISK"
printf "$SYNC_DIR <-- Google Cloud compute persistant disk mount point\n"
echo "------------------------------------------------------------------"

echo "Creating directories..."
echo "------------------------------------------------------------------"
#Create  directories
#sudo mkdir -p $WD
#sudo chmod a+w $WD
mkdir -p $SYNC_DIR $BUCKET_DIR $GDRIVE

echo "------------------------------------------------------------------"
echo "Mounting Google drive..."
echo "------------------------------------------------------------------"
#Mount Google GDRIVE
google-drive-ocamlfuse $GDRIVE

#Copy the keys folder from Google GDRIVE
mkdir -p $KEY_DIR
echo "------------------------------------------------------------------"
echo "Syncing SSH keys from Google Drive..."
echo "------------------------------------------------------------------"
echo ""
rsync -azr --delete --progress "$KEY_DIR_SYNC" $WD
#rsync -azr --delete --progress "$TEST_KEY_DIR_SYNC" $WD
chmod 600 $KEY_DIR/*

echo "------------------------------------------------------------------"
echo "Mounting Google Cloud storage bucket..."
#Mount Google storage bucket
gcsfuse $BUCKET $WD/$BUCKET
echo "------------------------------------------------------------------"
echo "Mounting Google Cloud persistant disk..."
echo "------------------------------------------------------------------"

#Mount Google Persistant disk
#sudo mount -o discard,defaults /dev/disk/by-label/$PDISK $SYNC_DIR
#sudo chmod a+w $SYNC_DIR

for i in `ls -1 $KEY_DIR`; do
	#Identify client in error log
	echo "Client: $i" >&2
	#Craft the SSH command
	SSH="ssh -p 2222 -o StrictHostKeyChecking=no -o IdentityFile=$KEY_DIR/$i"

	echo "------------------------------------------------------------------"
	echo ""
	echo "[$i] <-- Syncing client" #Display client
	echo "------------------------------------------------------------------"
	echo "Syncing public_html from live server to a mounted Google cloud persistant disk using rsync..."
	echo "------------------------------------------------------------------"

	#Copy password into mysql backup script
	#$BIN_DIR/findpw.sh $i > "$PASS_DIR_SYNC/$i.txt"
	PASS=`cat "$PASS_DIR_SYNC/$i.txt"`
	cp $WD/mysqlbackup.sh $BIN_DIR/
	sed -i 's/love/"'"$PASS"'"/g' $BIN_DIR/mysqlbackup.sh
	chmod u+x $BIN_DIR/mysqlbackup.sh
	#Sync bin directory
	rsync -azhv --progress --delete -e "$SSH" $BIN_DIR/ $i@$DOMAIN:/home/$i/bin/

	mkdir -p $BUCKET_DIR/$i

#	#Mount the SSH Share
#	BU_DIR="$WD/inmotion-clients"
#	mkdir $BU_DIR/$i
#	sshfs -p 2222 -o StrictHostKeyChecking=no -o IdentityFile=$KEY_DIR/$i $i@$DOMAIN:/home/$i $BU_DIR/$i
#	#Unmount the share
#	#sleep 5
#	#fusermount -u $BU_DIR/$i


#	#Copy old backups
#	if [ ! -d $BUCKET_DIR/$i/archives ]; then
#	echo "------------------------------------------------------------------"
#	echo "Copying current backups to archives..."
#	echo "------------------------------------------------------------------"
#	mkdir $BUCKET_DIR/$i/archives -p
#	$SSH $i@$DOMAIN "mkdir -p /home/$i/backups/archives && tar czf /home/$i/backups/archives/2016-04-01.tar.gz /home/$i/backups/2016-04-01"
#	$SSH $i@$DOMAIN "mkdir -p /home/$i/backups/archives && tar czf /home/$i/backups/archives/2016-04-12.tar.gz /home/$i/backups/2016-04-12"
#	rsync -azhv --stats --progress -e "$SSH" $i@$DOMAIN:/home/$i/backups/archives/*.tar.gz $BUCKET_DIR/$i/archives/
#
#	#Delete old backups
#	echo "Deleting old backups..."
#	$SSH $i@$DOMAIN "rm -rf /home/$i/backups/2016* /home/$i/backups/archives"
	$SSH $i@$DOMAIN "crontab -r"
#	fi

	#Back up MySQL
	echo "Backing up MySQL database..."
	echo "------------------------------------------------------------------"
	mkdir $BUCKET_DIR/$i/mysql -p
	$SSH $i@$DOMAIN "/home/$i/bin/mysqlbackup.sh"
	rsync -azh --progress --stats -e "$SSH" $i@$DOMAIN:/home/$i/backups/*.sql.gz $BUCKET_DIR/$i/mysql/
	#Sync the Google storage cloud with our presistant disk mirror
	#gsutil -m rsync -d -r -e $SYNC_DIR/$i gs://$BUCKET/$i


	#Sync our clients website with a persistanct disk mirror using rsync
	#for n in $DIR_LIST; do
	echo "Backing up files..."
	echo "------------------------------------------------------------------"
	rsync -azh --stats --progress -e "$SSH" --exclude "*.zip" --exclude ".sql" --exclude "sql.gz" --exclude "tar.gz" $i@$DOMAIN:/home/$i/$DIR_LIST $SYNC_DIR/$i #2>> error.log
	if [ $? != 0 ]; then
		echo $i >> error.log
		echo "ERROR!"
	fi
	#done

	echo ""
	echo "[$i] <-- Backing up client" #Display client
	echo "------------------------------------------------------------------"
	echo "Backing up data to a Google Gloud storage bucket using duplicity.."
	echo "------------------------------------------------------------------"
	echo "An incremental backup every day. A full backup every month."
	echo "We keep 12 full backups and their corresponding incrementals."
	echo "One year of daily back up data!"
	echo "------------------------------------------------------------------"

	#Clean up in case of aborted backups
	duplicity cleanup --no-encryption --force gs://$BUCKET/$i

	#Backup data to bucket
	duplicity --progress --no-encryption --full-if-older-than 1M $SYNC_DIR/$i gs://$BUCKET/$i

	#Delete old backups
	#duplicity remove-older-than 1Y --force $SYNC_DIR/$i gs://$BUCKET/$i
	duplicity remove-all-but-n-full 12 --force gs://$BUCKET/$i

	#sshfs -p 2222 -o allow_other,defer_permissions,IdentityFile=$DIR/$i [email protected]:/home/$i/backups $BU_DIR/$i
	#scp -p 2222 -i $DIR/$1 filebackup.sh $i@$DOMAIN:bin/
	#cat filebackup.sh | $SSH 'cat > bin/filebackup.sh'
	#$SSH '~/bin/install_backup.sh; rm -rf ~/backups/MONTHLY; rm -rf ~/backups/2015-*; rm -rf ~/backups/WEEKLY-*; rsync -ah ~/public_html/ ~/backups/MONTHLY; ~/bin/filebackup.sh' 
	#rsync -am --stats  $BU_DIR/$i/public_html $BUCKET_DIR/$1/

done
sleep 10
fusermount -u $GDRIVE
fusermount -u $BUCKET_DIR
#sudo umount $SYNC_DIR
]]>
https://jphein.com/the-best-backup-script-ever/feed/ 0 3329
How to run a script and have it output nice logs for you in bash https://jphein.com/how-to-run-a-script-and-have-it-output-nice-logs-for-you-in-bash/ https://jphein.com/how-to-run-a-script-and-have-it-output-nice-logs-for-you-in-bash/#respond Thu, 28 Apr 2016 05:26:29 +0000 https://blog.jphein.com/?p=3319 It is standard when you are writing your script, to write errors to “Standard Error” ( STDERR ). Like so:

echo "Unique ID and Error" >&2

Usually when you run a script it outputs both standard error and standard output to your terminal display. You can however redirect those to log files.

If you want just the standard output to be logged (errors will still be displayed in your terminal):

./myscript > scriptlog.txt

If you want your errors to be logged to a file and have the standard output still displayed in your terminal:

./myscript 2> errorlog.txt

For having them outputted to different files:

./myscript > scriptlog.txt 2> errorlog.txt

Finally, if you want both standard error and standard output to be sent to the same file:

./myscript > scriptlog.txt 2>&1

Also, you can use this same redirection to make the script completely silent (For instance when you are running the script as a cronjob, and do not want it to send you email):

./myscript > /dev/null 2>&1
]]>
https://jphein.com/how-to-run-a-script-and-have-it-output-nice-logs-for-you-in-bash/feed/ 0 3319
How to install Virtualbox Extension Pack from the command line (Bash) on Ubuntu 15.10 wily https://jphein.com/how-to-install-virtualbox-extension-pack-from-the-command-line-bash-on-ubuntu-15-10-wily/ https://jphein.com/how-to-install-virtualbox-extension-pack-from-the-command-line-bash-on-ubuntu-15-10-wily/#respond Wed, 13 Apr 2016 02:50:41 +0000 https://blog.jphein.com/?p=2962 From: https://forums.virtualbox.org/viewtopic.php?f=7&t=44337

#!/bin/bash
version=$(vboxmanage -v)
echo $version
var1=$(echo $version | cut -d ‘r’ -f 1)
echo $var1
var2=$(echo $version | cut -d ‘r’ -f 2)
echo $var2
file=”Oracle_VM_VirtualBox_Extension_Pack-$var1-$var2.vbox-extpack”
echo $file
wget http://download.virtualbox.org/virtualbox/$var1/$file -O /tmp/$file
#sudo VBoxManage extpack uninstall “Oracle VM VirtualBox Extension Pack”
sudo VBoxManage extpack install /tmp/$file –replace

]]>
https://jphein.com/how-to-install-virtualbox-extension-pack-from-the-command-line-bash-on-ubuntu-15-10-wily/feed/ 0 2962