https://en.wikipedia.org/wiki/Link_aggregation
Broadband bonding is a type of channel bonding that refers to aggregation of multiple channels at OSI layers at level four or above. Channels bonded can be wired links such as a T-1 or DSL line. Additionally, it is possible to bond multiple cellular links for an aggregated wireless bonded link.
Previous bonding methodologies resided at lower OSI layers, requiring coordination with telecommunications companies for implementation. Broadband bonding, because it is implemented at higher layers, can be done without this coordination.[24]
Commercial implementations of Broadband Channel Bonding include:
- Mushroom Networks’ Broadband Bonding Service [25]
- Connectify’s Speedify fast bonding VPN – software app for multiple platforms: PC, Mac, iOS and Android [26]
- Peplink’s SpeedFusion Bonding Technology [27]
- Viprinet’s Multichannel VPN Bonding Technology [28]
- Elsight’s Multichannel Secure Data Link [29]
- Synopi’s Natiply Internet Bonding Technology [30]
My journey for usable internet from worse to best on unstable lines:
Speedify on RPi -> OpenMPTCProuter(best of all for TCP only + aggregate) -> borrowed Peplink -> Glorytun UDP (bad with packet loss, even at 1% limiter) -> ExitLag -> Engarde (no aggregation), finally done 
Bonding without aggregation
From: https://github.com/porech/engarde
Site to Site Bonding
https://blog.muthuraj.in/2020/06/high-throughput-site-to-site-vpn-using.html
Ubiquity Edgerouter X on both ends
Load-balancing:
Ubiquity Edgerouter X
OpenWRT MWAN3
https://github.com/bertrandmartel/openwrt-mwan-config
Luckily securing RDP with WireGuard is pretty easy. Plus there is a WireGuard app for most platforms. Windows, MacOS, Linux, iOS, Android, etc.. https://www.wireguard.com/install/
From: https://www.henrychang.ca/how-to-setup-wireguard-vpn-server-on-windows/
Setup firewall rules (just as you would for a Linux server setup: open and forward ports 51820, configure ddns etc)
You can use the handy graphical tool for setting up the VPN with Wireguard for Windows. Simply download, and install the Windows version, and run Wireguard.
From: https://golb.hplar.ch/2019/07/wireguard-windows.html
One feature I like is that the Windows version of WireGuard remembers the VPN connection state. When you reboot Windows while WireGuard is connected to the server, the software automatically reconnects and re-establishes the VPN tunnel when it starts up. This prevents you from accidentally connecting without a VPN.
My server conf
[Interface]
PrivateKey =
ListenPort = 51820
Address = 10.5.4.1/32

[Peer]
PublicKey =
AllowedIPs = 10.5.4.25/32

[Peer]
PublicKey =
AllowedIPs = 10.5.4.20/32
To add another user just add another [Peer] section.
Then install your client App.
My client conf:
[Interface]
Address = 10.5.4.25
PrivateKey =
#DNS = 10.5.5.1 #Server caching dnsmasq that forwards to azure
#DNS = 168.63.129.16 #Azure
DNS = 1.1.1.1 #Cloudflare

[Peer]
PublicKey =
Endpoint = <serverip>:51820
#Endpoint = 127.0.0.1:59401
#AllowedIPs = 0.0.0.0/0
AllowedIPs = 10.5.4.1/32

# This is for if you're behind a NAT and
# want the connection to be kept alive.
PersistentKeepalive = 25
To generate a keypair for your client I use:
wg genkey | tee privatekey | wg pubkey > publickeyTo turn your conf file into a qr code use:
qrencode -t ansiutf8 < wg0.confPoint your remote desktop software to 10.5.4.1 instead of the server’s public IP.
Don’t forget to close the RDP port if it’s still open to the internet.
]]>The Oculus Quest is not available in the US, and even if/when it becomes available again it’s still over $400. Plus it’s limited to the Oculus store games, unless you use a USB 3.0 10ft link cable. That is why I needed an alternative setup to run virtual reality programs such as:

- Skyrim VR
- Asgards Rath
- Moss
- Hellblade: Senua’s Sacrifice
- Vanishing Realms
- Blade and Sorcery
- Super Hot
- Beat Saber
- VRChat (Multiplayer)
- Google Earth VR
The following guide is primarily for people that have no VR hardware, besides a google cardboard like phone headset, but it is still useful if you already own Gear VR, Daydream, Oculus GoQuest, etc.. I will show you how to wirelessly stream SteamVR, and Oculus titles. As well as add head, body and feet trackers. Also, play non-VR games in pseudo VR.
I will present two guides below. One for the minimum setup you’ll need, and another for a fully immersive body tracking setup.
Minimum Setup to Play VR Games

3 Degrees of Freedom (3DoF) Head Mounted Display (HMD) w/ Gamepad
This setup will allow you to look around in a VR game with orientation tracking (3 degrees of freedom), and control your movement etc with a gamepad. You can use a keyboard and mouse if you don’t have a controller. The game will not track the position of your body, just the orientation of your HMD. (Yaw, Pitch, and Roll)
It’s smart to start with this setup to test the video streaming software, etc…
Unfortunately you will still need:
Hardware
- Windows 10 computer with a Nvidia Geforce 1050ti or better.
- 5GHz WiFi AP. I use the Netgear R6220. $20 on eBay.
- An Internet connection. I use 1.5Mbps DSL.
- A smartphone. I use the LG G5. $50 on eBay.
- VR Goggle Headset like the Google Cardboard for your phone. I found mine the VR Shinecon at a thrift store for $2. You can of course use the Gear VR, Daydream, Vive Focus, Oculus Go/Quest, PSVR, etc..
- PlayStation or Xbox controller. I use a $5 PS3 Dualshock. Or, an extra android phone. I did end up buying a GearVR controller for $7 on eBay. With the added bonus of being able to use it to control my mouse on my linux desktop with this sweet little package: https://github.com/rdady/gear-vr-controller-linux
NOTE: You can use a keyboard and/or mouse instead. My goal however, was to play wirelessly.
Game Software
You will to download and install all of theses to your Windows 10 computer.
- Steam – https://store.steampowered.com/about/
- SteamVr – https://store.steampowered.com/app/250820/SteamVR/
- Oculus Store – https://www.oculus.com/setup/
- Revive Dashboard – https://github.com/LibreVR/Revive/releases
- Optional: SteamVR Advanced Settings – https://github.com/OpenVR-Advanced-Settings/OpenVR-AdvancedSettings/releases
Headset (HMD) Software
You will need to download and install ONE of the below pieces of software to your smartphone. Also, the server portion of the package to your computer. iVRy is good to start with because if it’s ease of use, and unlimited free version in black and white. If you have a Samsung Gear VR, or an Oculus Go/Quest, use ALVR. If you have an iPhone 5s or newer you might want to try out KinoVR. I use Riftcat/Vridge.
iVRy – $8
Free to try in color for 10 minutes, and black and white after. Easy to use.
Server (Steam plugin): https://store.steampowered.com/app/992490/iVRy_Driver_for_SteamVR/
Android Client: https://play.google.com/store/apps/details?id=com.mediator_software.ivry&hl=en_US
iOS Client: https://apps.apple.com/us/app/ivry/id1210129937
Riftcat/Vridge – $15 (Complete review pending…)
Server: https://riftcat.com/vridge
Android client: https://play.google.com/store/apps/details?id=com.riftcat.vridge2&hl=en_US
iOS client: https://apps.apple.com/us/app/vridge/id1458108034
Pros: Free to try for 10 minutes at a time. Can use Moonlight and ARcore. ARCore is experimental. Using phone as controller is $5. Has play non VR games in VR addon for $10 (Gamewarp). Can use Opentrack for positional tracking. Good support.
Cons: Cannot use ARCore and Moonlight at same time. Cannot use Gamewarp and Moonlight at the same time. Cannot use GearVR controller and Moonlight at the same time.
ALVR – FREE & Open Source! GearVR & Oculus Go/Quest only. Can use ARcore for positional tracking. The developer doesn’t seem to be doing anything for the last year.
Server: https://github.com/polygraphene/ALVR/releases
Client: https://github.com/polygraphene/ALVRClient/releases
Newer Quest fork: https://github.com/JackD83/ALVR
Trinus Cardboard VR – $10
Server: https://www.trinusvirtualreality.com/trinus-cardboard/#downloadtrinus
Android client: https://play.google.com/store/apps/details?id=com.loxai.trinus.test&referrer=utm_source%3Dtweb
iOS client: https://apps.apple.com/us/app/trinusvr/id1101683353
Using phone as controller is free. Can use some LED tracking with your webcam for Positional data, can also use Freepie. You can play non VR games in VR. UI in non-intuitive.
KinoVR – Claims to have 6DoF for it’s iOS version. Maybe using ARKit? Android & iOS. I don’t know anything about this project.
Intugame (No longer being developed)
https://www.quarkxr.com/past-work
Gamepad
If you want to use a PS3 Dualshock controller wirelessly over bluetooth, you’ll need to install this driver:
PS3 Dualshock Controller – https://github.com/nefarius/ScpToolkit
If you install the bluetooth driver, you will not be able to use other bluetooth devices until you remove the driver. To remove the driver follow this guide: https://forums.vigem.org/topic/250/scptoolkit-removal-guide
Xbox Controller’s should work out of the box I think.
VR Controller Software
If you don’t have a wireless gamepad lying around, but you do have an extra android phone. Turn it into a wireless controller.
Turn your Anroid phone into a 3DoF VR controller.
- Vridge Touch – Requires Vridge $5
- Trinus Hand – Requires Trinus. Free
- Google Daydream Controller Emulator – FREE https://developers.google.com/vr/daydream/controller-emulator
If you don’t have a phone on the Daydream compatibility list then you can use the a rooted AndroidOS with Magisk to install the xmlpak – a road to vendor apps module to download the daydream apps. Otherwise you can pair your phone with the emulator app to your computer using bluetooth, and use Driver4VR to connect it to SteamVR. (Although this may conflict with the Kinect skeleton tracking)
This does not work with the most recent Google Services for VR. You need to downgrade to this one: https://www.apkmirror.com/apk/google-inc/google-vr-services/google-vr-services-1-20-235017259-release/
Thank you to this thread: https://www.reddit.com/r/daydream/comments/eduszg/controller_emulator_not_working/
VR Controller Hardware
Riftcat/Vridge supports one GearVr, Oculus Go, Daydream, or Vive Focus controller. However, you have be using the GearVR, Daydream, or Vive Focus HMD respectively.
Driver4VR supports one or two PS Move, Joycon, Wii remote/nunchuck, Daydream, and GearVR controllers without any corresponding HMD. Also Leap Motion, Kinect & NoloVR. You can also use a generic bluetooth VR controller. This includes the option of virtualized hand tracking using the orientation of the controller.
GearVR driver: https://github.com/gb2111/Access-GearVR-Controller-from-PC
https://www.driver4vr.com/forums/topic/2-gear-vr-controllers-w10/
I was confused by Rucio’s reference to “IKN”, but here is how I got both controllers to work in 1909. I’m assuming he meant “IRK”. Heads up, this will mess with your computer’s registry and has the potential to break windows if done incorrectly. No one except yourself is responsible for anything that may go wrong.

* Connect one of the Gear VR controllers to Windows via the Bluetooth menu. Make a note of what the device name is, specifically the 4 letters and numbers inside the parenthesis. This should work without error.

* Regedit.exe as Administrator, navigate to ComputerHKEY_LOCAL_MACHINESYSTEMCurrentControlSetServicesBTHPORTParametersKeys. On the left, there will be a subkey (folder) under “Keys”, the name of this folder will be specific to each computer. Expand that folder with the downwards arrow. Now you should see a folder with the last 4 characters in the name matching the 4 characters in the Bluetooth menu. Open this folder.

* There is a entry with the name “IRK”. Click that and you’ll see the the attached screen. Replace the 01 at the start of each line with 02.

* Close out of Regedit and restart your computer.

You should now be able to pair the second controller without issues. You don’t need to worry about changing that value back, but you may need to remove both devices and repeat this process if you ever need to repair the controller.
See below for verification.
Full Immersive Room Scale Setup w/ 6DoF
6DoF HMD w/ two 6DoF Contollers (position emulated) two 6DoF Foot trackers w/ Virtual hip tracker. For this setup, you will need to use Riftcat/Vridge software for it’s integration with Opentrack. Unless you use Driver4VR for all body tracking. In which case you can use whichever HMD streaming package you like.
There are a number of different ways to get positional data of your HMD. Here are the ones I’ve discovered.
- ARCore (Requires ARCore compatible phone. Check here: https://developers.google.com/ar/discover/supported-devices, or a rooted phone with the Magisk ARCore/Playground Patcher module) This is the most desirable option because it uses the camera from your phone. You will need VR goggles without a front cover, or you’ll need to make a hole for the camera. I’ve heard a messy room is better. I also read you can add stickers of some kind to your walls to improve tracking. Only seems to work when you use the default streaming options, and not Moonlight. It didn’t work very well with my LG G5.
How to enable ARCore in Riftcat:
Go to RiftCat/Config folder and edit your VRidge.cfg file. Find “ArcoreTrackingEnabled” and change its value to “true”. My config was stored at: C:Program Files (x86)Riftcat 2Configvridge.cfg. How you know it is working is when your vridge app requests permission to use the camera. - PS Eye with Aruco Markers via Opentrack (This is the one I chose since I already owned a PS Eye Camera, and a laser printer)
- PS Eye with IR LED’s via Opentrack with IR filter over lens
- Kinect skeleton mode via opentrackkinect + Opentrack OR Immotion OR Driver4VR
- Kinect with color LED markers via Driver4VR
Aruco Marker Requirements:
- A printer, or some graph paper and black pen.
- Cardboard, paper, glue.
- A hat, and some sandals.
- A webcam like the PS Eye $7 X 2. Or the Xbox Kinect $10.
- Two controllers of some kind, I used GearVR controller, and another android phone with the Google Daydream Controller Emulator.
- Driver4VR software for body tracking.
Open Track Head Tracking Software
If you are not ARCore, you’ll need to use either a PS Eye or Kinect camera to track your head. Oculus Go/Quest already does this. Probably using lasers.
To enable headtracking in Riftcat you’ll need to download and install:
Opentrack: https://github.com/opentrack/opentrack
If using Kinect download and install Kinect to Opentrack – https://github.com/sheepsskullcity/opentrackkinect
Hip + Feet Tracking Software
Driver4VR – https://www.driver4vr.com/download/
Drivers
PS Eye Driver – https://github.com/jkevin/PS3EyeDirectShow (Supports multiple camera’s at once, but they are name the same, so you must initialize them in succession.)
Kinect for xbox 360 / v1:
-SDK https://www.microsoft.com/en-us/download/details.aspx?id=40278
-Runtime https://www.microsoft.com/en-au/download/details.aspx?id=40277
Kinect for xbox one / v2
– SDK https://www.microsoft.com/en-us/download/details.aspx?id=44561
– Runtime https://www.microsoft.com/en-us/download/details.aspx?id=44559
Troubleshooting Kinect 360 Download Kinect Developer Toolkit, start Kinect Tookit Browser and try Skeleton Basics application and Color Basics application – You may also run the Kinect Explorer-D2D after a computer restart to get further information from the console window that you can share screenshot https://www.microsoft.com/en-us/download/details.aspx?id=40276
Kinect for xbox one / v2: – Use Kinect Verifier https://developer.microsoft.com/en-us/windows/kinect/hardware-setup
Play non VR games in VR
Riftcat Gamewarp w/ Reshade
https://support.riftcat.com/hc/en-us/articles/360015646579
Trinus
With Reshade or VorpX
VorpX (Full review pending…)
With Moonlight, Opentrack, and OpenPIE MIU, Or Riftcat/Vridge
Reshade
With Moonlight, Opentrack, and OpenPIE MIU, Or Riftcat/Vridge
https://www.reddit.com/r/EliteDangerous/comments/4cfo37/google_cardboard_and_moonlight/
https://github.com/BlueSkyDefender/Depth3D
3D vision
With Moonlight, Opentrack, and OpenPIE MIU, Or Riftcat/Vridge
https://www.reddit.com/r/oculus/comments/7zp9hx/3d_vision_sbs_3d_for_flatscreen_games_with_the/
Cinema Mode
Nero GameVR Will just display any game in big screen mode within VR, but not actually convert game to VR.
Steam will also do this “Play in Theater”.
Also, for GearVR Oculus Go/Quest you can use the Remote Desktop app.
https://www.vrdesktop.net/
Create profile QR code for your VR Goggles
Vridge Commands
Alt+Ctrl+Shift+R – Recenter – By default it’s Alt+Ctrl+Shift+R, but it can be changed in RiftCat settings -> VRidge -> Tracking Options.
Game Specific Help for Vridge
Skyrim
https://youtu.be/Y7hRKgfAgUw – VRidge Basic Tutorial http://go.riftcat.com/SkyrimSharpness – Improve Skyrim image quality. http://go.riftcat.com/SkyrimMods – Learn how to install
Aruco Marker Generator
Turn you non Galaxy device into Gear VR compatible. Not sure if this works yet. Probably not
https://forum.xda-developers.com/mobile-vr/gear-vr/port-gear-vr-software-to-android-device-t3540402
Further Reading About Smartphone VR
https://github.com/ChristophGeske/ARCoreInsideOutTrackingGearVr/blob/master/README.md
]]>- Change BIOS to boot when power comes back up.
- Install Ubuntu Desktop
https://ltsp.github.io/docs/installation/ - Install LTSP
https://ltsp.github.io/docs/installation/ - Create interface bridge:
https://netplan.io/examples#configuring-network-bridges
Example bridge config.
sudo nano -w /etc/netplan/01-netcfg.yaml# This file describes the network interfaces available on your system
# For more information, see netplan(5).
network:
version: 2
renderer: networkd
ethernets:
eno1:
dhcp4: no
bridges:
br0:
addresses:
- 10.0.16.25/24
gateway4: 10.0.16.1
nameservers:
search: [mydomain, otherdomain]
addresses: [10.0.16.1, 1.1.1.1]
interfaces:
- eno1- Install KVM
sudo apt install virt-manager Install Windows VM
- Download Windows
- Create QEMU/KVM Virtual Machine.
- Be sure to Disk bus under Disk hard drive type to VirtIO.
- Be sure to change NIC device model to “virtio”
- Be sure to select the bridge you set up.
- Confirm There is a “Display Spice” and “Video QXL”
- Attach both Windows 2016 ISO and the VIRTIO driver ISO downloaded from here:
https://fedorapeople.org
Install FreeRDP nightly
https://ci.freerdp.com/job/freerdp-nightly-binaries/
- /groups/virt/virtio-win/direct-downloads/stable-virtio/virtio-win.iso
- Install Windows server, and choose custom to choose the Win2k16 version. Select the CD-rom drive the was attached and navigate to the prospective folders.
- Balloon
- NetKVM
- vioserial
- Viostor
- Install networking driver from iso. Install virtio serial, and virtio balloon driver. If not done in the above step by simple going to device manager, and right clicking to choose update driver. Choose browse my computer and point it to the iso. be sure to click include sub directories.
- Install Display driver QXL by going to Device mananger Display update driver
- Install QEMU “guest-agent” from iso
- Install spice-guest-tools from:
https://www.spice-space.org/download/windows/spice-guest-tools/spice-guest-tools-latest.exe
Configure VM for remote desktop
- Change serial, and activate Windows 2016
- Enable Windows Audio service and set to automatic.
- Rename Computer.
- Set static IP.
- Allow remote desktop through firewall.
- Connect to existing Domain for User Authentication, or set up a new one:
https://social.technet.microsoft.com/wiki/contents/articles/22622.building-your-first-domain-controller-on-2012-r2.aspx - Install Remote Desktop Services
https://community.spiceworks.com/how_to/122824-install-terminal-services-on-windows-server-2012-r2 - Install Remote Desktop Licenses
https://social.technet.microsoft.com/wiki/contents/articles/37408.setup-rd-licensing-role-on-windows-server-2012-r2.aspx - Add Users.
Configure thin client
- Setup the RDP client
https://github.com/ltsp/community/wiki/xfreerdp
Currently, I am using scrcpy with v4l2loopback (Option 7) for the easiest and most performant way. It works with both a USB cable or over WiFi. Before that I was using gstreamer mpeg with IP Webcam android app. However gstreamer v42loopback broke with modern Ubuntu. All other options I tested had too much delay. I will be testing Android 14’s latest USB webcam option soon.
If you want to use OBS Read my previous article to install obs: https://jphein.com/how-to-install-open-broadcaster-software-obs-on-ubuntu-18-10-cosmic-cuttlefish/
Preparation for Options 1-5
I will be using the free Android app called IP webcam. https://www.google.com/url?sa=t&source=web&rct=j&url=https://play.google.com/store/apps/details%3Fid%3Dcom.pas.webcam%26hl%3Den_US%26referrer%3Dutm_source%253Dgoogle%2526utm_medium%253Dorganic%2526utm_term%253Dip%2Bwebcam%26pcampaignid%3DAPPU_1_8EL_W6TODt-r0PEPpfiBqA0&ved=2ahUKEwikhpnZu_jeAhXfFTQIHSV8ANUQ8oQBMAB6BAgMEAM&usg=AOvVaw0fuionUtSaXIOy16RhlSM9

1. Start and configure IP webcam. Run the server.
You can use either USB or Wi-Fi. My Wi-Fi is rather slow, so I’ll be using a USB cable to connect my Android phone to my Ubuntu computer.
2. The second step is to plug your phone into your computer using the USB micro or USB C cable. Then turn on USB tethering on your phone.
NOTE: Some unrooted phones do not allow you to turn on USB tethering if your current ISP does not allow it. If that is the case, you can adb port forwarding instead with this command: (USB debugging must be turned on in Developer settings.
adb forward tcp:8080 tcp:8080If you use port forwarding instead of USB tethering, or Wifi then your url portion of your uri will be localhost instead of the IP address of the phone.
Option 1 – Use built-in OBS Media Source
The delay is too great for me…


Option 2 – VLC
An easy way is by using VLC, but it seems to also create a delay on my machine. Does anyone have suggestions?
sudo apt --yes install vlc
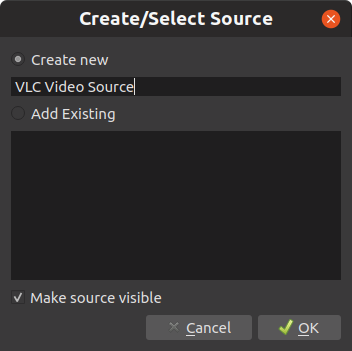
Then add a VLC media source in OBS, Click the small “+” sign, and “Add Path/URL” then paste your IP Webcam url. See below examples:
MPEG
http://192.168.42.129:8080/videofeed
ULAW (This no longer works for me)
rtsp://192.168.42.129:8080/h264-ulaw.sdp
PCM (This no longer works for me)
rtsp://192.168.42.129:8080/h264-pcm.sdp
Option 3 – Gstreamer with OBS gstreamer plugin
UPDATE: The OBS Snap now includes the gstreamer plugin! It seems to work better than before.
I noticed someone has made a Gstreamer plugin for OBS.
https://obsproject.com/forum/resources/obs-gstreamer.696/
In order to use this you’ll need to use the PPA version and not the Snap version.
Install OBS using PPA:
https://launchpad.net/~obsproject/+archive/ubuntu/obs-studioDownload the .so file from https://obsproject.com/forum/resources/obs-gstreamer.696/ and install in /usr/lib/obs-plugins/Add source “gstreamer source” in OBS.
Enter the gstreamer command in the gstreamer input box:
MPEG
souphttpsrc location="http://192.168.42.129:8080/videofeed" do-timestamp=true is-live=true ! multipartdemux ! jpegdec ! videoconvert ! video.H264 (I can’t get this to work anymore)
uridecodebin uri=rtsp://192.168.42.129:8080/h264_ulaw.sdp name=bin ! queue ! video. bin. ! queue ! audio.

maybe this?
rtspsrc location="rtsp://localhost:8080/h264_opus.sdp" protocols=tcp latency=0 onvif-rate-control=false is-live=true name=bin

bin. ! queue ! rtph264depay ! h264parse ! vaapih264dec ! videoconvert ! video.

bin. ! queue ! rtpopusdepay ! opusparse ! opusdec ! audioconvert ! audio.
H264 seems to have more delay. MPEG seems to have less delay:
Option 4 – Gstreamer with v4l2loopback
This is my favorite way. Gstreamer seems to have less delay then the OBS media plugin, VLC, or even ffmpeg. The loopback is sweet, because it let’s you treat your phone just like any other v4l2 device, like a UVC webcam. That way you can use it as a cam for Google Meet, Duo, etc…
Make sure you have gestreamer plugins installed:
sudo apt --yes install gstreamer1.0-plugins-good gstreamer1.0-plugins-bad gstreamer1.0-plugins-ugly gstreamer1.0-libav gstreamer1.0-plugins-rtp gstreamer1.0-vaapi
You can test to make sure that gstreamer connects with the IP webcam from your Android phone by issuing the below command.
gst-launch-1.0 souphttpsrc location="http://192.168.42.129:8080/videofeed" do-timestamp=true is-live=true ! multipartdemux ! jpegdec ! videoconvert ! ximagesink
Install v4loopback
sudo apt install --yes v4l2loopback-utils
sudo modprobe v4l2loopback
Create the virtual webcam
This seems to work with the MPEG stream:
gst-launch-1.0 souphttpsrc location="http://192.168.42.129:8080/videofeed" do-timestamp=true is-live=true ! multipartdemux ! jpegdec ! videoconvert ! v4l2sink device="/dev/video2"
I can’t get this one to work yet.
gst-launch-1.0 souphttpsrc location="http://192.168.42.129:8080/videofeed" do-timestamp=true is-live=true
    ! multipartdemux
    ! decodebin3
    ! videoconvert
    ! videoscale
    ! videorate
    ! video/x-raw,format=YUY2,width=640,height=480,framerate=24/1
    ! v4l2sink device="/dev/video2"
I wonder how you would receive the IP Webcam H264 stream with gstreamer? maybe:
`gst-launch-1.0 rtspsrc location='rtsp://192.168.42.129:8080/h264-ulaw.sdp' ! rtph264depay ! h264parse ! avdec_h264 ! v4l2sink device="/dev/video2"`

maybe this?

rtspsrc location="rtsp://localhost:8080/h264_opus.sdp" protocols=tcp latency=0 onvif-rate-control=false is-live=true name=bin

bin. ! queue ! rtph264depay ! h264parse ! vaapih264dec ! videoconvert ! video.

bin. ! queue ! rtpopusdepay ! opusparse ! opusdec ! audioconvert ! audio.
Use the output of OBS as a virtual webcam
NOTE: The v42lsink is now inlcuded in OBS! It’s called Start Virtual Camera, and will appear after you install v42loopback.
If you want more than one Android phone streaming to your computer using the loop-back method. You’ll have to reload the loopback mosudo modprobe v4l2loopback devices=1 video_nr=10 card_label=”OBS Cam” exclusive_caps=1dule inter kernel with a variable telling it how many loopback devices to make. For two, use the commands below:
sudo modprobe -r v4l2loopback
sudo modprobe v4l2loopback devices=2
NOTE: All this needs to be done before you add the Video Capture Device (V4L2) in OBS. If you make any changes to the video stream after you add the source, you will need to remove the source or close OBS in order to create the loopback again.
I had to use this command to get it to work with Google meet:
sudo modprobe -r v4l2loopback
sudo modprobe v4l2loopback devices=1 video_nr=10 card_label="OBS Cam" exclusive_caps=1
Option 5 – using ffmpeg
ffmpeg -i http://127.0.0.1:8080/video -vf format=yuv420p -f v4l2 /dev/video0Option 6 – using vdo.ninja
Another option is to use the 3rd party service vdo.ninja. Then add the url as a browser source to OBS.
Option 7 – using scrcpy
Install latest version: https://github.com/Genymobile/scrcpy/blob/master/doc/linux.md
optional enable wireless adb on your android phone:
plug phone into computer with usb cable and then run:
adb tcpip 5555Add loopback device:
sudo modprobe v4l2loopback devices=1 video_nr=10 card_label="scrcpy" exclusive_caps=1Configure camera: https://github.com/Genymobile/scrcpy/blob/master/doc/camera.md
For example:
scrcpy --video-source=camera --camera-id=1 --camera-size=1920x1080 --camera-fps=60 --tcpip=10.0.6.105 --v4l2-sink=/dev/video10 --no-playback Further Reading
Arch wiki has some good ideas: https://wiki.archlinux.org/title/V4l2loopback
Learn more about Gstreamer, and rtspatt here: https://medium.com/nutanix-iot/turning-a-laptop-into-an-ip-camera-de00f6b1e63
For automated script for Ubuntu from the “IP Webcam” developer see here: (Uses adb port forwarding, gstreamer, and v42loopback) https://github.com/bluezio/ipwebcam-gst/
The blog that has the working mpeg gstreamer command I used: https://cubethethird.wordpress.com/2015/12/15/using-android-camera-as-webcam-on-linux/
ustreamer: If you want to do this with a raspberry pi, or other linux computer with a webcam, instead of an android phone: https://github.com/pikvm/ustreamer
iPhone and Windows
For iPhone see: https://obsproject.com/forum/resources/ios-camera-for-obs-studio.651/ or https://apps.apple.com/us/app/ndi-hx-camera/id1477266080
For Windows see here: http://ip-webcam.appspot.com/
]]>LTSP already comes with these client scripts:
- kiosk – Firefox running locally on thin client.
- ldm – Linux desktop running remotely on local server.
- menu – Interactive Menu
- shell – Drop to root bash shell running locally on thin client.
- ssh – Secure Shell for remote terminal on local or remote server.
- telnet – unsecure ssh
 running remotely on local or remote server.
- xdmcp – Raw Xorg linux desktop running remotely on server.
- xfreerdp – RDP for Windows desktop running remotely on local or cloud server.
- xterm – xterm terminal running locally on thin client.
This has been furthered by my BoXen Linux project to include:
- freerdp-nightly – Nightly builds of xfreerdp to take advantage of Microphone redirection and the latest graphics codecs.
- rdpgui – Gui for displaying a welcome website, and to prompt for credentials when using xfreerdp-nightly.
- vdi – KVM-VDI LTSP client, see https://github.com/Seitanas/kvm-vdi/
- vnc – VNCviewer for remote desktop on local or remote Android or MacOS computers.
- spice – virt-viewer for KVM Virtualization software. Can provide remote access to local or remote desktops of ANY kind you can virtualize.
- X2go – remote Linux desktop on remote server
LTSP seems to be a very good way of serving desktops.
]]>As you can see from the matrix below there are MANY ways of providing desktops to your users.
However, I think this way has many advantages for a Nonprofit. I would recommend it generally, although of course other topographies are more useful in specific situations.
Benefits for a Nonprofit
- Green computing – Thin clients use less power than traditional workstations.
- Reduced maintenance costs – Thin client deployment means you’re only maintaining a couple servers, instead of multiple traditional workstations. Using Azure cloud means you don’t have to maintain server hardware.
- 100% free horizontal software – Completely free Open Source horizontal market software.
- Discounted vertical market software – Purchase heavily discounted MS remote desktop licenses at Techsoup. Along with anything else you might need. e.g. Quickbooks, MS Office, and any other vertical market software. https://www.techsoup.org/
- $3500 Azure Credit, Free Office 360 – Free cloud servers, Office.
Apply for Microsoft Nonprofit here: https://nonprofit.microsoft.com/register - Free Voice,Gsuite,etc.. – Free cloud Telephony, calendaring, file management, and email with custom domain.
Apply for Google Nonprofit here: https://www.google.com/nonprofits/ - Free hardware; Nevada County among others will donate their old computers, and peripherals to any eligible local nonprofit. Perfect for blazingly fast thin clients. Bring your tax exempt paperwork to the warehouse on the last Friday of the month. Or, try Purchasing hardware from your local government entity here: https://www.publicsurplus.com/sms/nevadacounty,ca/list/current?orgid=315996 After that try eBay: https://rover.ebay.com/rover/1/711-53200-19255-0/1?mpre=https%3A%2F%2Fwww.ebay.com%2Fb%2FPC-Desktops-All-In-One-Computers%2F179%2Fbn_661752&campid=5337848787&toolid=20008
- No taxes – If you use Comcast as your internet provider, make sure to file tax exemption paperwork with them to waive the applicable taxes. Email tax exempt certificate to: [email protected] . Include service address & account #.
- 50% off internet – If you are school, or other eligible nonprofit in California sign up here for 50% off your internet bill. https://jphein.com/discounted-phone-and-internet-for-nonprofits-in-california/
Terms
- [wiki]Vertical market software[/wiki] – https://en.wikipedia.org/wiki/Vertical_market_software
- [wiki]Thin client[/wiki] – https://en.wikipedia.org/wiki/Thin_client
- [wiki]Linux Terminal Server Project[/wiki] (LTSP) – https://en.wikipedia.org/wiki/Linux_Terminal_Server_Project
- [wiki]Ubuntu[/wiki] – https://en.wikipedia.org/wiki/Ubuntu
- [wiki]Remote Desktop[/wiki]
Guide
Follow along. At the end of this guide you should be able to plug in any number of old computers without hard drives into your local network. Then have them boot blazingly fast Windows based modern software. Wireless, and remote VPN clients are also supported.
In this setup all thin clients will be sharing a single Windows 2016 Datacenter instance. However, you can provide any number of environments using this method, including huge VDI deployments. My favorite is using LTSP Ubuntu fat client desktops with RemoteApps for seamless cloud integration of necessary windows based proprietary software.
I am using Ubuntu 18.04 Bionic Beaver for the LTSP server, because LTSP does not currently work with Ubuntu 18.10 Cosmic Cuttlefish.* In my case the entire setup was virtualized in the Azure cloud using KVM Virtual Machine Manager for virtual thin clients.
It might look like this:
[Azure Standard D4s v3[[PXE thin client – KVM guest] –> [Ubuntu 18.04] LTSP Server]] –>[Azure Standard NV6 [Windows 2016]]
In real life the more likely scenario would be to install Ubuntu on a bare metal server onsite. Then, install Ubuntu 18.04 inside a KVM vm. Plug a thin client into your network, and configure it for PXE boot in BIOS. It would look a little like this:
[PXE thin client] –> [[Ubuntu 18.10] [Ubuntu 18.04 KVM guest LTSP server]] –> [Firewall] –> [Internet] –> [Azure Standard NV6 [Windows 2016]]
In this guide I will be first showing you how to set up the virtualized system, and then go into some changes you’ll need to make in the field.
Requirements
- An internet connection. 3MB/s or more recommended.
- A computer with keyboard and display capable of running at least SSH. To issue the commands from.
- A computer capable of running Ubuntu with at least one network card. Or a virtual machine capable of nested virtualization like the Azure Standard D4s v3. For the LTSP server.
- A virtual or real windows machine locally or in the cloud. You’ll need Remote desktop licenses if you want to use microphone forwarding. If using Azure, not every region has the NVIDIA Tesla servers (NV6) for hardware graphics rendering. USA South Central is what I used. This is used for the desktop environment.
IPs
- 10.0.0.1 – Gateway.
- 10.0.0.5 – eth0 – Local interface on Ubuntu server – Connected to the Internet.
- 192.168.122.1 – virbr0 – Virtual bridge on Ubuntu server for testing virtual thin clients.
- 10.0.0.4 – Windows 2016 datacenter RDP server with NV6 Nvidia Tesla hardware.
Create your Azure Virtual Machines
After signing up and being accepted to Microsoft Nonprofit, verify your $3500 credit here: https://www.microsoftazuresponsorships.com/Balance
Create your virtual machines here: https://portal.azure.com
Note: DO NO USE accelerated networking on the Ubuntu Server.
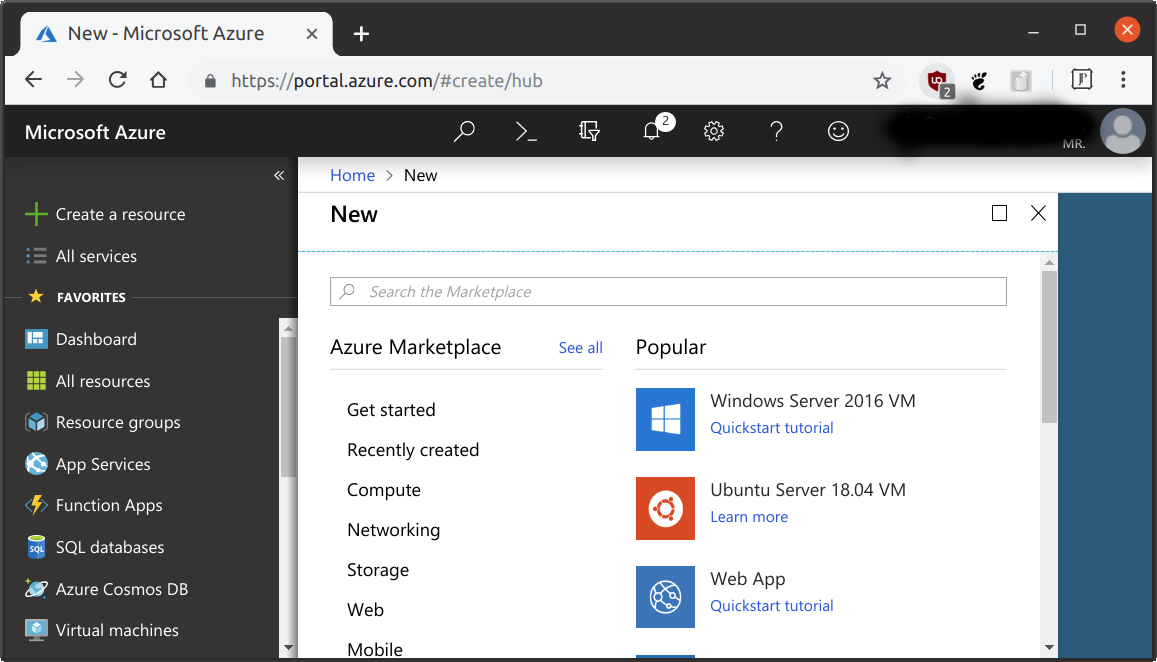
LTSP Server
- Image type: Ubuntu 18.04
- Size: Azure Standard D4s v3
Desktop Server
- Image type: Windows 2016 Datacenter
- Size: Azure Standard NV6
[jbox]Azure comes with a premade Ubuntu 18.04 image, but if you are doing this in the field you would need to install Ubuntu on your server:
Install Ubuntu 18.04.1 Desktop (Minimal)
- Ubuntu 18.04.1 Desktop.
- Download ISO here: https://www.ubuntu.com/download/desktop
- Install the desktop version, minimal install.
- Instructions here: https://jphein.com/how-to-install-ubuntu-18-04-18-10-to-an-usb-3-1-m-2-16gb-drive-using-kvm/
If you decide to have a local Windows server instead or in addition to the Azure vm, you’ll need to install Windows locally.
Install Windows 2016 Datacenter
- Download ISO from Microsoft Volume Licensing Center
- Install
[/jbox]
Configure Windows 2016 Datacenter
Configure remote desktop for microphone redirection:
- Install Remote Desktop Session Host
- You’re either still inside the grace period OR have the Remote Desktop Licensing role installed and a valid CAL
- Make sure the remote desktop group policy allows audio recording
Configure graphics acceleration: https://lg.io/2016/10/12/cloudy-gamer-playing-overwatch-on-azures-new-monster-gpu-instances.html
Configure the Ubuntu and install LTSP Server
[jbox]You can find a bash script automating all the below commands here: https://raw.githubusercontent.com/jphein/boxen/master/boxenbrain [/jbox]
To manually install BoXenLinux we will be configuring LTPS using the Chrootless Proxy mode for in the field. It is the easiest of the 4 ways to install LTSP. However, for the Azure cloud we’ll need to install using a chroot.
[jbox color=green]Set a static IP for your wired network interface in the field
Microsoft azure VM comes with the static IP set on your default interface. However, in the field you’ll need to set a static IP address.
https://www.itzgeek.com/how-tos/linux/ubuntu-how-tos/netplan-how-to-configure-static-ip-address-in-ubuntu-18-04-using-netplan.html
https://netplan.io/examples
[/jbox]
Optional: Install OpenSSH server
If using the Azure install as the LTSP server, you’ll want to overwrite the existing sshd_config so that you can using password login if you used a key when creating the VM.
sudo apt install ssh
Install LTSP and epoptes (epoptes lets you remote desktop in and help anyone using a thin client), Instructions from http://wiki.ltsp.org/wiki/Installation/Ubuntu:
sudo add-apt-repository --yes ppa:ts.sch.gr #The Greek Schools repository
sudo apt install --yes --install-recommends ltsp-server-standalone ltsp-client epoptes
Configure dnsmasq
Note: You may want to edit the /etc/dnmasq.d/ ltsp-server-dnsmasq.conf and add “dhcp-option=3,192.168.122.1” to set a different gateway, but probably not.
sudo ltsp-config dnsmasq --enable-dns
sudo service dnsmasq restart
Add yourself the epoptes group
sudo gpasswd -a ${SUDO_USER:-$USER} epoptes
Was told to remove these packages
sudo apt purge --yes --auto-remove mate-hud snapd
[jbox color=blue title=”Optional: Chroot Install”]
Build a chroot client for alternate arch, dekstop enviroment or package base
Grab freerdp’s key
cd /etc/ltsp
sudo wget http://pub.freerdp.com/repositories/ADD6BF6D97CE5D8D.asc
- Option 1 – with command
sudo ltsp-build-client --purge-chroot --mount-package-cache --mirror 'http://azure.archive.ubuntu.com/ubuntu/'
 --apt-keys '/etc/ltsp/ADD6BF6D97CE5D8D.asc, /etc/apt/trusted.gpg.d/ts_sch_gr_ubuntu_ppa.gpg'
 --extra-mirror 'http://ppa.launchpad.net/ts.sch.gr/ppa/ubuntu bionic main, http://pub.freerdp.com/repositories/deb/bionic/ freerdp-nightly main'
 --late-packages epoptes-client freerdp-nightly --prompt-rootpass --fatclient
- OR, Option 2 – using my ltsp-build-client.conf
sudo wget https://github.com/jphein/boxen/raw/master/etc/ltsp/ltsp-build-client.conf
sudo ltsp-build-client --config ltsp-build-client.conf
You may want to install a new kernel like this one if the azure kernel doesn’t work with all of KVM’s input drivers:
sudo apt-get install linux-image-lowlatency
Then you have to edit the update-kernels.conf file, so that LTSP chooses that one to boot the client.
Create some symlinks so freerdp-nightly is more easy t my lazy scripting
sudo ltsp-chroot
ln -s /opt/freerdp-nightly/bin/xfreerdp /usr/bin/xfreerdp-nightly
ln -s /usr/share/ltsp/screen.d/xfreerdp /usr/share/ltsp/screen.d/xfreerdp-nightly
exit
Create GUI login screen for xfreerdp-nightly (Not updated!)
cd /opt/ltsp/amd64/usr/share/ltsp/screen.d/

sudo wget https://raw.githubusercontent.com/jphein/boxen/master/rdpgui

sudo wget https://raw.githubusercontent.com/jphein/boxen/master/xfreerdp-prompt

sudo chmod +x rdpgui xfreerdp-prompt
sudo ltsp-update-image
Note: You may get this error on Microsoft Azure VM! https://bugs.launchpad.net/ubuntu/+source/ltsp/+bug/1802707 hmmmm…. This script seems to fix it:
#!/bin/bash
# tadaen sylvermane | jason gibson
# configure locales for ubuntu bionic ltsp chroot creation


for var in LC_ALL= LANG= ; do
        export "$var"en_US.UTF-8
done
ltsp-build-client --chroot "$1"
[/jbox]
[jbox color=green title=”Local Chrootless Install”]
This is the recommended, and simplest install
Install FreeRDP-nightly and client zenity GUI
sudo sh -c 'echo "deb http://pub.freerdp.com/repositories/deb/$(lsb_release -cs)/ freerdp-nightly main" >> /etc/apt/sources.list.d/freerdp-nightly.list'
wget -O - http://pub.freerdp.com/repositories/ADD6BF6D97CE5D8D.asc | sudo apt-key add -
sudo apt update
sudo apt install --yes freerdp-nightly
sudo ln -s /opt/freerdp-nightly/bin/xfreerdp /usr/bin/xfreerdp-nightly
cd /usr/share/ltsp/screen.d/
sudo ln -s xfreerdp xfreerdp-nightly
sudo wget https://raw.githubusercontent.com/jphein/boxen/master/usr/share/ltsp/screen.d/rdpgui
sudo wget https://raw.githubusercontent.com/jphein/boxen/master/usr/share/ltsp/screen.d/xfreerdp-prompt
sudo wget https://raw.githubusercontent.com/jphein/boxen/master/usr/share/ltsp/screen.d/launch
sudo mkdir boxen
cd boxen
sudo wget https://raw.githubusercontent.com/jphein/boxen/master/usr/share/ltsp/screen.d/boxen/welcome
cd ..
sudo ln -s launch welcome
sudo ln -s /sbin/shutdown shutdown
sudo chmod +x rdpgui xfreerdp-prompt launch boxen/welcome
Create LTSP client NBD image using the chrootless method of the servers root /
You need to run this any time you make changes to your filesystem you want to be updated in your LTSP client.
sudo ltsp-update-image --cleanup /
[/jbox]
Grab the lts.conf for our thin clients
cd /var/lib/tftpboot/ltsp/amd64/
sudo wget https://raw.githubusercontent.com/jphein/boxen/master/var/lib/tftpboot/amd64/lts.conf
Edit lts.conf to suit your needs
nano -w lts.conf
Test with KVM virtual pxe thin client
If you are already using KVM to install Ubuntu in a VM then you don’t need to install it again. However, if you are using a real bare metal server then you’ll need to run the install command.
sudo apt install virt-manager
[jbox]Libvirtd will run dnsmasq on virbr0 by default. We need to kill that instance and restart the global dnsmasq with our LTSP configs. You will need to killall and restart dnsmasq every time you reboot.
###dnsmasq hack for testing
sudo mv /etc/dnsmasq.d/libvirt-daemon /root/
sudo sh -c 'echo "dhcp-range=192.168.122.20,192.168.122.250,8h" >> /etc/dnsmasq.d/ltsp-server-dnsmasq.conf
#These steps will need to performed again if you reboot
sudo killall dnsmasq
sudo service dnsmasq restart
[/jbox]
#Create the PXE test KVM client
sudo virt-install
  --name pxe
  --memory 4096
  --vcpus 2
  --disk none
  --pxe
  --os-variant ubuntu17.10
  --wait 0
Connect locally using very nice spice
virt-viewer --connect qemu:///system pxe
Connect remotely using spice
virt-viewer --connect qemu+ssh://[email protected]/system pxe


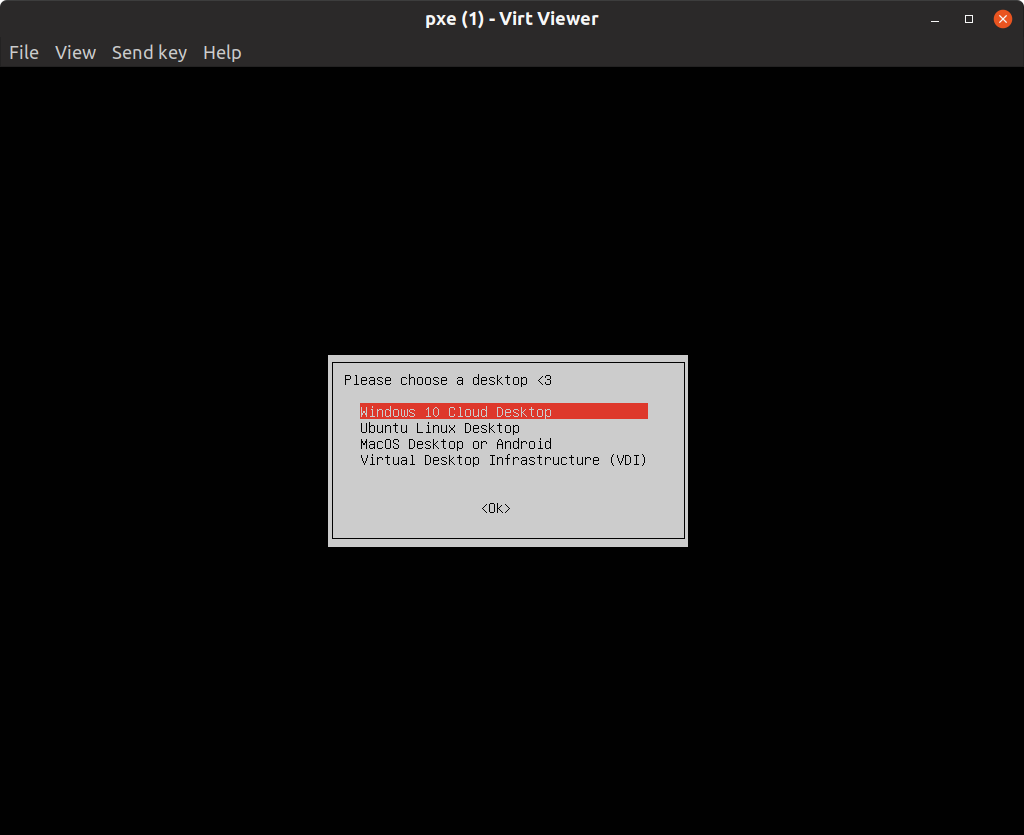
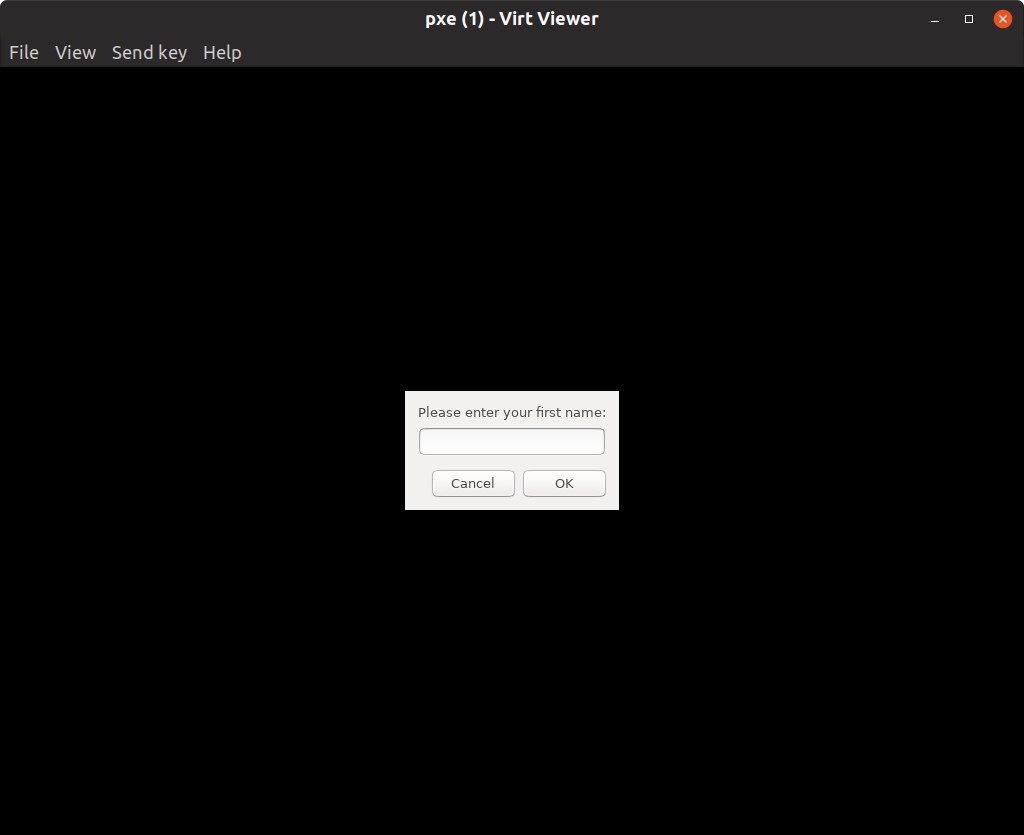
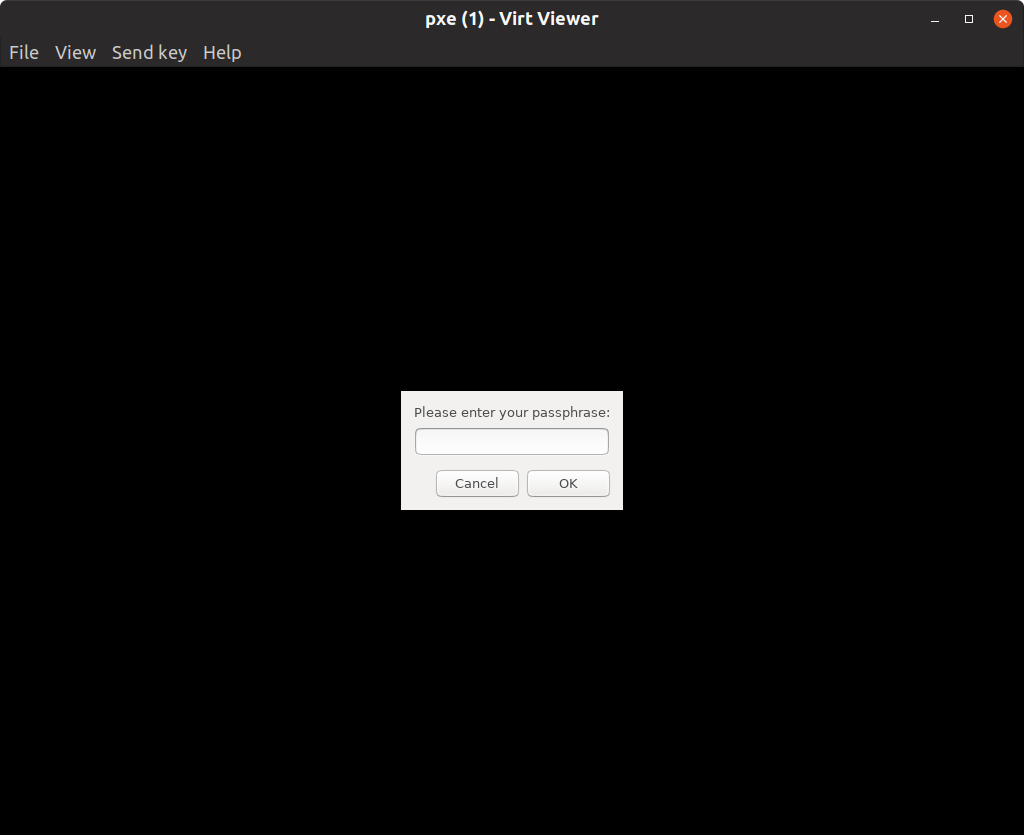
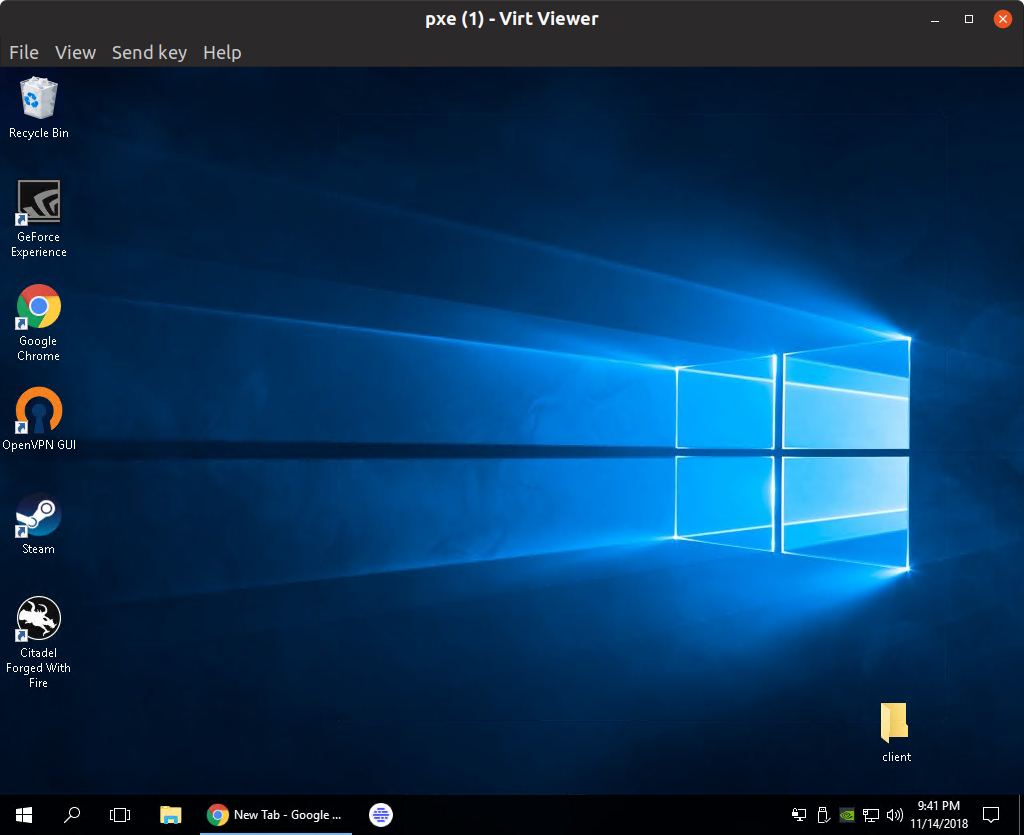 Tada!!!
See also
lts.conf manpage ltsp-build-client manpage ltsp-update-image manpage ltsp-config manpage ltsp-chroot manpage http://wiki.ltsp.org/wiki/Installation/Ubuntu https://help.ubuntu.com/community/HowToSetupLTSPDevelEnvironment https://github.com/wyllianbs/xfreerdp-gui https://unix.stackexchange.com/questions/119880/make-freerdp-prompt-user-for-username-and-password/187370 http://www.saminiir.com/debugging-pxe-boot/
* Ubuntu 18.10 I previously tried this with Ubuntu 18.10 Cosmic Cuttlefish, and ran into some issues. Mainly the maintainer of LTSP for Ubuntu does not fix anything that is not a LTS release.
Optional Install ltsp-manager
sudo add-apt-repository --yes ppa:franz-die/ltsp-manager; apt update

sudo apt install ltsp-manager
Optional: Install X2Go remote desktop software
sudo add-apt-repository ppa:x2go/stable
sudo apt-get update
sudo apt-get install x2goserver x2goserver-xsessions x2gomatebindings
Optional: Install Ubiquity to install Ubuntu on PXE booted clients or servers
sudo apt-get install ubiquity ubiquity-frontend-gtk
Running it is a manner of running from the client
ubiquity gtk_ui
Optional: Add iPXE to grub menu
apt install grub-ipxe
[jbox]Optional: Set up Firewall with IP Masquerading
Probably won’t need to do this.
First, packet forwarding needs to be enabled in ufw. Two configuration files will need to be adjusted, in /etc/default/ufw change the DEFAULT_FORWARD_POLICY to “ACCEPT”:
sudo nano -w /etc/default/ufw #change DEFAULT_FORWARD_POLICY="ACCEPT"
Then edit /etc/ufw/sysctl.conf,
sudo nano -w /etc/ufw/sysctl.conf
and uncomment:
net/ipv4/ip_forward=1
net/ipv6/conf/default/forwarding=1
Now add rules to the /etc/ufw/before.rules file. The default rules only configure the filter table, and to enable masquerading the nat table will need to be configured. Add the following to the top of the file just after the header comments:
sudo nano /etc/ufw/before.rules
# nat Table rules
*nat
:POSTROUTING ACCEPT [0:0]
# Forward traffic from eth1 through eth0.
-A POSTROUTING -s 192.168.122.0/24 -o eth0 -j MASQUERADE
# don’t delete the ‘COMMIT’ line or these nat table rules won’t be processed
COMMIT
Allow SSH
sudo ufw allow 22
sudo ufw allow from 192.168.122.0/24
sudo ufw enable
[jbox]
Optional: Install apt-cacher
apt-cacher will cache packages so you don’t waste your time downloading them again again.
sudo apt install apt-cacher
sudo nano /etc/apt-cacher/apt-cacher.conf #Uncomment allowed_hosts= *
sudo ufw allow 3142/tcp
sudo sh -c 'echo "Acquire::http::Proxy "http://10.0.0.5:3142"";' > /etc/apt/apt.conf.d/01proxy
sudo /usr/share/apt-cacher/apt-cacher-import.pl -l /var/cache/apt/archives
sudo service apt-cacher restart
Optional: Test with QEMU
Set up virtual bridge for client networking
On the azure VM I was able to use the default virtual bridge virbr0. Just commented out the dnsmasq.d/ file libvirt that prevented dnsmasq from serving IPs on that network. However, testing on a real server I needed to make my own bridge. These commands should not be issued if working on your server remotely. Only a local bare metal install should issue these commands.
sudo ip tuntap add dev virttap mode tap user $USER
sudo brctl addbr virtbr
sudo brctl addif virtbr eth0 # your LAN interface
sudo brctl addif virtbr virttap
sudo ip link set virtbr up
sudo ip link set eth0 up
sudo ip link set virttap up
dhclient virtbr
You may need to restart dnsmasq again
sudo service dnsmasq restart
Run QEMU to test your LTSP setup
cd
qemu-img create -f vmdk testpxe.vmdk 10
/usr/bin/qemu-system-x86_64 -m 1024 -hda testpxe.vmdk
                              -boot n
                              -option-rom /usr/share/qemu/pxe-rtl8139.rom
                              -net nic
                              -net tap,ifname=virttap,script=no,downscript=no
]]>
Requirements:
- A Netgear WNDR4300SW device, and 12v 2.5a power supply.
- A Linux computer (Ubuntu 18.10) with an ethernet jack
- An Android phone with a 5GHz radio (Nexus 5) with OS that allows USB tethering (LineageOS 14.1)
- Micro USB cable.
- A Cat5/e/6 cable.
- A working internet connection with an ethernet jack free.
- At least one 110v plug free to run the router.
- Incredible patience.
Installing OpenWRT on the WNDR4300SW
-
- Download the OpenWRT two images from here: https://openwrt.org/toh/views/toh_fwdownload?dataflt%5BModel*~%5D=wndr4300
- Compile the C Program used to modify the WNDR4300 firmware for the WNDR4300SW. (Thank you to all the fine, smart folks here: https://gist.github.com/aplocher/7d717925fe00c6602bed) , and modify the WNDR4300 factory firmware with this pasted into a terminal:
wget https://raw.githubusercontent.com/jphein/wndr4300sw/master/patch4300V1.0.0.6SW.c
gcc -o 4300sw patch4300V1.0.0.6SW.c
chmod u+x 4300sw
./4300sw openwrt-18.06.1-ar71xx-nand-wndr4300-ubi-factory.img
- Reset the router to factory defaults by holding down the reset button with a paperclip for 30 seconds.
- Connect either via ethernet orusing the default SS Use the URL: http://192.168.1.1.
I was unable to access the router via telnet using this: https://wiki.openwrt.org/toh/netgear/telnet.console, but thanks to Todd Nestor, I was able to get the default username and password from his article here: http://toddnestor.com/hacking-the-netgear-wndr4300-router/ The stock WNDR4300SW default credentials (username/password) are admin/cciadmin . Upload the factory image using the firmware update feature. - OR, use the TFTP option here: https://oldwiki.archive.openwrt.org/toh/netgear/wndr4300
-
set a static IP on your computer, i.e 192.168.1.35, and connect the ethernet cable to the router
-
power on the router
-
press and hold the RESET button as soon as the switch LEDs light up.
-
keep holding RESET until the power LED begins to flash orange and then green.
-
once the power LED is flashing green, release RESET
-
start the TFTP transfer to router at 192.168.1.1. In your computer execute:
sudo apt install tftp-hpa
tftp 192.168.1.1 -m binary -c put openwrt-18.06.1-ar71xx-nand-wndr4300-ubi-factory.img
- log on to openwrt and upgrade using the openwrt-18.06.1-ar71xx-nand-wndr4300-squashfs-sysupgrade.tar
-
Installing Lineage OS on the Nexus 5
- This is well documented here: https://wiki.lineageos.org/devices/hammerhead/install
- Turn off lock screen
- Enable auto USB tether using Automate: https://android.stackexchange.com/questions/127930/automatically-tether-usb
- Run the flow, Turn off logging, and check “start running flows on device boot”.
Connecting and Configuring
-
- Connect smartphone to wifi Hotspot with Micro USB cable.
- Enable USB tethering in router and smartphone: https://openwrt.org/docs/guide-user/network/wan/smartphone.usb.tethering
-
ssh [email protected]- Connect router to internet via it’s WAN port
-
opkg update
opkg install kmod-usb-net kmod-usb-net-rndis kmod-usb-net-cdc-ether
uci set network.TetheringWAN=interface
uci set network.TetheringWAN.proto='dhcp'
uci set network.TetheringWAN.ifname='usb0'
uci set firewall.@zone[1].network='wan wan6 TetheringWAN'
uci commit
-
- Enable Wireless
If later you want to just use the router you can use the 5GHz radio and change the MAC to the authorized Nexus 5. Using: https://gist.github.com/rcg4u/91cb1a17750397082910180aa075a12e
]]>A very confusing topic! Don’t worry I figured it out. =] I will go over topics such as: Networks, Coverage, Technology, Resellers, Roaming, Lifeline (Free low income smart phone and monthly service), Prepaid, Cellphone hardware, Unlocking, Voice over IP (VOIP), Credo Mobile, Google Voice, Google Fi, Republic Wireless & Freedompop. All in the context of living in Nevada County.
Networks: There are four major networks in the USA: Verizon, ATT, T-mobile, and Sprint. I will refer to these 4 as networks.
Coverage: They all have different coverage in different areas. In order to be sure which is best for you, you can consult their maps. ask people you know, use aggregate crowd-sourced coverage map apps (Like OpenSignal or Sensorly), or test the different networks yourself.
Technologies: On top of the four networks they mainly use two wireless technologies 3g and 4g. (simplified; reality is much more complicated with different frequencies being used for most networks and technologies). Most networks have, or are in the process of shutting down their 2G networks. (AT&T shut its 2G GSM network down on December 31, 2016.[5] ). The coverage can be very different for these as well. Very old phones don’t use 4g, and some very new phones don’t use 3g. I will call these technologies.
Resellers: To further complicate the issue. There are hundreds of companies that resell service on these networks, usually for cheaper. These are called MVNOs or Mobile Virtual Network Operators. I will call these providers, resellers, carriers, or companies. What complicates it further is that resellers like Straight talk actually resell service on all four networks. They pick one for you based on either your location or the phone they want to sell you. More info here:
https://en.wikipedia.org/wiki/List_of_United_States_wireless_communications_service_providers
One really mystifying piece is that if you are one of the hundreds of resellers of these four major networks, a stipulation of your service agreement is that you cannot tell your customer which network/s you are reselling. They also don’t disclose their roaming partners. As a customer you have to figure that out yourself. One great resource is Wikipedia. A page I’ve contributing to quite a bit. =] Especially in the low income lifeline section for California. You can find the company you’re wondering about here:
https://en.wikipedia.org/wiki/List_of_United_States_mobile_virtual_network_operators
Roaming: In addition every company may have different roaming partners as well. This means that if your phone is compatible, and the networks are compatible you may hop networks when you don’t have your primary network available. Only If your carrier and that carrier are partners. Some have no roaming partners. Some charge you for roaming. Some don’t.
Lifeline: If you are low income, you can get a free smart phone and service on whichever network you prefer. Through the lifeline program that was started way back for landlines. Find a service to sign up for here:
https://en.wikipedia.org/wiki/List_of_United_States_mobile_virtual_network_operators#California
Nevada City: For instance where I live, ATT 4g works well. ATT 3g not well. Verizon 3G works ok. Verizon 4g not at all. Sprint 3g works intermittently. Sprint 4g not at all. T-mobile no go. So for me, a reseller of ATT 4g is best. In downtown Nevada City, all four networks seem to work, although T-mobile probably the worst. I haven’t tested in a while. Once you find out which network works best for you at home, traveling, and your day 2 day. I think it’s best to pick a reseller that matches your politics. Credo Mobile is committed to donating a large portion of their profit to charitable causes you get to vote on. They use the Verizon network now.
Prepaid: Prepaid phone just refers to whether of not your provider bills you in advance, or after the month of usage is over. Many companies offer both options. With a postpaid plan you run the risk of being charged exorbitant amounts of money if you go over your quota. With a prepaid plan, your service shuts off if you reach your quota, unless you buy more.
Cellphone hardware: Then there is the phone itself. not all phones work with all networks and technologies. It has to do with what the the radios installed and which electromagnetic frequencies the radios support. Some modern phones have all the radios in them. However, you have to swap a SIM card if you want to switch networks. Apple is working on a smart sim card, so you can use all the networks without swapping sim cards. To figure out which frequencies (technologies) your phone supports use a service like phonearena.com.
Unlocking: Some phones have been crippled or software “Locked” to a specific network even though the have the necessary hardware to work with others. Sometimes you can get the original company that sold the crippled phone to “Unlock” it.
VOIP: Most modern phones and cell phone carriers also offer voice and text over wifi. This can be called VOIP. This means that if you don’t have any coverage, or spotty coverage you can do your calling and texting over any available wifi network. The Google Fi project and Republic Wireless seamlessly swaps you from wifi, cellular and their roaming partners. Where as before your call would be disconnected as you switched networks. AT&T, Verizon, T-mobile, and Sprint are jumping on the bandwagon, but usually charge you extra for the service, and cannot seamlessly swap your call between cellular and wifi. Most modern voice communication is actually VOIP. Google Voice gives you a free virtual phone number with unlimited voice and texting. You can communicate from any internet connected device.
What do I use? I use a reseller of ATT 4G network, Freedompop for my cell phone service. They give me free service of up to 200MB/month per SIM card. They offer exactly zero customer support, and constantly try to trick you into upgrading to a paid service. It’s perfect for me. With google voice and freedompop I do all my communication over wifi or free cellular data. I have two landlines, my desktop, my laptops and a bunch of smartphones all hooked up to that number. I love typing my text messages. They are all connected to the internet. My landlines connect to a little box that is connected to the internet. My phone bill is $0. I pay $45/month for unlimited internet at home through Spiral internet. They are a local reseller of ATT DSL. I use Comcast cable internet at work.
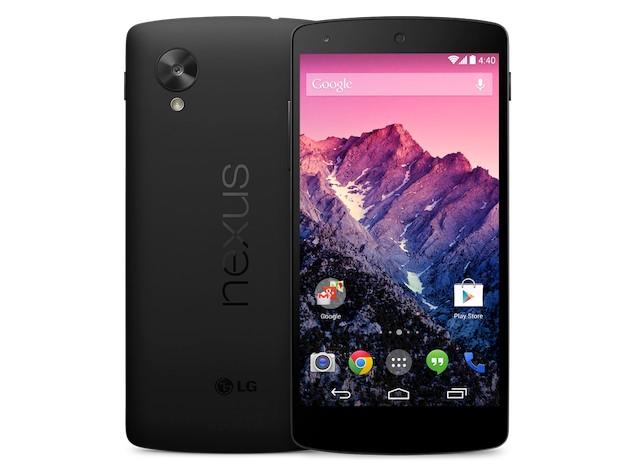
$99 + $9.99 shipping. No taxes or other fees. I disabled all paid trials. Instructions are below.
The big reason I choose Android vs iPhone (iOS) is the fact that I can have free WiFi hotspot tethering on any carrier. Apple allows the carrier to disable this hardware in order to charge you for this service. Some android devices also disable this feature unless enabled by the carrier. Luckily the Nexus 5 from Freedompop is not one of those. I did have to follow this guide to fix the Android OS myself.
https://thecellphoneguru.com/faqs/how-to-get-tethering-wifi-hotspot-to-work-on-your-lg-nexus-5/
The reason I choose to buy it directly from Freedompop, was because I was already planning on activating with them to take advantage of the 1G/month free 4G (Sprint) data plan. They charge $20 to BYOD if you don’t buy it from them. Also, I’d have to find the correct Sprint ICCID SIM card. The device comes preactivated with the correct SIM card if you buy it from them directly. There is no way I could find a good condition Nexus 5 with Sprint SIM card for only $80. So it was a great deal.
I also purchased their $0.25 Global SIM card for 700MB/month free 3G (ATT & T-mobile) data plan. That way since all Nexus 5’s are unlocked, I can always pop that SIM in if I need ATT or T-mobile coverage, OR if I run out of data. I ordered a number of these just in case. At $0.27 a pop, I figured it was worth it. Link to purchase is included in article below. [jbox color=red]Read this entire article to disable all paid trials. I did this for my Nexus 5 CDMA account, and my Global SIM accounts.
FREE cell phone service by Freedompop on the AT&T, Sprint and T-mobile networks! Free shipping.
[/jbox]
The LG Nexus 5 will not work with Verizon. However, you do get all the 3 other major networks (AT&T Sprint, and T-mobile). The Verizon iPhone 5C is the phone I would get If I wanted an iPhone with Verizon coverage. It comes unlocked as well. Also, Sprint has added it to their whitelist. That means the Verizon iPhone 5C out of the box can now be activated on all 4 major carriers! Or any of their MVNO’s except for the Sprint MVNO Freedompop’s CDMA service. =[ They have not updated their whitelist to reflect Sprint’s yet. If you, like me want to use Freedompop, I’d buy an unlocked Sprint iPhone 5C.
Next phone I’ll get will probably be a Verizon Nexus 6. They also have the ability to use all 4 networks. And you can sign up for Google Fi. With Google Fi, you get to automatically swap between At&t, Sprint, T-mobile, US Cellular, and WiFi. Plus international carriers. I think At&t coverage is included because of addition to the Three network which includes AT&T as it’s roaming partner. Note: Need to research this. Anyone want to send me a Nexus 6 or Nexus 5x?
[jbox color=blue]Here is my guide on how to Unlock the bootloader, install a custom recovery, and root the Nexus 5. I needed to do this in order to change the name of my phone. Here is my guide for that. Note: this process requires you to perform a factory reset.[/jbox]
Speed test on the Free Freedompop 4G LTE (Sprint) network:

]]>

Personally, I have my phone in Airplane mode most of the time. I use Wifi whenever available, often Wifi hotspots are much closer than cell towers. That way my wifi radio is radiating less powerfully than the cellular radio would be. I use a headset, handset, or speaker phone whenever possible. I try to make sure my phone is not close to or touching myself or anybody else. Especially when airplane mode is off. You can try this little trick for automating the process of turning airplane mode on whenever you are connected to WiFi.
https://www.fcc.gov/general/specific-absorption-rate-sar-cellular-telephones
https://en.wikipedia.org/wiki/Microwave
Microwaves are a form of electromagnetic radiation with wavelengths ranging from one meter to one millimeter; with frequencies between 300 MHz (100 cm) and 300 GHz (0.1 cm).[1][2] This broad definition includes both UHF and EHF(millimeter waves), and various sources use different boundaries. In all cases, microwave includes the entire SHF band (3 to 30 GHz, or 10 to 1 cm) at minimum, with RF engineering often restricting the range between 1 and 100 GHz (300 and 3 mm).